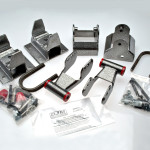
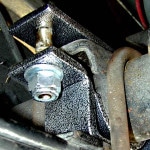
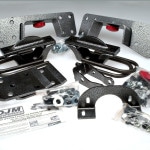
The first thing to get off the table regarding “flip kits” is nothing is actually flipped! Simply put a flip kit moves the axle from beneath the leaf spring to on top of the leaf spring. The devil is in the details here and how its done is very important. When you place your axle on top of the leaf springs there are two very important things to consider. No. 1 you must move the rear axle back towards the rear of the truck, away from the transmission, around ¾ of an inch. This is done because your drive shaft actually becomes longer when you “flip” your axle. Say what? Gets longer, how? You’ll notice the splined slip joint in the front of your drive shaft. It’s there to allow the drive shaft to move towards and away from the transmission as the suspension cycles up and down. If you were to support your truck by placing jack stands under the frame (both sides) in the rear. Then, with a floor jack supporting the rear end, remove the lower shock bolts and let the rear end down with the floor jack and look at the splined slip joint, you will see a fully extended slip joint. Now slowly jack the rear end up with the floor jack and watch the slip joint contract. If you could jack the rear end up to the point where it was level with the transmission the splines might completely disappear and the drive shaft would be forced into the transmission. This is not a good thing and why you need to move the axle back away from the transmission when you install a “flip kit”. The axle locator brackets accomplish this, generally a “U” shaped piece that sets on the leaf spring, over the center bolt. There is a hole in the factory axle locator which is centered, and you will see that the hole in the axle locator from the flip kit is offset. That is how the flip kit moves the axle back away from the transmission. It is very important to make sure you install the axle locator bracket correctly with the offset hole over the leaf spring center bolt spacing the axle to the rear. Now the second consideration when installing a “flip kit” is pinion angle. The typical drop you can expect from a flip kit is in the 5” to 8” range, depending on the thickness of your leaf spring pack. And while the rear of a pick up truck is designed to operate in a wide range of ride heights (empty to overloaded) it is still necessary to establish an optimal static pinion angle. Axle locating brackets in most flip kits have a built in angle, by having unequal length legs in the “U”. This works pretty good most of the time, but not all trucks are created equal and often you need to adjust the pinion to get rid of a pesky vibration. You can buy pinion “shim kits” that come in 2, 4, and 6 degree packages that need to be installed between your axle locator bracket and the leaf spring. Better that that, DJM makes their flip kits with adjustable axle locator brackets. You have the ability to rotate your axle to the proper angle and then lock it in place. This is the best way to deal with pinion angle. Oh, one more thing about vibrations, if you have a two piece drive shaft and you’re having very low speed vibrations it is almost always caused by the carrier bearing. The bearing where the short front drive shaft and the longer back drive shaft connect. Typically raising this “carrier bearing” up towards the bottom of the bed between ½” to 1” will rid you of this inconvenience. There are kits available for this condition also. Wow! Sounds like I should just use a lowered leaf spring and forget all this worry. If it were that simple everyone would do it! You have to consider the exact same things with lowered leafs as you do with flip kits (or hangers and shackles). You lose travel and effect the pinion angle. Lowered leaf springs do not have a great reputation when it comes to ride and you don’t have the same load carrying capacity as with factory leafs. It seems the best choice for lowering leaf spring applications is still flip kits. Do I have to cut my frame? Only if you have lost enough travel to make your ride harsh.
C-Notch
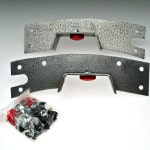
Usually a six inch drop of any kind causes you to need to “notch” the frame to gain travel. You actually cut relief (notch) in the frame directly above the axle and install a frame support bracket. The frame support is a big steel reinforcing plate that bolts to the frame more than making up for any loss of strength that may have resulted from the “notch”. These are typically 3/8” thick plates bolted in with at least 8 – ½” hardened bolts, washers and locking nuts. Resist the temptation to weld these plates in. Your frame is probably tempered which means you can weaken it by applying heat. It’s a little more work to drill the holes but a lot safer. Here’s a really good tip – ALWAYS “FLIP YOUR AXLE BEFORE INSTALLING YOUR FRAME SUPPORT”. Remember the axle gets moved towards the rear when flipped, besides you can more accurately locate the “notch” if your axle is in place. Well, you have moved your axle from below the leaf to on top, and notched and reinforced the frame – what else is left to do? Some, but not all “flip kits” have “shock extenders” which of course do not really extend shocks. What they do, do is reposition the lower mount so they become more vertical.
Shock Extenders & Shocks
Shocks just are not very effective if they are laid over nearly horizontal, some kits only require one shock to be “extended”.CALMAX SuperShocks would be an excellent choice for shocks to optimize the ride with your flip kit. Having done that its time to test drive. Another good tip is to check the tightness of all bolts (including the axle U-bolts) after you have put a hundred so miles on your lowered truck


