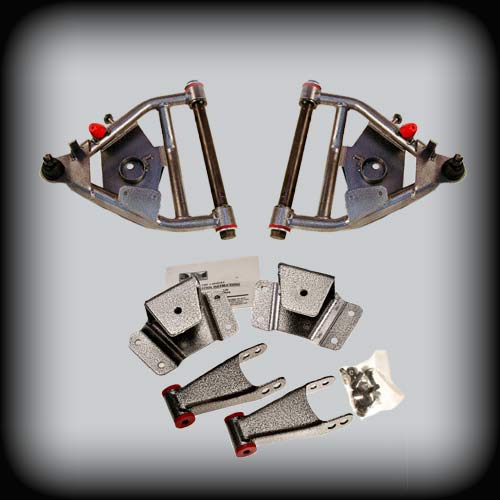
1973-1991 C20/C30 3 inch Front / 4 inch Rear Complete Lowering Kit (Shocks Included)
$1,311.71
This complete Chevy C20 and Chevy C30 lowering kit delivers both style and comfort with easy installation, premium components, and superior durability for a smooth ride and enhanced handling.
Transform your 1973-1991 C20/C30 into a sleek, lowered machine with this 3-inch front and 4-inch rear lowering kit. Complete with high-quality shocks, this kit provides superior handling and a smoother ride.
- Front 3″ drop for perfect stance
- Rear 4″ drop for balance and style
- Loop SuperShock (1409) and Loop SuperShock (1800)
- Ball Joint 6129
- Bushing kit BK2655L
- Description
- Additional information
- Lower Control Arm Instructions
- Rear Hanger & Shackle Instructions
- Replacement Parts
Description
Why Buy from DJM Suspension
High-Quality Components
Our lowering kits are crafted with precision and built to last, ensuring your vehicle gets the best performance with minimal maintenance.
Easy Installation
Designed for a hassle-free installation with included instructions, you can enjoy the improved ride and appearance without professional help.
Improved Ride Comfort
The included shocks improve handling, providing a smooth and controlled driving experience while maintaining the lowered look.
About DJM Suspension
DJM Suspension, a family-owned and operated American manufacturer, has been leading the lowering industry since the early 1970s. With a passion for aftermarket automotive products, including this 1985 C20 lowering kit, we provide top-tier performance and style for your vehicle.
Frequently Asked Questions
Upgrade Your Truck’s Suspension
Get your truck the look and ride it deserves with DJM Suspension’s 1985 C20 lowering kit, which fits perfectly to any C20/C30 model between 1973 and 1991. You’ll enjoy a smooth ride, better handling, and a more aggressive stance. Shop now and take your ride to the next level!
Additional information
1973 – 1991 C20 / C30 Front 3″ lower control arms (8 lug trucks only)
| Weight | 50 lbs |
|---|
1973–1991 C20/C30 (8 LUG) 4 inch Rear Lowering Leaf Spring Hanger and Shackle Kit
| Weight | 20 lbs |
|---|
14.5″ Loop / Loop SuperShock (1409)
| Weight | 3 lbs |
|---|
18.5″ Loop / Loop SuperShock (1800)
| Weight | 3 lbs |
|---|
PART # CA2655L-3D & CA2655L-3P
1973-1991 CHEVY C30 PICKUP LOWER CONTROL ARMS
INSTALLATION INSTRUCTIONS
Rev. # 07-02
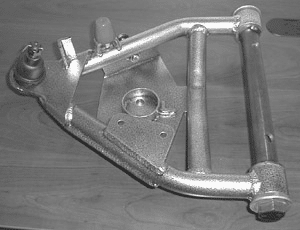
Please take the time to read these installation instructions and check the Hardware Parts List to be sure you have all the listed parts.
DJM parts should be installed by qualified mechanics. If you are not familiar with automotive repair, have the parts installed by someone with experience.
Please read the warranty information (blue page enclosed). Complete your Product Warranty Card and mail it to DJM Suspension.
Please take a few minutes to fill out your installation helper (back side of warranty). Accurate measurements BEFORE BEGINNING INSTALLATION will show any irregularities in your vehicle.
NEVER WORK UNDER TRUCK SUPPORTED BY A JACK ONLY!!! USE QUALITY JACK STANDS WHICH HAVE A RATING ADEQUATE FOR YOUR TRUCKS WEIGHT!!!
THIS KIT IS DESIGNED TO BE USED WITH THE FACTORY COIL SPRINGS.
MODIFYING FOR AIR BAGS WILL VOID DJM'S WARRANTY!!
New front shocks #TS1409 are recommended, but not required.
INSTALLER MUST CHECK THAT THERE IS ABSOLUTELY NO CLEARANCE PROBLEMS BETWEEN THE WHEELS, THE SPINDLE, THE CALIPER, THE LOWER CONTROL ARMS AND ANY OTHER COMPONENT BEFORE DRIVING VEHICLE.
Hardware Parts List
| CA2655L-3D 1 — Left Lower Control Arm 4 — Pivot Bushings (Installed) 2 — Sleeves (Installed) 1 — Ball Joint (Installed, 6129) 1 — DJM Cross Shaft (Installed) 1 — Tube Loctite 2 — Grease Fitting & Cotter Pin Bags (1 for each Arm, Ball Joints) 4 — Grease Fittings (2 for each Arm, for Pivot Bushings) |
CA2655L-3P 1 — Right Lower Control Arm 4 — Pivot Bushings (Installed) 2 — Sleeves (Installed) 1 — Ball Joint (Installed, 6129) 1 — DJM Cross Shaft (Installed) |
Installation Instructions
-
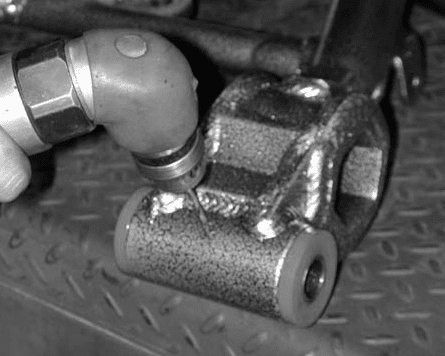
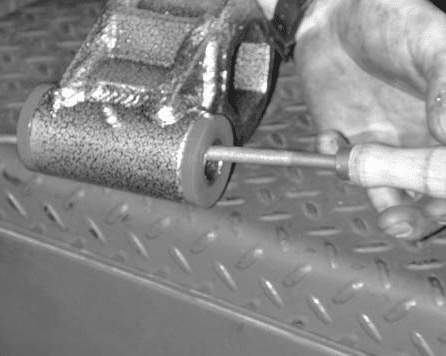
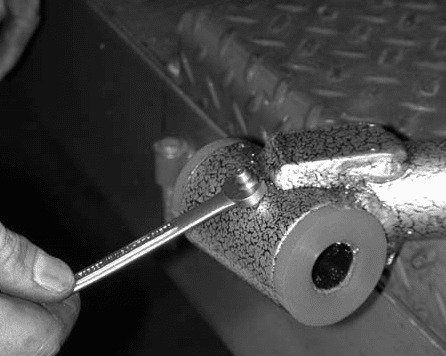
On the bottom of the pivot tubes are threaded holes for the grease fitting. With a 1/8" bit, drill through the bushing and sleeve to allow a path for grease. Remove any burrs on the inner sleeves and carefully thread in the grease fitting.

Thread grease fitting into pivot tube
Drill through bushing and sleeve with 1/8" bit
Remove burrs and thread in grease fitting -
Line up pins for cross shaft and install using factory u-bolts. Install with factory coil spring only.
-
Before installing sway bar bracket to control arm, loosen the bolts that hold the D-bushings to the frame under bumper. Raise the lower control arm to ride height and install sway bar brackets, then tighten.
-
Grease all grease fittings.
-
Review all procedures and check that all parts are tight and installed correctly.
-
Replace wheels and torque lug nuts. Check that the tires will turn both ways without making contact. INSTALLER MUST CHECK THAT THERE IS ABSOLUTELY NO CLEARANCE PROBLEMS BETWEEN THE WHEELS AND TIRES, THE SPINDLE, THE CALIPER, THE CONTROL ARMS OR ANY OTHER COMPONENT BEFORE DRIVING VEHICLE.
-
Turn your steering wheel until it is straight. By sighting down the tires and truck you can get the toe fairly close. Adjustment is made with the tie rod ends. Loosen nuts at the rack and turn the tie rod ends until the tires are in a straight line from front to rear. Close is all you need — your alignment shop will correct this for you. Don't forget to tighten the nuts.
-
With the vehicle on the ground, measure the height of the front and record on the installation helper. Your measurements should be about 3" less than the before measurement.
-
REMEMBER AFTER TEST DRIVING, INSPECT INSTALLATION AND DOUBLE CHECK ALL HARDWARE IS TIGHT. TAKE YOUR TRUCK TO A QUALIFIED ALIGNMENT SHOP FOR A PROFESSIONAL ALIGNMENT. ALIGN TO FACTORY SPECS.
PART # HS1119-4
1973-1991 CHEVY C30 REAR HANGERS & SHACKLES
INSTALLATION INSTRUCTIONS
Rev. # 1-04
Please take the time to read these installation instructions and check the Hardware Parts List to be sure you have all the listed parts before beginning installation.
DJM parts should be installed by qualified mechanics. If you are not familiar with automotive repair, have the parts installed by someone with experience.
Please read the warranty information (blue page enclosed). Complete your Product Warranty Card and mail it to DJM Suspension.
Please take a few minutes to fill out your installation helper (back side of warranty). Accurate measurements BEFORE BEGINNING INSTALLATION will show any irregularities in your vehicle.
NEVER WORK UNDER TRUCK SUPPORTED BY A JACK ONLY!!! USE QUALITY JACK STANDS WHICH HAVE A RATING ADEQUATE FOR YOUR TRUCKS WEIGHT!!!
THIS KIT REQUIRES THE REMOVAL OF UPPER OVERLOAD SPRINGS AND STRIKER PADS, WHICH MAY REQUIRE ADDITIONAL LOAD CARRYING DEVICES TO RETAIN LOAD CAPACITY.
NEW REAR SHOCKS DJM PART #1800 ARE REQUIRED.
Caution: Leaf springs are under considerable tension. Good judgment should be used when removing shackle bolts. The rear spring may move causing a pinch point between the spring and rear shackle.
Hardware Parts List
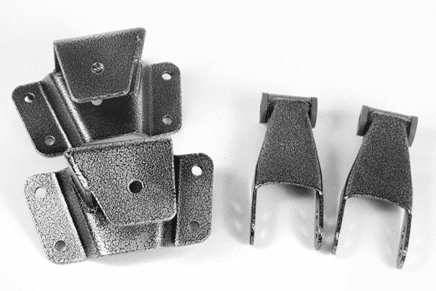
| 2 — Spring Eye Hangers 2 — Shackles w/ Bushings (SH1012-2) 8 — 7/16" x 14 Nylock Nuts 8 — 7/16" x 14 x 1-1/4" Bolts 16 — 7/16" Flat Washers |
Installation Instructions
-
Working on one side at a time, remove the u-bolts holding the springs to the axle. To keep the spring pack together while removing the overload, use two large C-clamps placed close to the center bolt on the leaf spring and tighten. Remove the center bolt nut. Slowly loosen the C-clamps and remove the upper overload spring. Clamp springs back together. Install center bolts and tighten. Remove C-clamps.
-
The spring center bolt must be in the hole on the top of the axle. Check before tightening u-bolts. When the center bolt is in place, install u-bolts, bottom plate, and nuts. Tighten u-bolts.
-
Remove the two striker pad brackets attached to the frame.
-
Loosen and remove the two shackle bolts and remove the stock shackle. Test fit the shackle and check for interference on the bottom of the bed. On some trucks a square bed brace will be in the way of the shackle. Cut a notch in the brace wide enough for the bolts.
-
Remove the bolt holding the front of the leaf spring to the front spring hanger.
-
Remove the rivets holding the spring hanger to the frame. This can be done with an air chisel or by drilling out the rivets.
-
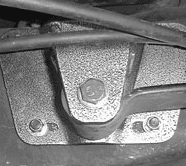
Mount your new DJM spring hanger in the original holes on the frame with the hardware provided. The gas tank may need to be moved to gain access to bolts on the driver side. Raise the axle so the front of the springs can be located in the new hanger. With factory bolts, attach the spring to the hanger and install nuts. Do not tighten nuts. (Some may find it easier to attach the spring to the hanger before bolting the hanger to the frame.) See Fig #1 for typical hanger installation.
Fig #1 — Typical hanger installation -
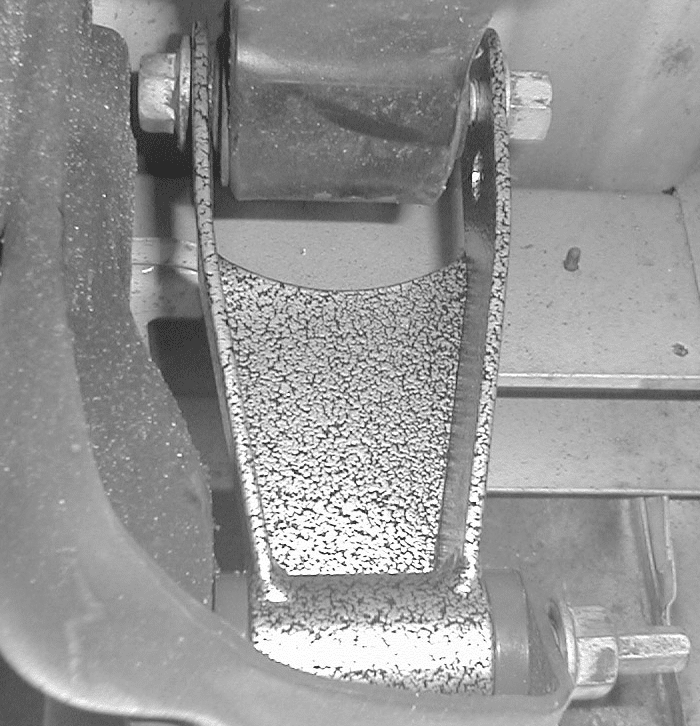
Apply some grease to the bushings and inside sleeves, then attach the new shackle on the frame mount and bolt in place with factory bolts (Fig #2). Shackle will install with bushings down and open side forward. The hole farthest away from the bushing will lower the truck more than the closer hole. Now raise the rear axle high enough to align the spring eye and shackle. Insert the remaining bolt and install nuts.
Fig #2 — Shackle installation -
Install rear wheels and torque lug nuts. Remove jack stand and floor jack. Check the height of the rear. You can change the height by moving the spring to the other hole in the shackle. When satisfied with the height, install new shocks. Tighten all bolts.
-
Take truck for a test drive. Record complete height on installation helper. Double check all hardware.