1986 1/2 – 1997 Nissan Hardbody 3 Inch Front Control Arms
$443.41
Get the stance you want without sacrificing ride quality or dealing with alignment headaches with our Nissan Hardbody control arms. These control arms give your Nissan Hardbody a clean front drop while keeping the truck comfortable and street-ready. It’s one of the easiest ways to get the drop, control, and smooth ride you want.
We know you want your Nissan Hardbody to sit right and drive right. These lowering control arms provide a true 3-inch drop while keeping your factory torsion bar settings unchanged.
That means you avoid the rough ride and alignment issues that come from over-adjusting stock parts. Plus, you get a clean drop with better control and consistent performance on the road.
Our Nissan Hardbody lower control arms:
- Provide a true 3-inch front drop
- Keep factory torsion settings
- Reduce alignment issues
Description
Why Buy from DJM Suspension
Proven Lowering Expertise
Get lowering control arms, bushings, and other suspension parts backed by decades of experience. Each component reflects 50+ years of hands-on development.
Designed for Real Driving
We build lowering control arms and suspension parts built to perform on the street. Your truck maintains comfort, control, and drivability after installation.
Trusted by Truck Owners
You join thousands of truck owners who rely on DJM Suspensions for lowering control arms and other parts that fit without stress and provide dependable results.
About DJM Suspension
DJM Suspension builds parts for drivers who care about how their truck looks and drives. As a family-owned American manufacturer, DJM has led the lowering control arms and parts market since the early 1970s. Since opening our doors, we’ve focused on quality, fit, and on-the-road performance. Every product we design reflects decades of passion for aftermarket suspension.
Frequently Asked Questions
Get the Right Stance Without Compromise
Lower your Nissan Hardbody the right way with control arms built for fit, ride quality, and long-term performance. Order your lowering control arms now!
Additional information
| Weight | 20 lbs |
|---|
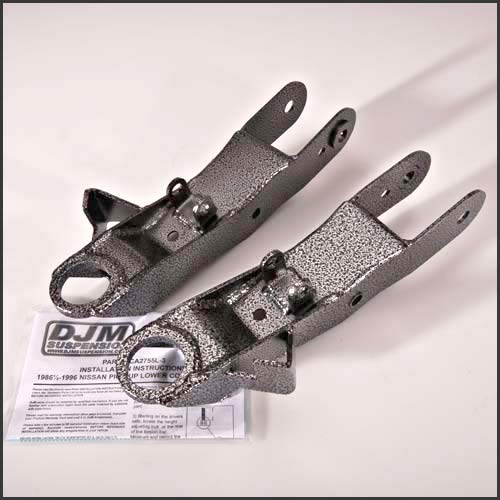
PART # CA2755L-3
1986½–1996 NISSAN PICK-UP LOWER CONTROL ARMS
INSTALLATION INSTRUCTIONS
Rev. # 10-08
Please take the time to read these installation instructions and check the Hardware Parts List to be sure you have all the listed parts before beginning installation.
DJM parts should be installed by qualified mechanics. If you are not familiar with automotive repair, have the parts installed by someone with experience.
Please read the warranty information (blue page enclosed). Complete your Product Warranty Card and mail it to DJM Suspension.
Please take a few minutes to fill out your installation helper (back side of warranty). Accurate measurements BEFORE BEGINNING INSTALLATION will show any irregularities in your vehicle.
NEVER WORK UNDER TRUCK SUPPORTED BY A JACK ONLY!!! USE QUALITY JACK STANDS WHICH HAVE A RATING ADEQUATE FOR YOUR TRUCKS WEIGHT!!!
THIS KIT DOES NOT INCLUDE NEW BALL JOINTS. YOU MUST REUSE OR REPLACE FACTORY BALL JOINTS.
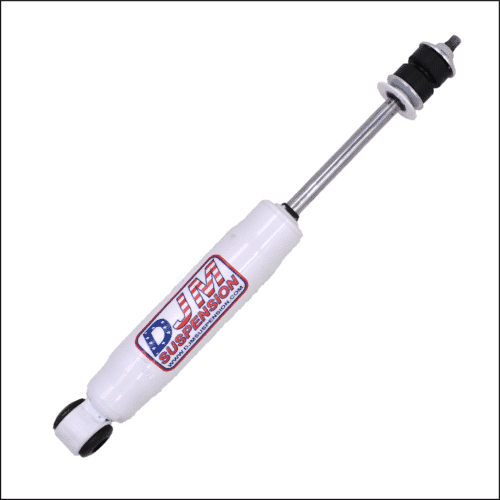
NEW FRONT SHOCKS DJM PART # 1315 ARE RECOMMENDED, BUT NOT REQUIRED.
USING AIR BAGS WILL VOID DJM'S WARRANTY!!
INSTALLER MUST CHECK THAT THERE IS ABSOLUTELY NO CLEARANCE PROBLEMS BETWEEN THE WHEELS, THE SPINDLE, THE CALIPER, THE LOWER CONTROL ARMS AND ANY OTHER COMPONENT BEFORE DRIVING VEHICLE.
Hardware Parts List
|
1 — Right Control Arm 1 — Left Control Arm |
Installation Instructions
-
Park your truck on a flat level surface. Chock the rear wheels. Loosen front lug nuts. Raise the front with a floor jack. Support the frame with jack stands. Remove front wheels.
NOTE: ALWAYS USE JACK STANDS — NEVER RELY ON JACKS ONLY!! -
Remove lower ball joint cotter pin and loosen nuts 2 full turns. Free ball joint from spindle using a pickle fork. Be extra careful not to damage the ball joint or dust boot — you will need to reuse the ball joint.
-
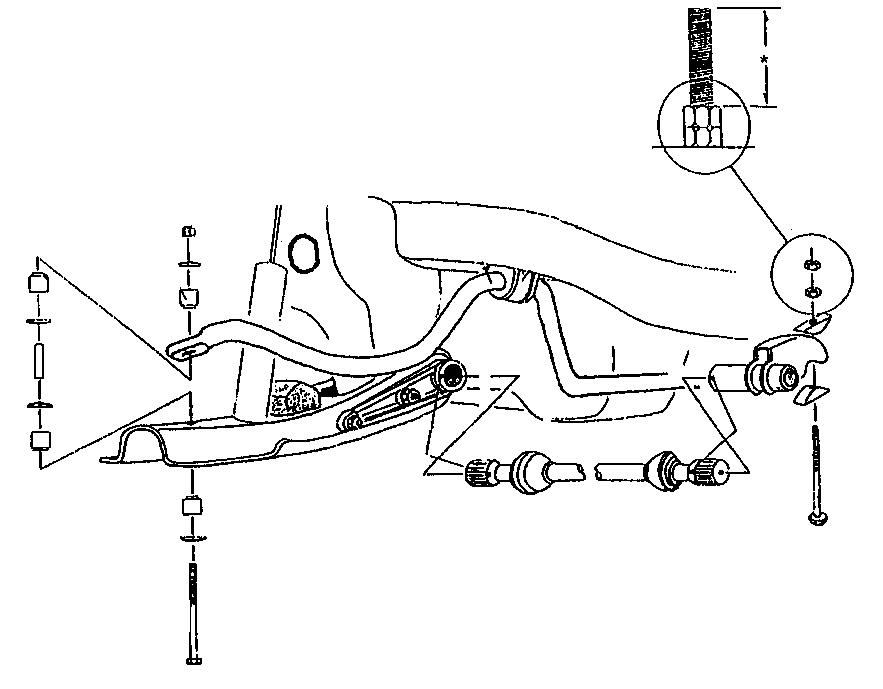
Starting on the driver's side, locate the height adjusting bolt at the rear of the torsion bar. Measure and record the length of the threads exposed between the end of the adjusting bolt and nut (Fig. A). Now make a mark at the front of the torsion bar where it goes into the bracket bolted to the lower control arm. Mark both the bar and the bracket (Fig. B). This will index the bar into the correct position when installing.
Note: Step 3 assumes torsion bars are in the factory position.
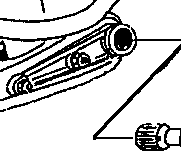
Fig. A — Record exposed thread length before disassembly 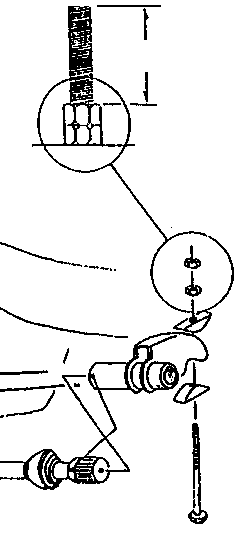
Fig. B — Mark torsion bar and bracket before removal -
Loosen the height adjusting bolts until there is no longer any load on the torsion bars.
-
Remove the two bolts holding the torsion bar assembly to the lower control arm. Slide the torsion bar and receiver away from the control arm. Repeat steps 3 through 5 on the passenger side.
-
Unbolt sway bar end link and remove lower shock bolt. Unbolt TC (Tension/Compression) rod. Remove ball joint nut. Remove pivot bolt and remove lower control arm. (Removal of plastic splash guard is recommended.)
-
Remove rubber boot from ball joint on original control arm. Carefully remove the clip which secures the ball joint and press out ball joint.
-
Press ball joint into your new DJM control arms. Install clip and rubber boot.
-
Install DJM control arm to frame using original hardware, but do not tighten. Make sure the short bolt next to the pivot is inserted before attaching to frame.
NOTE: The steering stop on the control arm must be facing forward. -
Bolt T/C rod to control arm and tighten to factory specifications. Install ball joint to spindle, tighten, and install new cotter pin.
-
Attach torsion bar assembly to control arm, making sure the torsion bar is indexed in the same position as before. Torque bolts to factory specs. Now tighten all mounting hardware except for pivot bolts. Pivot bolts must be tightened after the vehicle is on the ground.
CA2755L-3 control arm assembly diagram -
Adjust height adjusting bolts to the original positions you documented in step 3 before disassembly. Do not tighten jam nuts.
-
Attach shock and sway bar end link using original hardware.
-
Check brake lines for interference. Install wheels and torque lug nuts. Check that tires will turn both ways without making contact. Remove jack stands.
-
Now tighten pivot bolts.
-
Make any adjustment necessary to obtain desired ride height. Make sure truck is level from side to side. Tighten adjusting bolt jam nuts. Double check all hardware to be sure everything is tight. Check that tires will turn both ways without making contact.
-
Take your truck for a test drive. Start off slowly and listen for any unusual noise.
-
After the test drive, measure the height of the front and record on the installation helper. Your measurements should be about 3" less than the before measurement. If not, readjust the height adjustment bolts.
TAKE YOUR TRUCK TO A QUALIFIED ALIGNMENT SHOP FOR A PROFESSIONAL ALIGNMENT.