In this post we will install a C-Notch on this 03 Silverado.
When you’re looking to lower your 2003 Chevy Silverado, installing a C-notch is a must-have modification if you want to enjoy a smooth, safe ride. This custom modification adds more clearance between the axle and the frame. It allows your truck to drop lower without compromising the suspension or causing the frame to bottom out.
But, how do you install a C-notch on your 2003 Chevy Silverado?
We’ll walk you through the steps to successfully install a C-notch on a Silverado. The process is easy to follow and helps you install a C-notch safely. From prepping the frame to tightening the bolts, this post covered everything you need to know for the job.
Tools and Parts You Should Keep Ready When Installing a C-notch on a Chevy Silverado
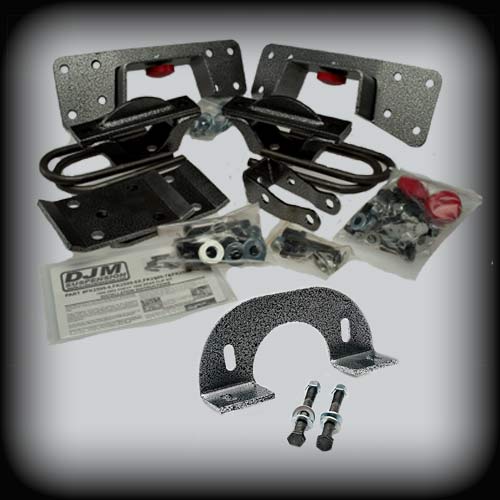
A quality C-notch kit for a 2003 Silverado includes plates, hardware, and a template. Use the template that matches your exact kit. Do not guess the shape. But in addition to this, you’ll also need a few other things ready.
This list typically includes:
- Jack and jack stands rated for your truck
- Wheel chocks
- Safety glasses and gloves
- Measuring tape and marker
- Your notch template from your kit
- Plasma cutter
- Grinder with cutoff and flap discs
- Drill and bits for frame steel
- Punch or air hammer to remove cut sections
- Wrenches and sockets for hardware
- Torque wrench
- New bump stops
- Brake line tools and fittings, if needed
Step 1: Clean the Frame for Better Visibility
Before you take out those cutting and welding tools from your garage, you need to prepare your work area. So, the first step is cleaning the frame. It’s a critical step in installing a C-notch Chevy Silverado because it allows you to work more precisely.
- Raise the rear of your truck and support it on jack stands
- Remove the rear wheels if they block your access
- Clean the outside and inside of the frame rail near the axle
- Remove dirt, undercoating, and loose rust
Use a wire brush to remove dirt, debris, and any rust that might be present on the frame. Once the frame is clean, you’ll have better visibility of the areas you need to work on, making the C-notch installation smoother and preventing any mishaps during the cutting stage.
Step 2: Move the Brake Line
The next step in the process is to move the brake line. You’ll want to move the brake lines away from the frame to make sure they don’t get damaged during the installation of the C-notch on your 2003 Silverado.
- Locate the rear brake line that runs along the frame
- Unclip the line from the frame tabs
- Cap the line to limit fluid loss and contamination
- Move the line out of the way
Be careful to protect the brake lines from kinks or damage while you install the C-notch. You’ll typically need A 9/16-inch or 14mm brake line flare nut wrench for this job.
Step 3: Mark the Frame with a Template
Using the C-notch kit for your 2003 Silverado, you should have received a template to mark where the cuts need to be made on the frame.
- Place the template on the frame in the recommended location
- Align the template to reference points on the frame
- Confirm the notch location matches the axle path
- Trace the template line with a clear marker
Step 4: Cut the Frame with a Plasma Cutter
Once your markings are in place, it’s time to make the cuts. A plasma cutter is the best tool for the job, as it provides clean, precise cuts. Here’s what you need to do.
- Put on eye protection and gloves
- Confirm no lines or wires sit behind your cut area
- Follow the traced line with steady motion
- Stop and reposition if the cut starts to drift
If you’re not comfortable using a plasma cutter, consider consulting a professional to avoid costly mistakes.
Step 5: Punch Out the Excess Frame
Once you’ve completed the cuts, the next step is to punch out the excess frame. Using a hammer or other appropriate tool, carefully remove the cut-out section of the frame. Be cautious not to damage surrounding areas as you work to remove the excess metal.
- Tap the cut piece free with a punch and hammer
- Remove any hanging material
- Grind the cut edge smooth
- Deburr sharp corners
Step 6: Test the C-Notch Fitment
With the excess metal removed, it's time to check the fit of your C-notch.
- Hold the notch plate in position
- Confirm the plate matches the cut shape
- Confirm the plate sits tight against the frame
- Confirm the axle path clears the new opening
The C-notch should fit snugly, and there should be no gaps or misalignments. Do not force the plate into place with bolts. The plate should fit flat.
Step 7: Drill Holes for Bolts
Next, you’ll need to drill holes for the bolts that will secure the C-notch on your Silverado. Drill the holes in the appropriate spots as per the instructions provided with the kit. These holes will secure the C-notch into place, so it’s important to get them right.
- Use the plate as a guide for hole locations if your kit allows it
- Center punch each hole mark
- First, drill the pilot holes
- Drill to the final size based on your hardware
Be sure to use the correct drill bit size for the bolts you’ll be using, and always double-check the measurements so everything lines up.
Step 8: Tighten Nuts and Bolts to the Frame
Once the holes are drilled, it’s time to install the 2003 Silverado C-notch into position. Using the bolts, nuts, and washers provided in your kit, tighten the C-notch securely to the frame.
- Install all bolts loosely at first
- Confirm the plates stay aligned
- Tighten bolts in a pattern to pull plates down evenly
- Torque hardware to the kit spec
Step 9: Install the Bump Stop
To complete the C-notch install on your Silverado, you’ll need to install the bump stop. The bump stop is a crucial component that ensures your truck’s suspension has proper travel without bottoming out, especially when lowering your truck.
- Mount the bump stop to the notch area or the bracket from the kit
- Confirm the bump stop hits the axle pad at full compression
- Check for clearance to brake lines and shocks
Step 10: Replace the Brake Line
Now that the C-notch has been installed, it’s time to replace the brake line. Carefully reattach the brake lines to their proper positions and fasten them securely.
- Route the brake line away from sharp edges and moving parts
- Re-clip the line to the frame using brackets or new hardware
- Verify the line has slack for suspension movement
- Bleed the brakes if you opened the system
After securing the brake lines, it’s a good idea to test the brake system to see if everything is functioning correctly before driving your truck.
Enjoy Your Newly Lowered 2003 Chevy Silverado
By following these steps, you can complete the C-notch install on your Silverado. This modification not only improves the appearance of your truck but also boosts its suspension and handling.
Always remember that safety is key when making modifications to your truck, so if you’re not confident in your abilities, don’t hesitate to seek help from a professional. You can also watch our installation video for details.
As far as buying a genuine lowering kit for your Chevy Silverado is concerned, DJM Suspension has got you covered. Since the early 1970’s, we’ve been known as one of the leading manufacturers of lowering components for Trucks and SUVs from all famous brands.
Check out our collection of American-made suspensions now.
For any help, please call 310-538-1583.