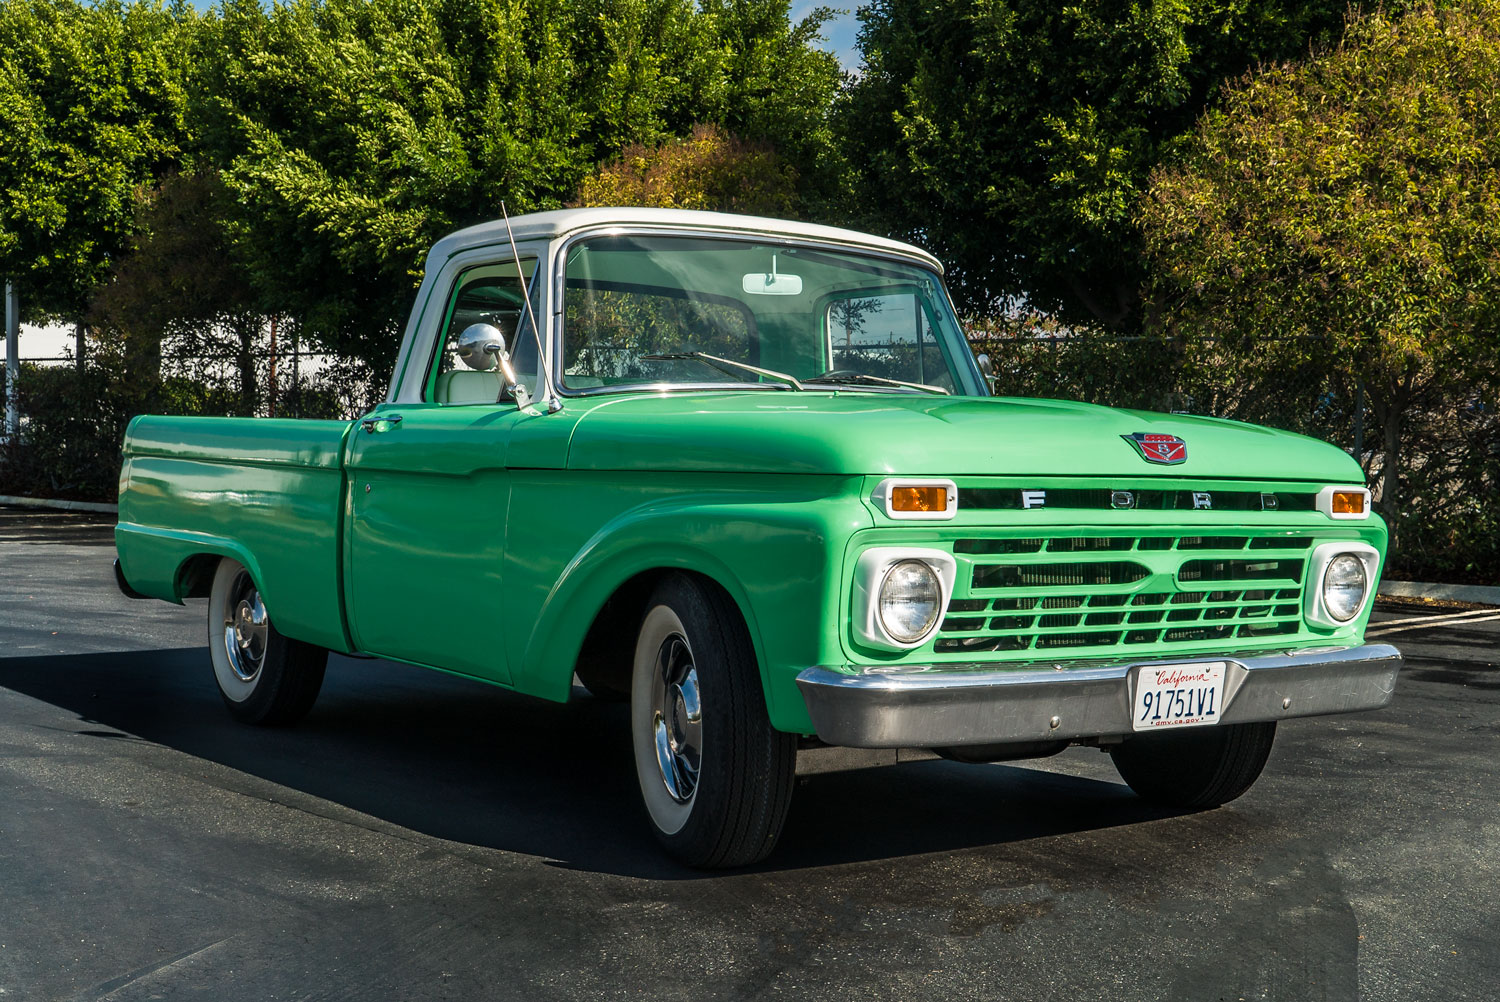
If you followed Part One of the 1966 Ford F100 budget makeover, you spent time planning your budget. You’ve also measured the ride height, checked alignment, reviewed caster settings, and mapped out the budget before lowering the truck.
With that groundwork complete, it’s now time to tackle the 1966 Ford F100 front suspension, remove the factory components, and prepare your truck for the new DJM Suspension lowering kit.
This guide walks you through each step, from safety setup to dismantling the I-beams, shocks, and radius arms.
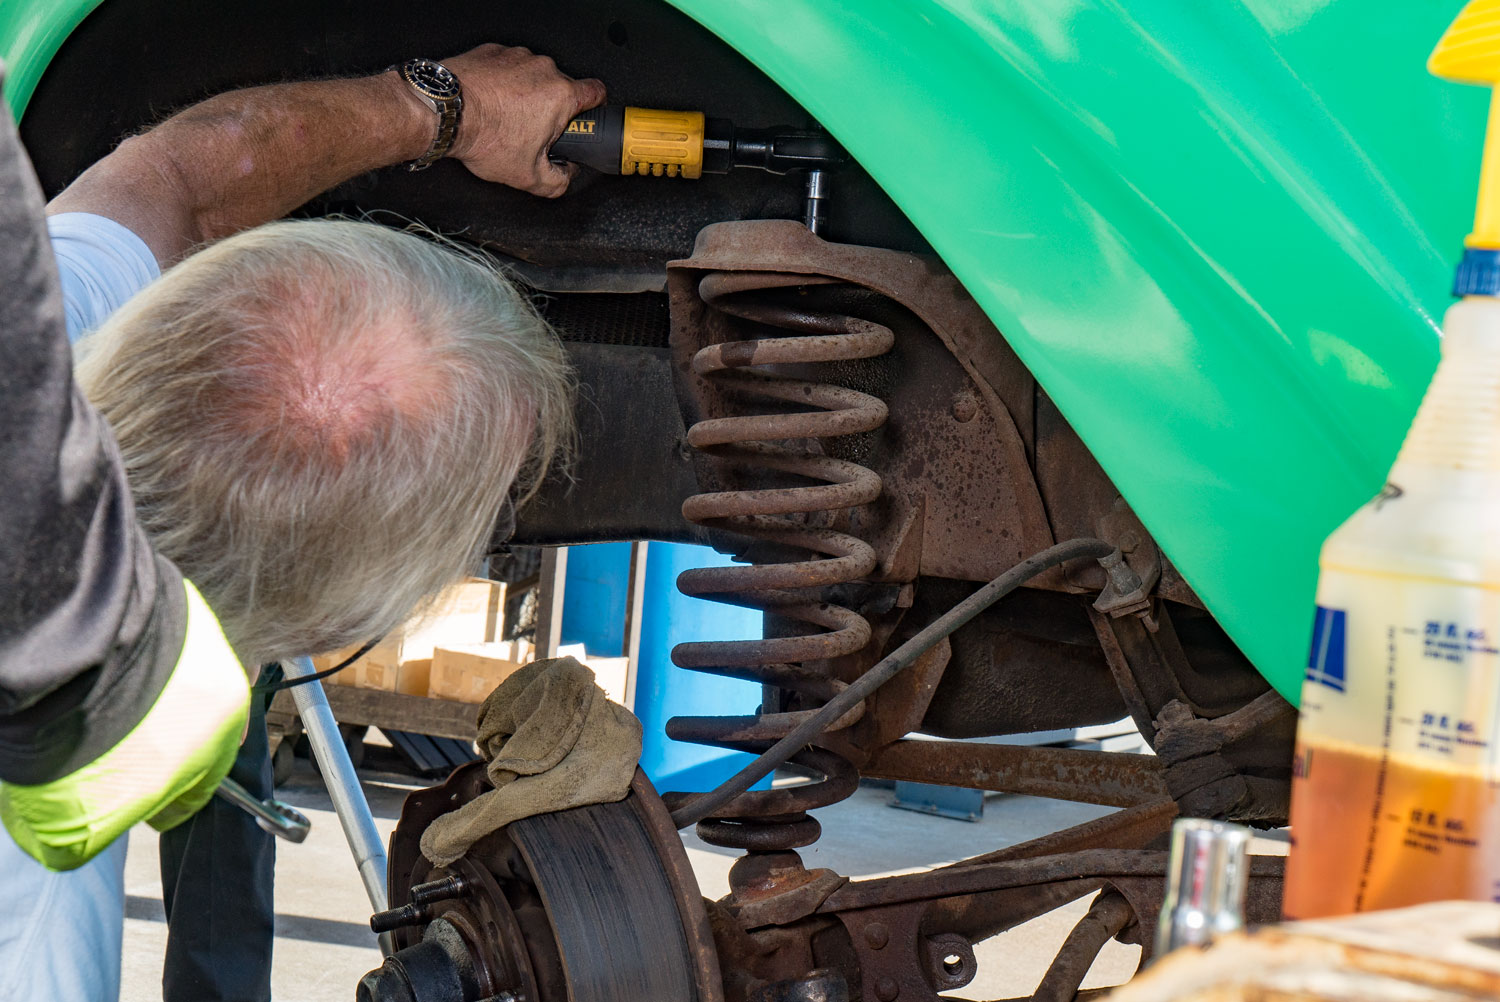
Safety Setup and Tool Prep
Before removing the front suspension, you must think about safety. Position your truck on a reliable lift and support it with rated hydraulic floor jacks. Double-check that the jacks are stable and that the truck is level. Doing this prevents accidents and creates a safer workspace.
A 52-year-old truck, like a Ford F100, uses all SAE fasteners. To avoid frustration, assemble a full set of wrenches and sockets. Pre-soak bolts with WD-40 or PB Blaster to easily remove the front suspension. This upfront preparation saves time and makes the process much smoother.
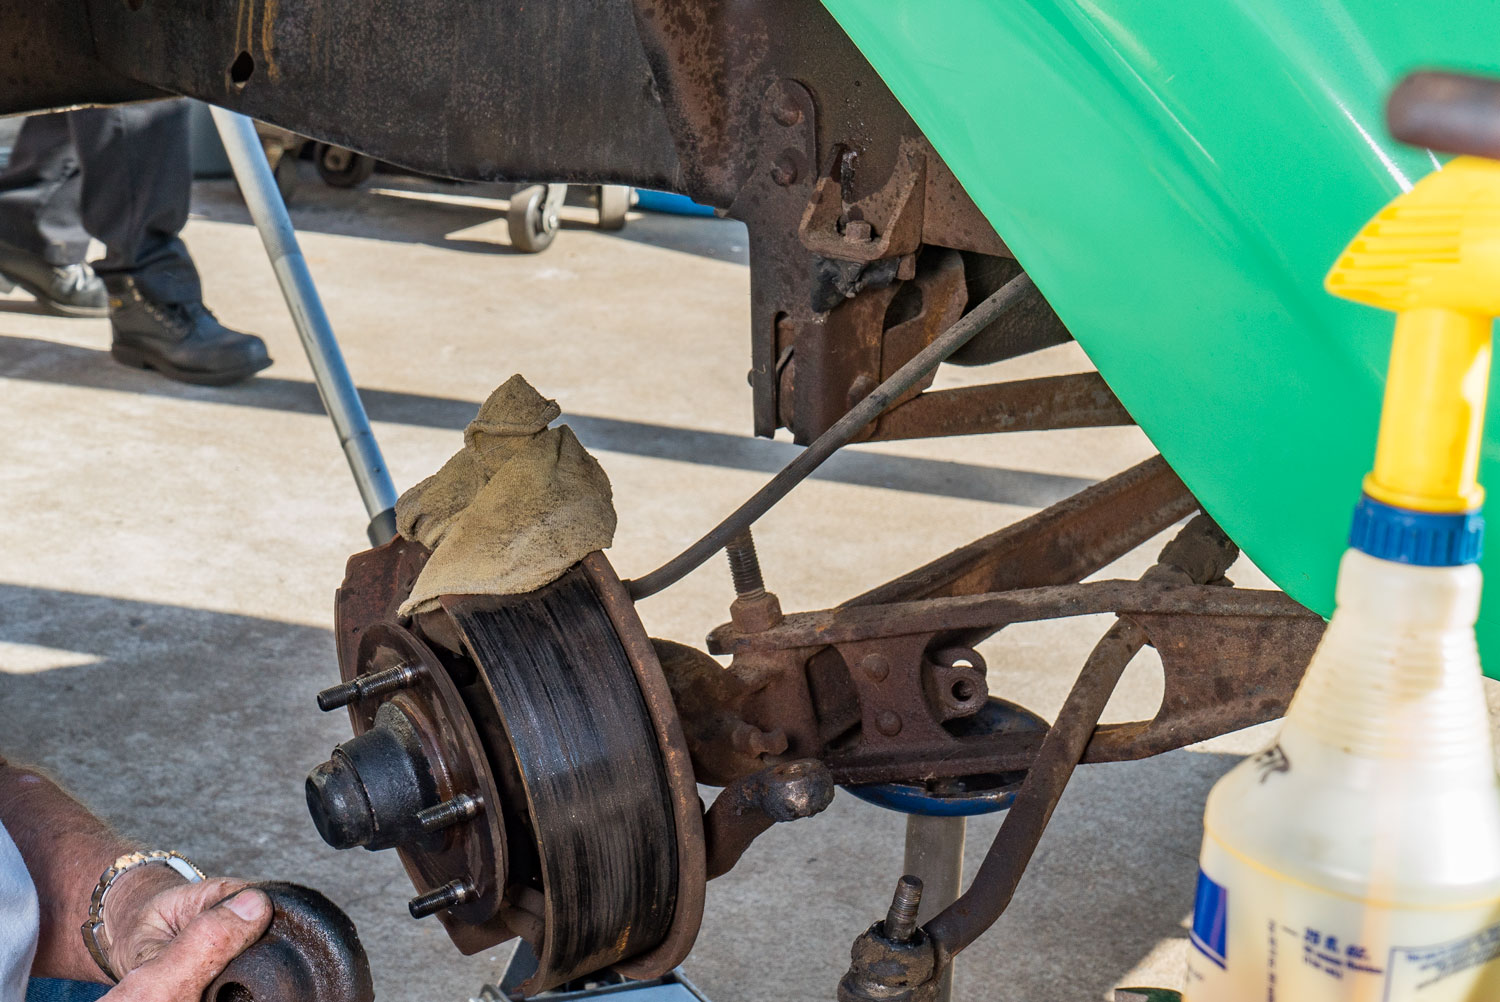
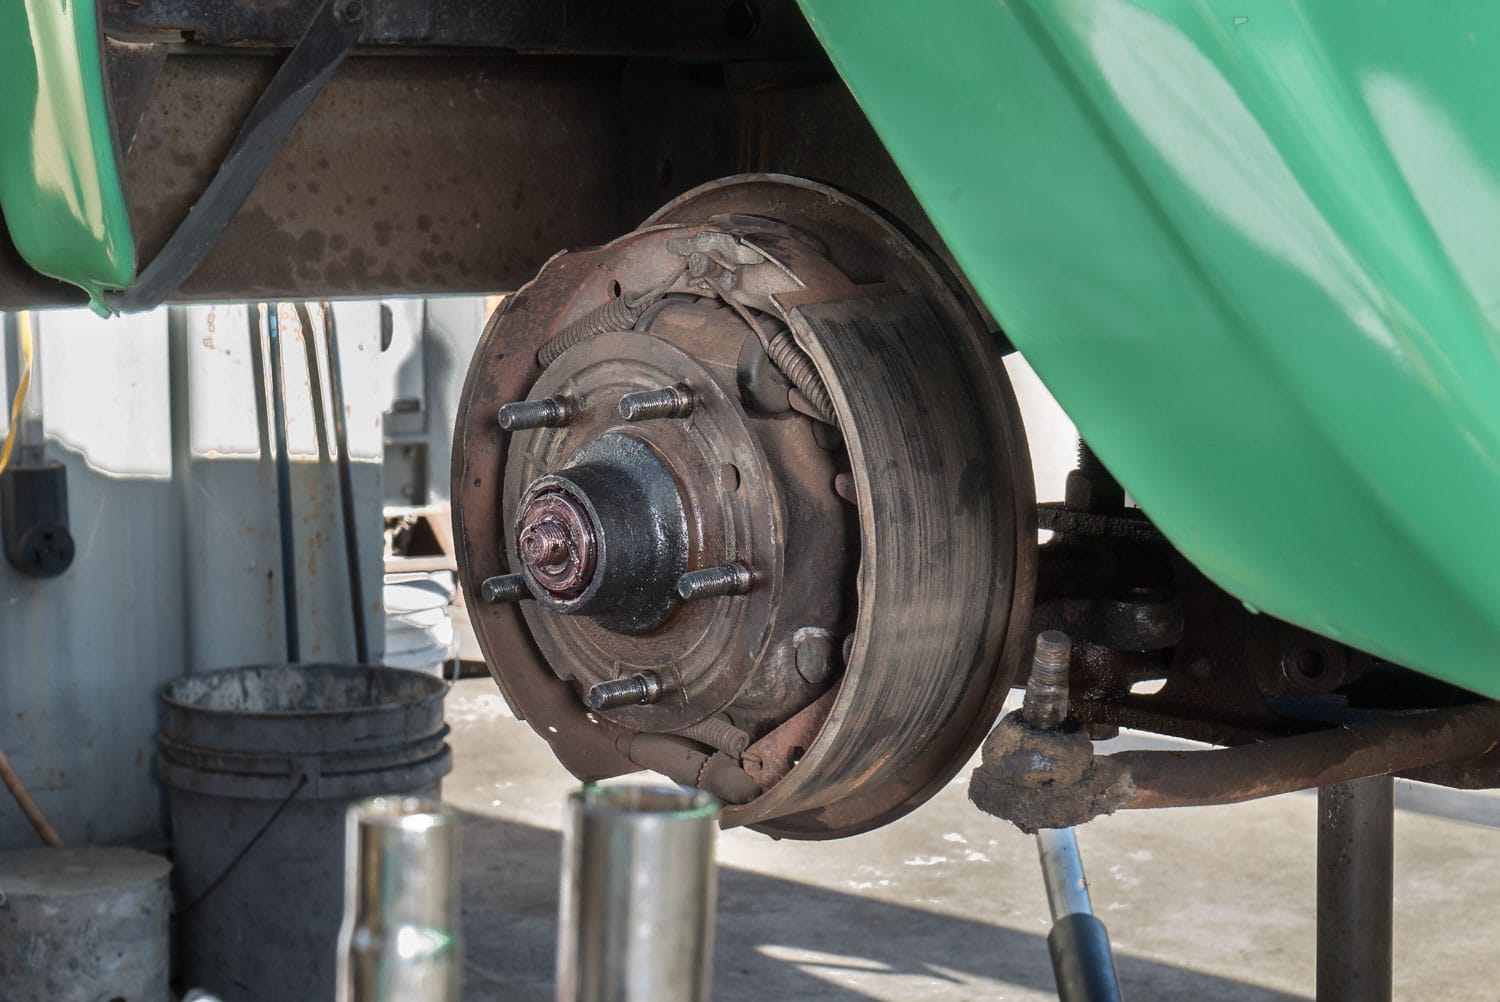
Inspecting the Brakes
After removing the wheels, inspect the brakes. Removing the drum reveals any issues hidden behind the surface. In this build, the drum brakes were installed incorrectly, so rebuilding them was necessary.
While upgrading to discs is an option, properly rebuilding the drums is cost-effective and reliable for a budget makeover. Taking the time to evaluate your brakes now sets the stage for a safer rebuild later.
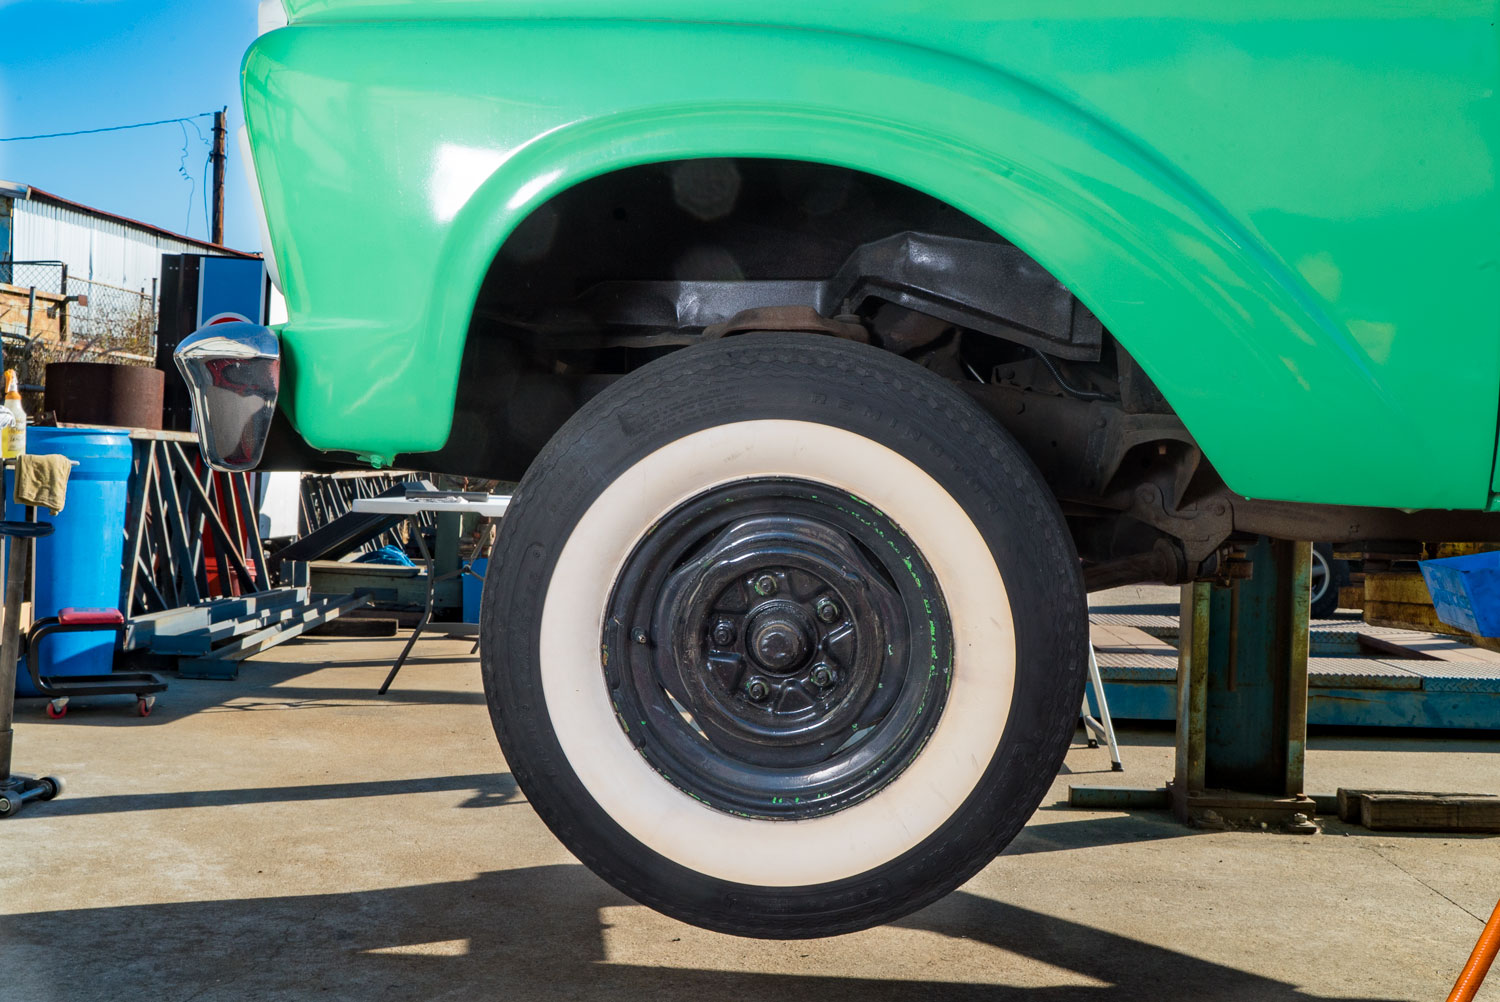
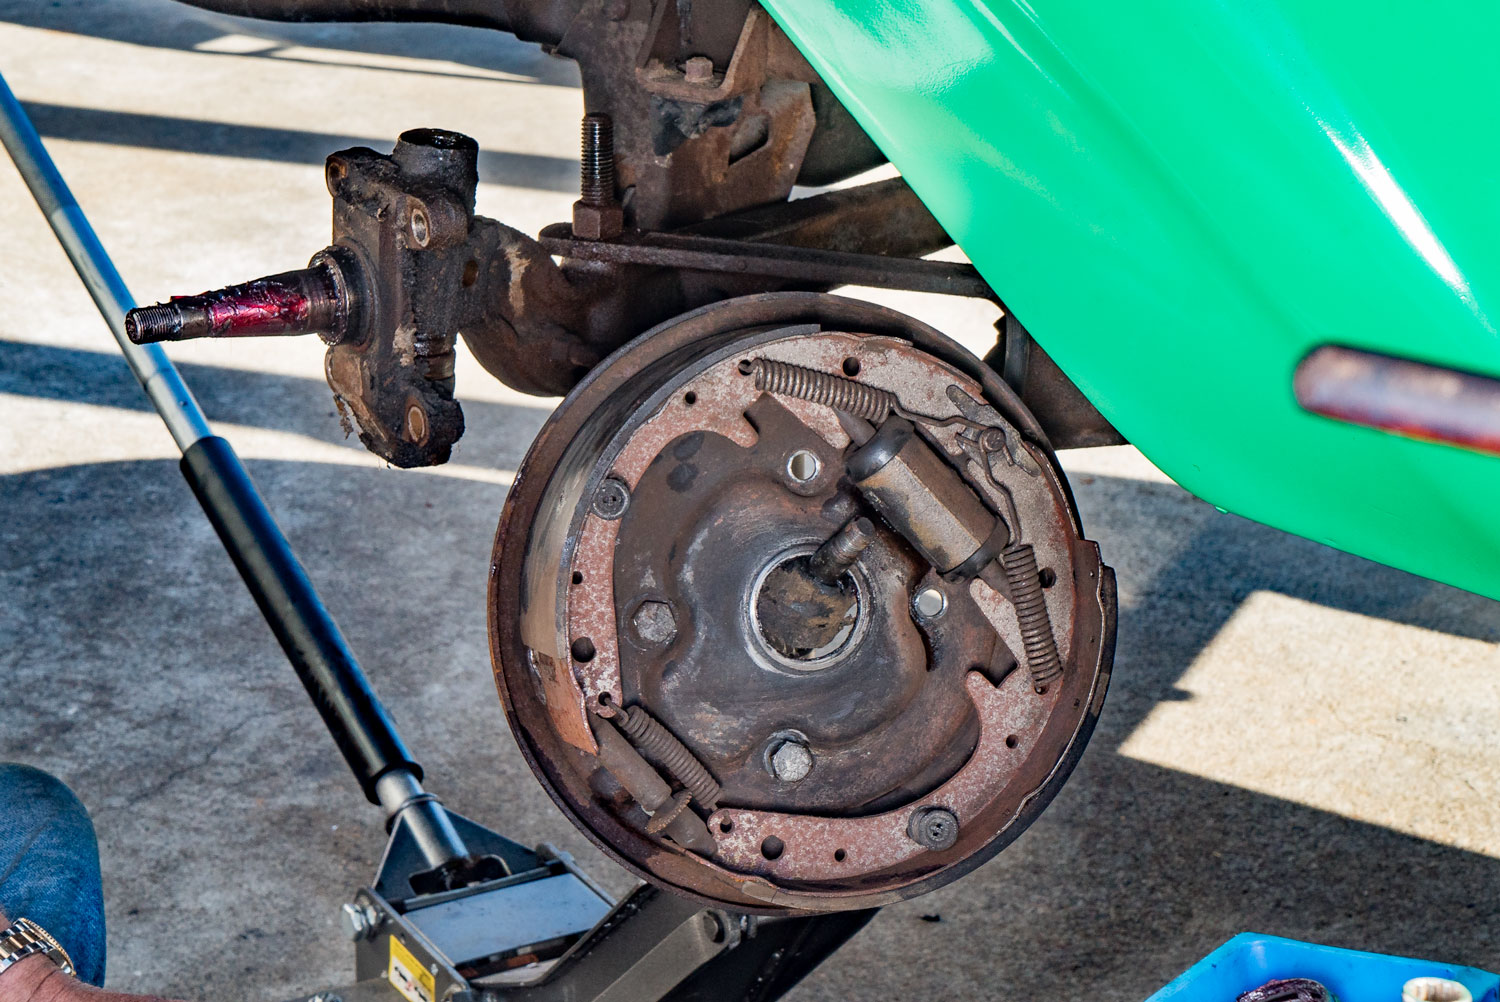
Removing Shocks and Coil Springs
Once the brakes are addressed, remove the front shocks and coil springs. These components are simple to take out, but they free the space needed to work on the upgraded Ford F100 radius arms and I-beam assembly. Keep track of hardware and springs, as the orientation and placement will help when installing the new suspension kit.
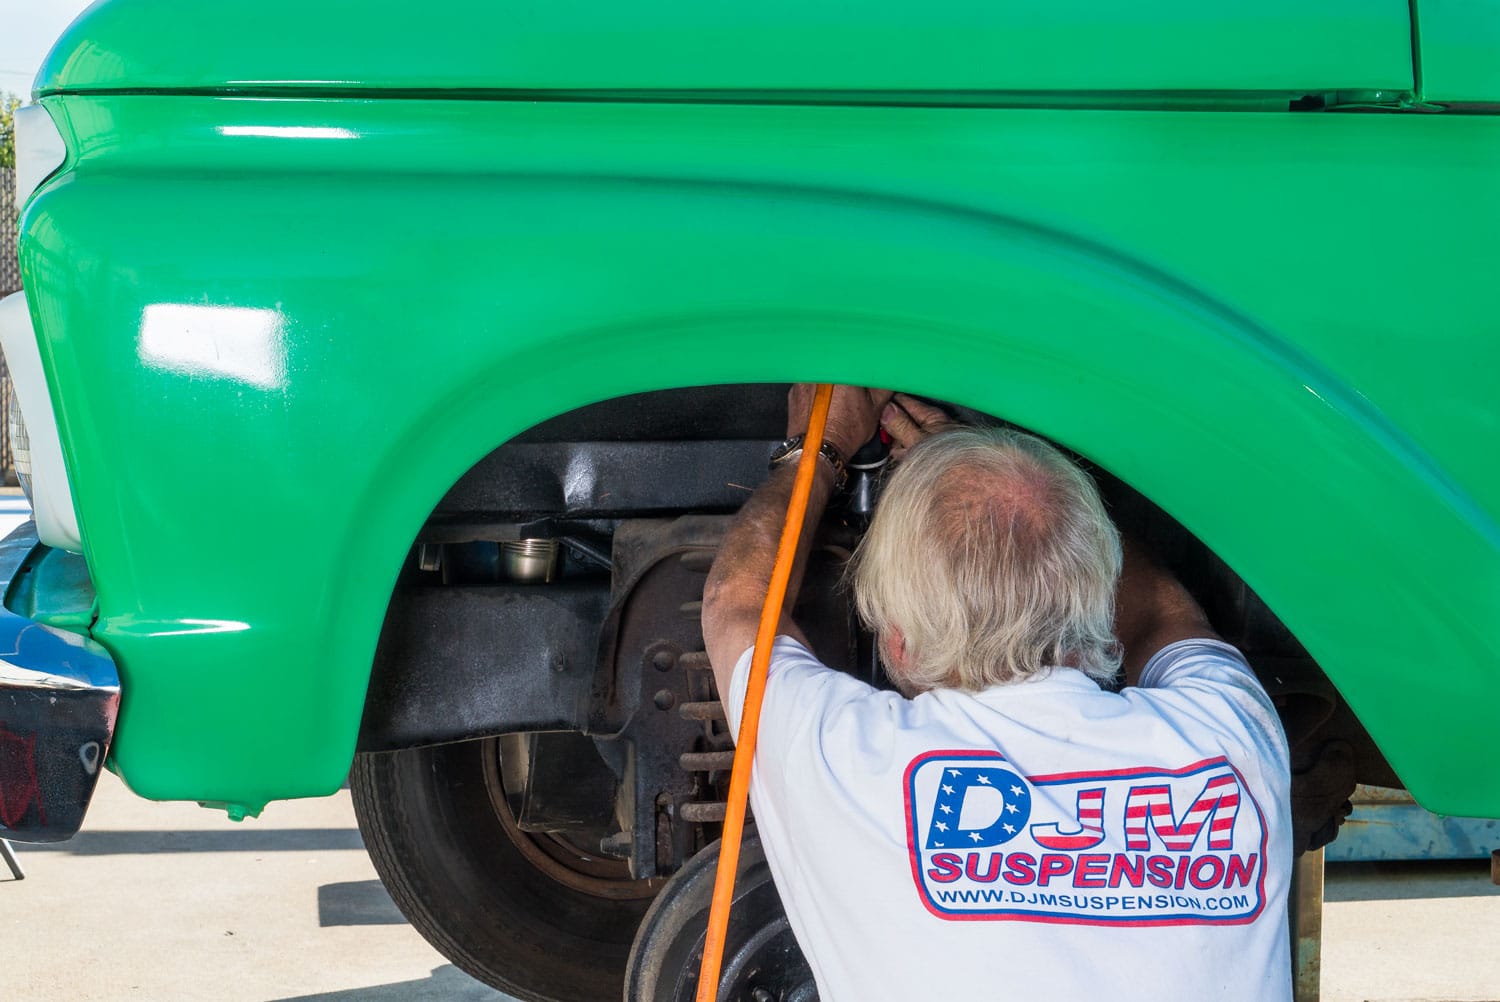
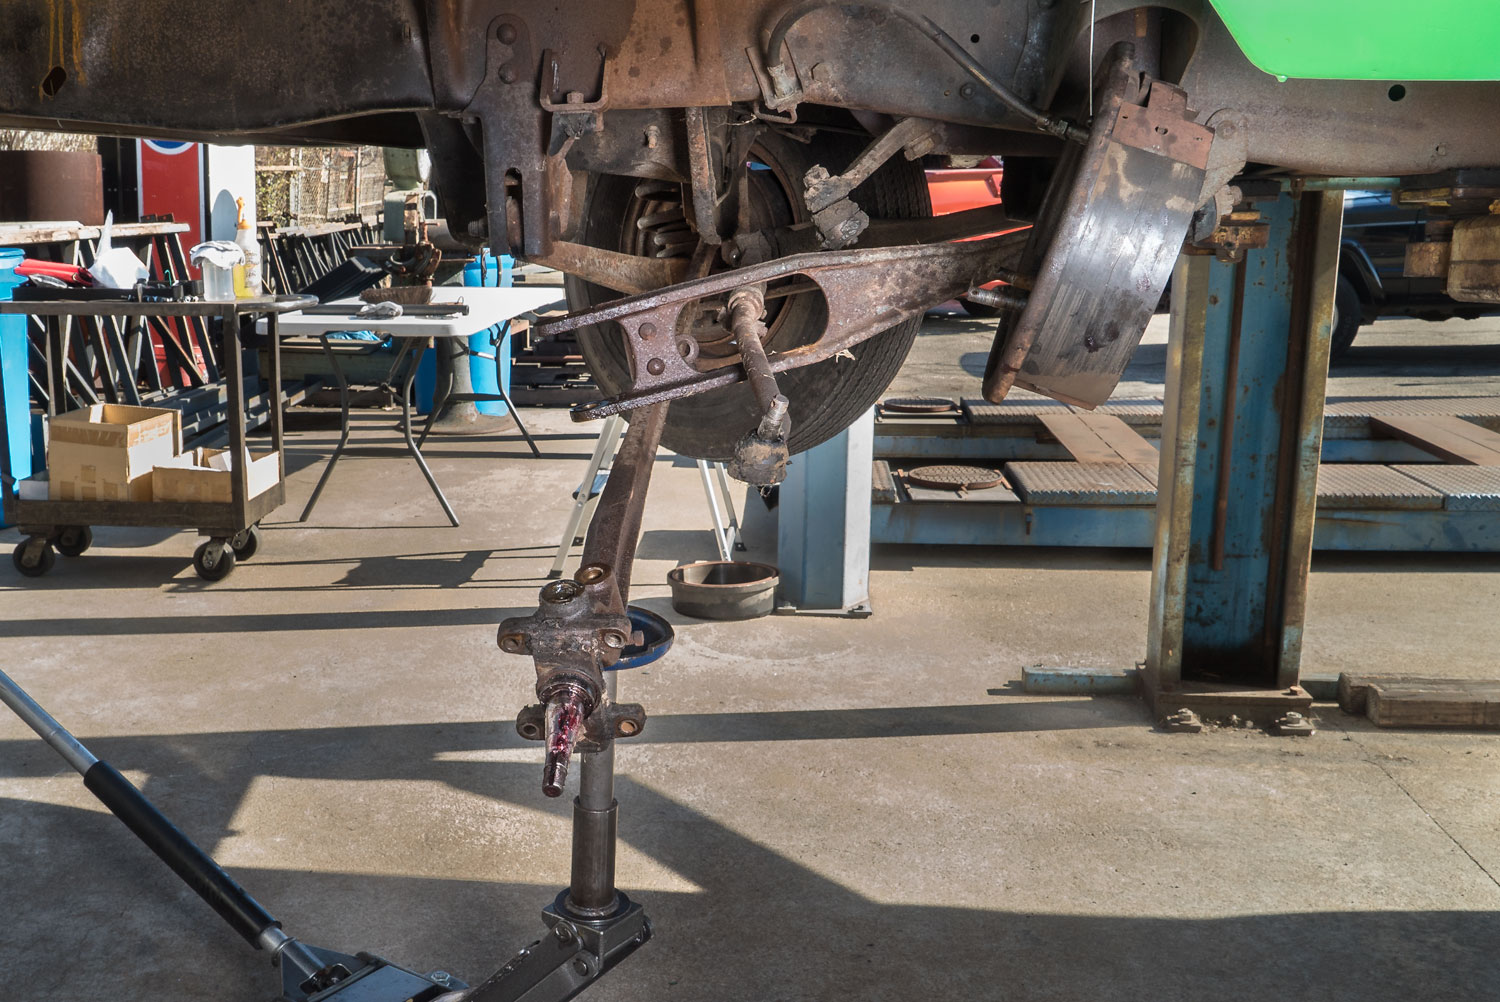
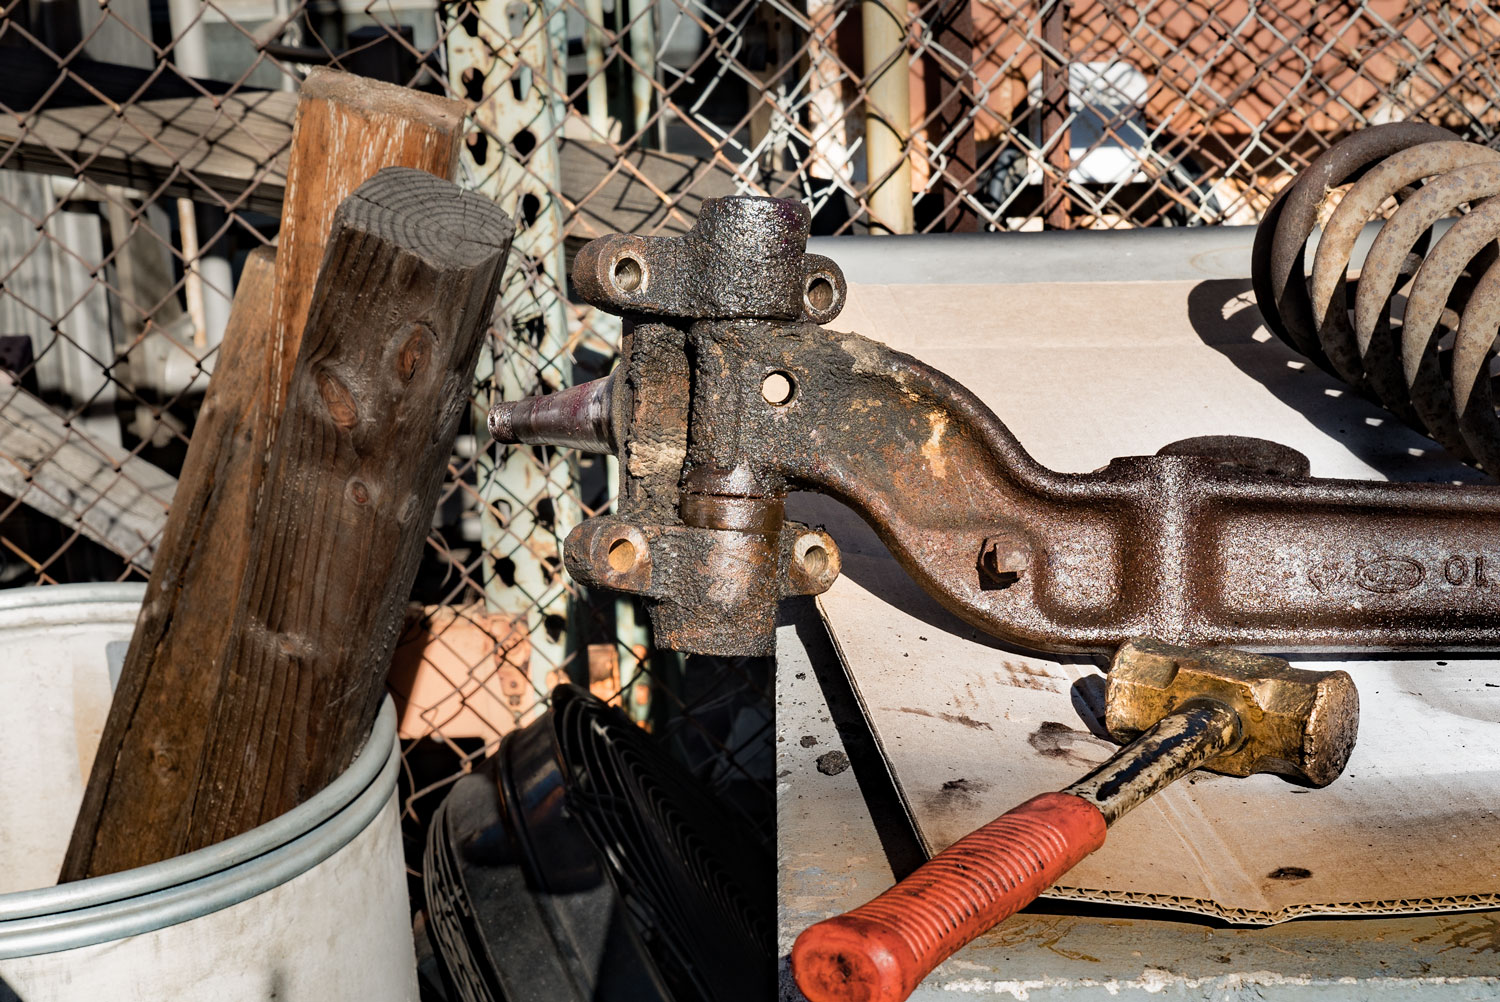
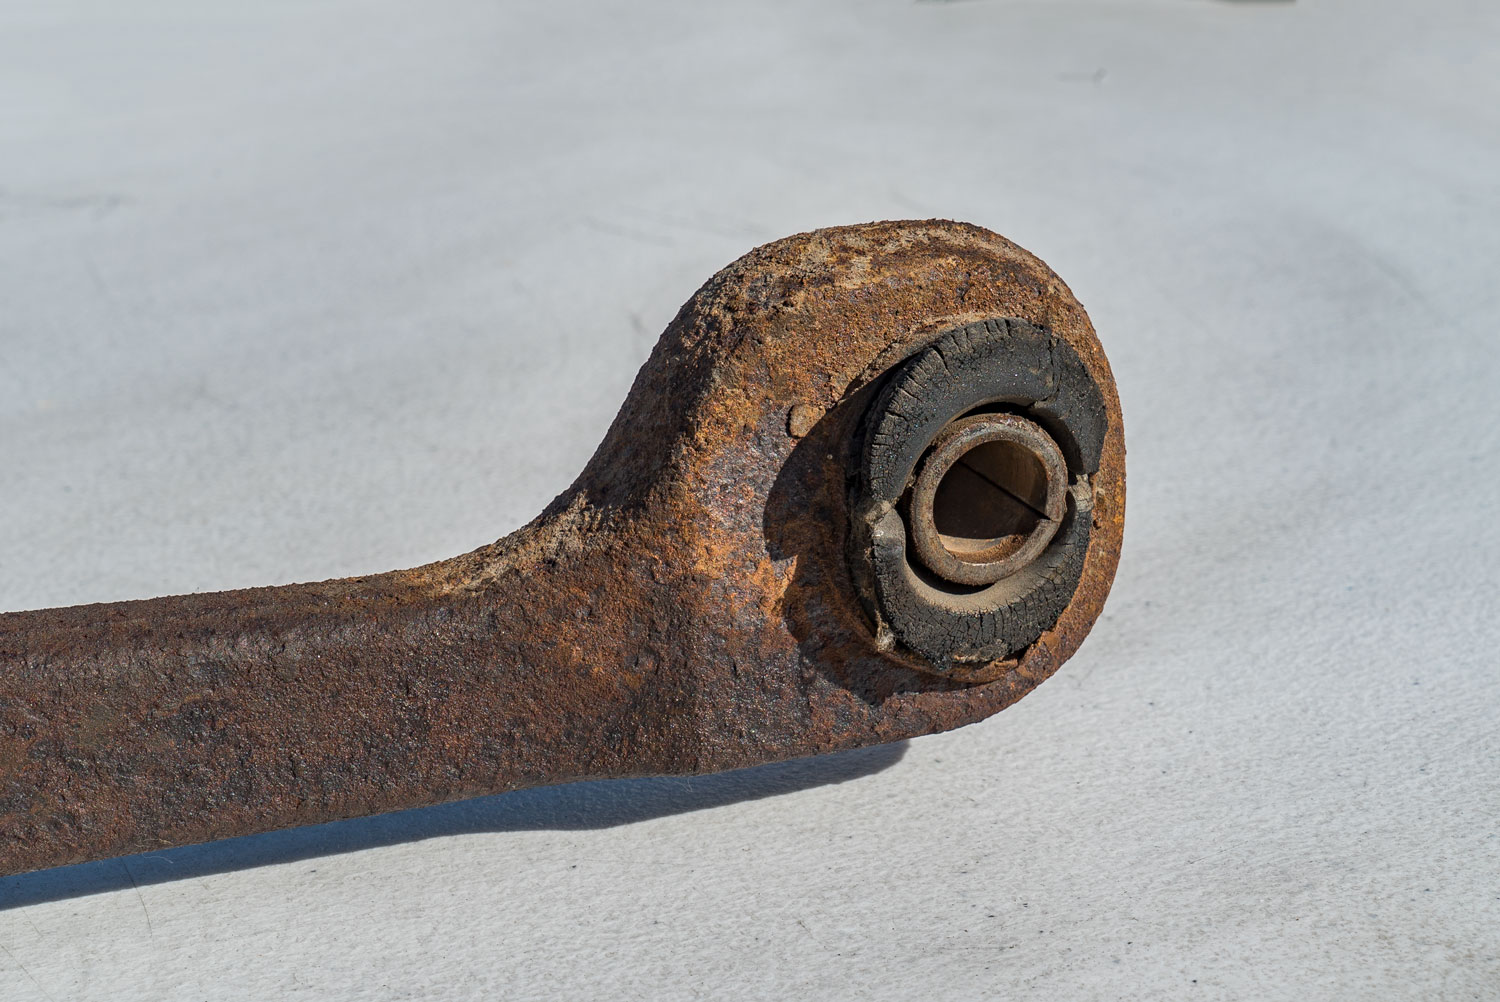
Radius Arms and I-Beams
The radius arms secure the I-beam in its proper front-to-back position. With the shocks and springs removed, take out the pivot bolt on the opposite side of the radius arm. Once these bolts are out, the I-beam and spindle assembly can be carefully removed. Applying gentle persuasion often helps, but take care to avoid damaging old bushings or mounting points.
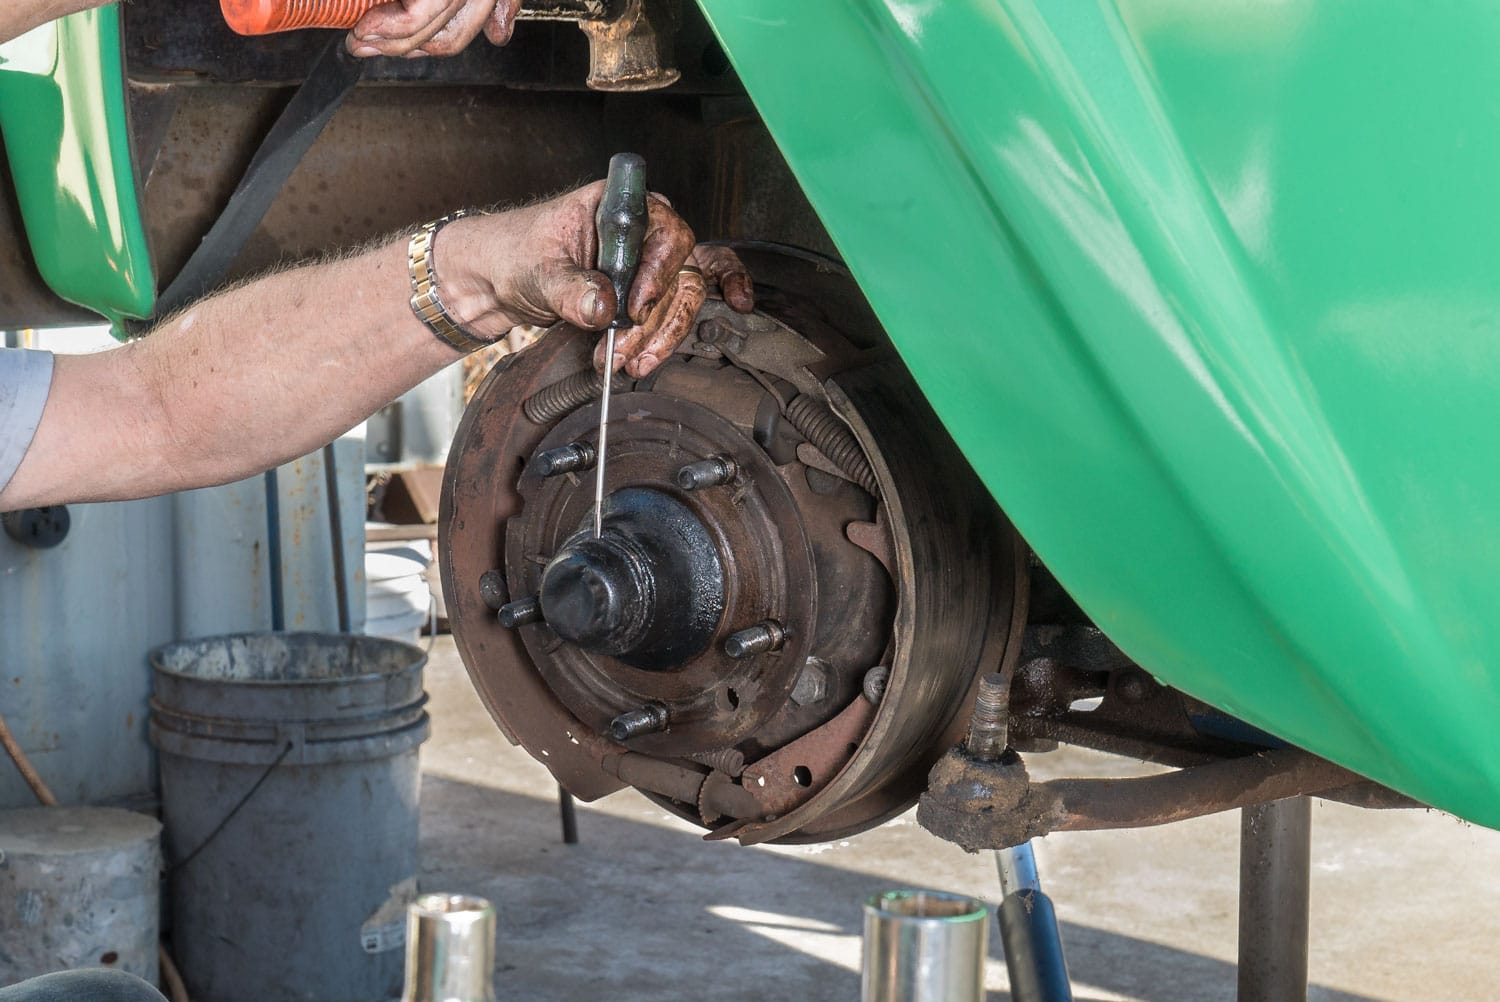
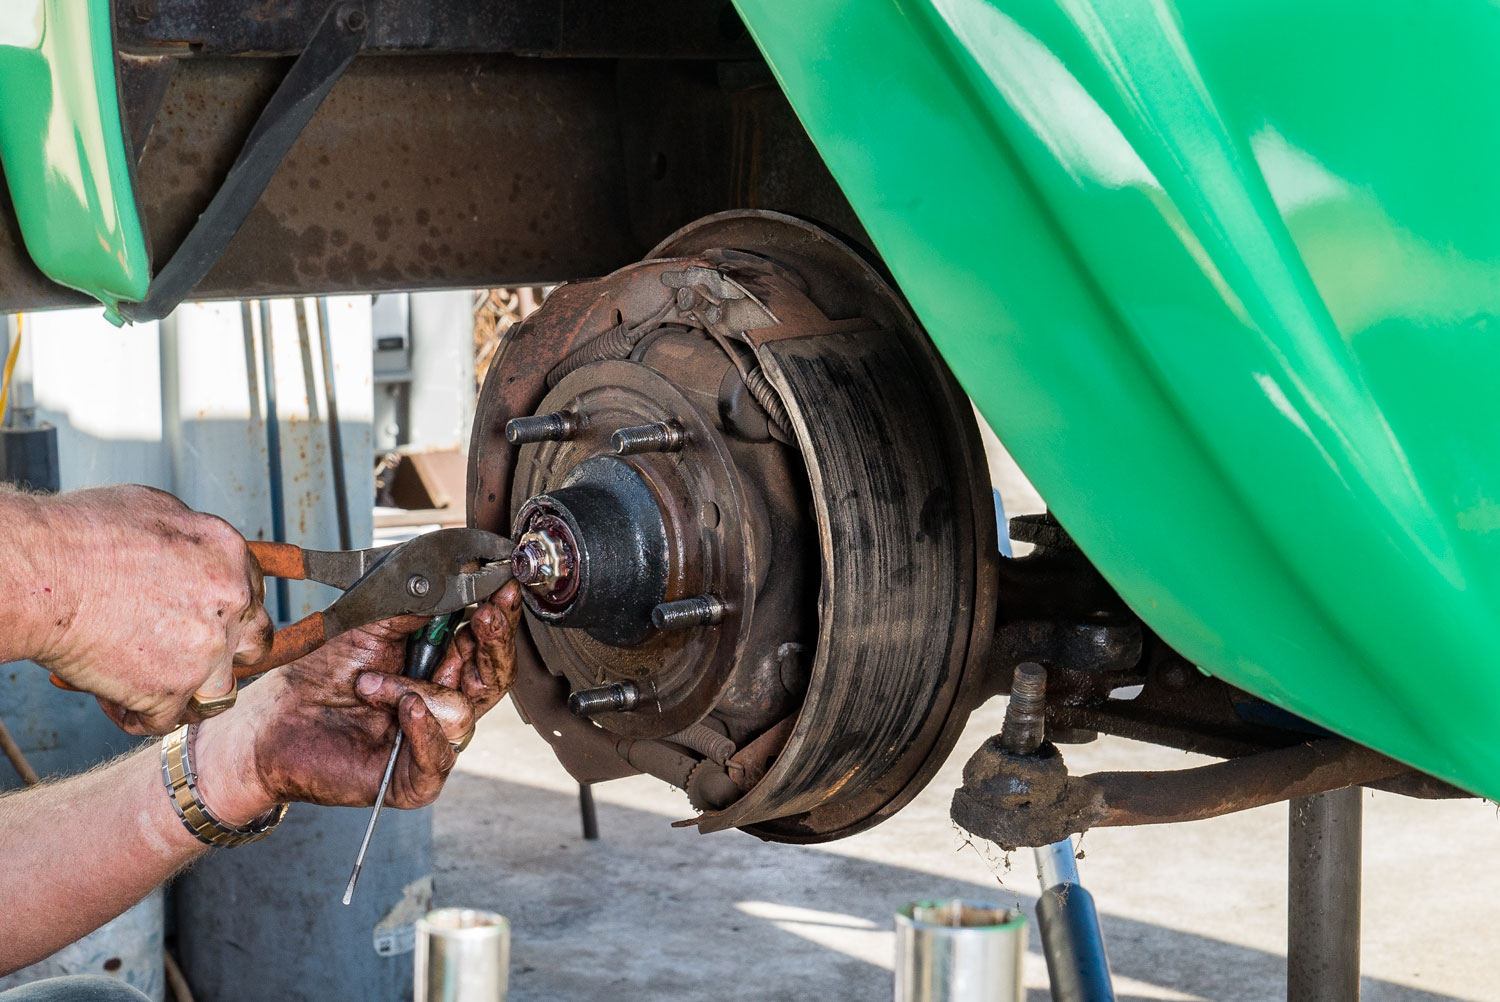
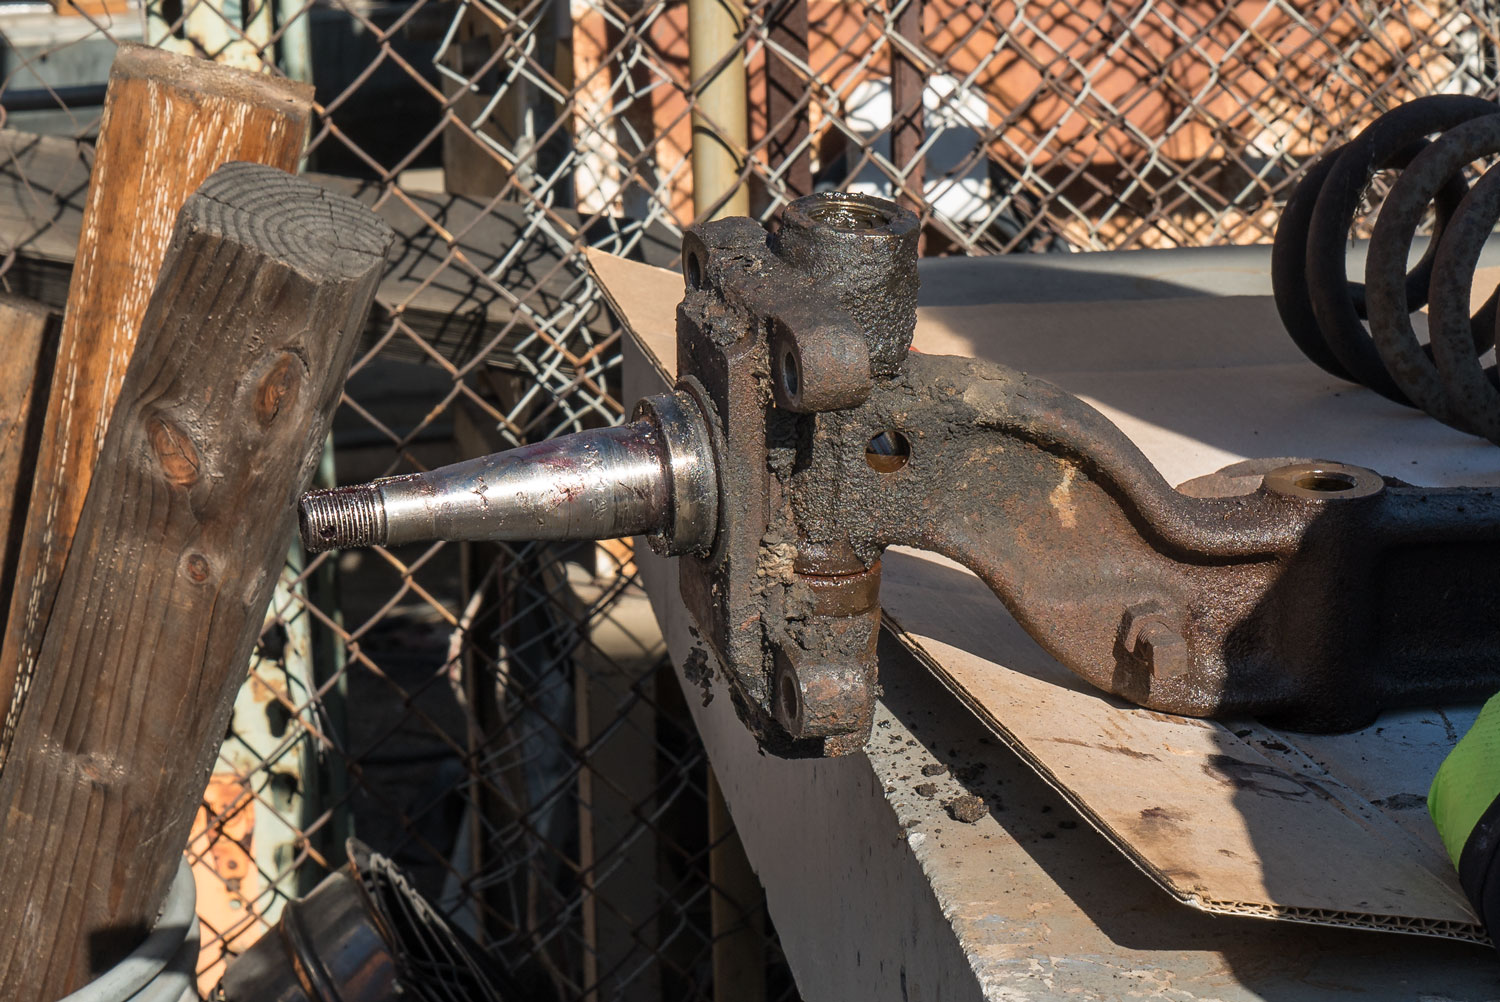
At this stage, you can bring the I-beam and spindle to a bench for dismantling. Remove the grease caps to access the kingpins, which are the part that holds the front end together. These pins are often original and may need professional pressing to remove. Using a local machine shop or an H-frame press, the kingpins can be safely pushed out without damaging the spindle.
When handling the kingpin, note the position of the bearing, as your new one must be installed in the same orientation. If a machine shop removes the kingpins, it’s common to also replace the kingpin bushings. This is a pivotal step in maintaining proper alignment and smooth steering for your truck.
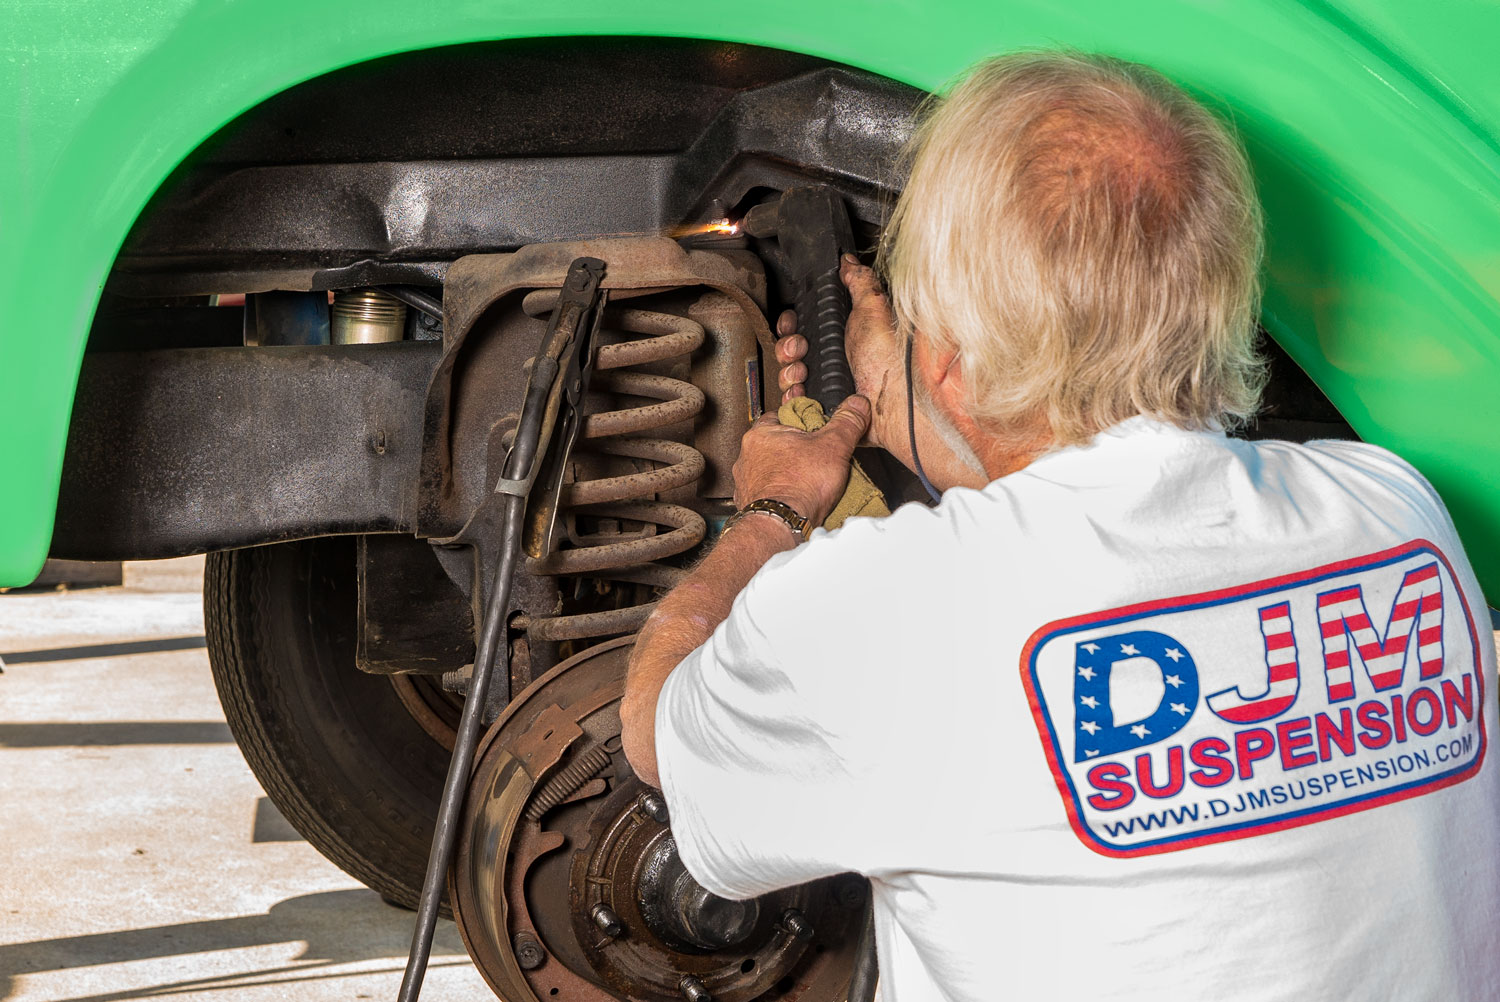
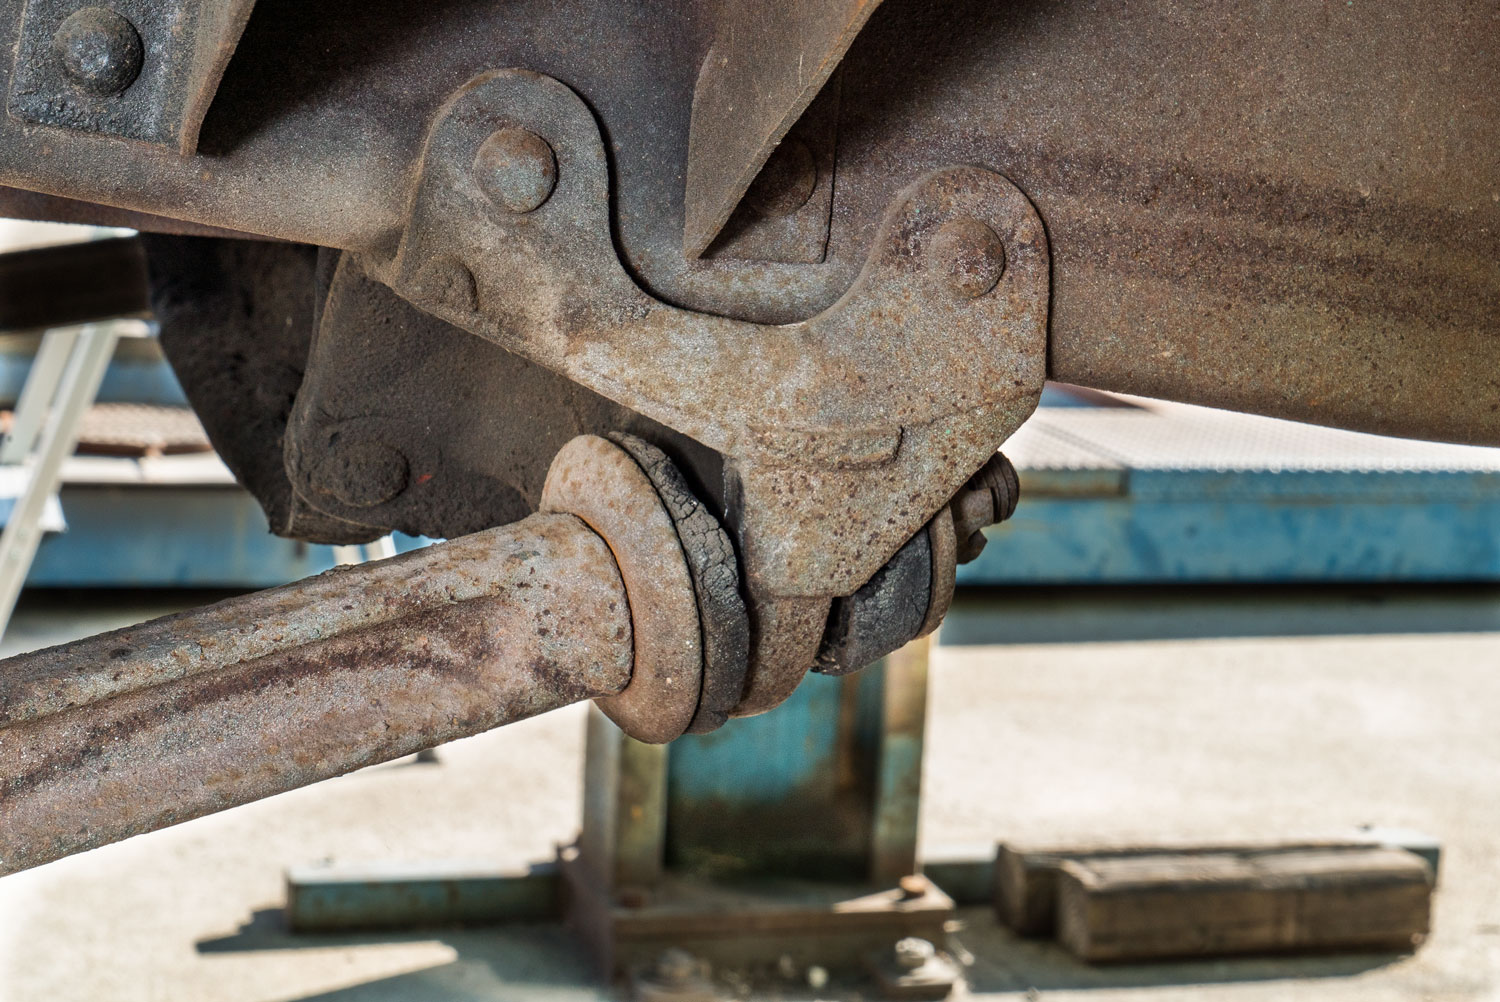
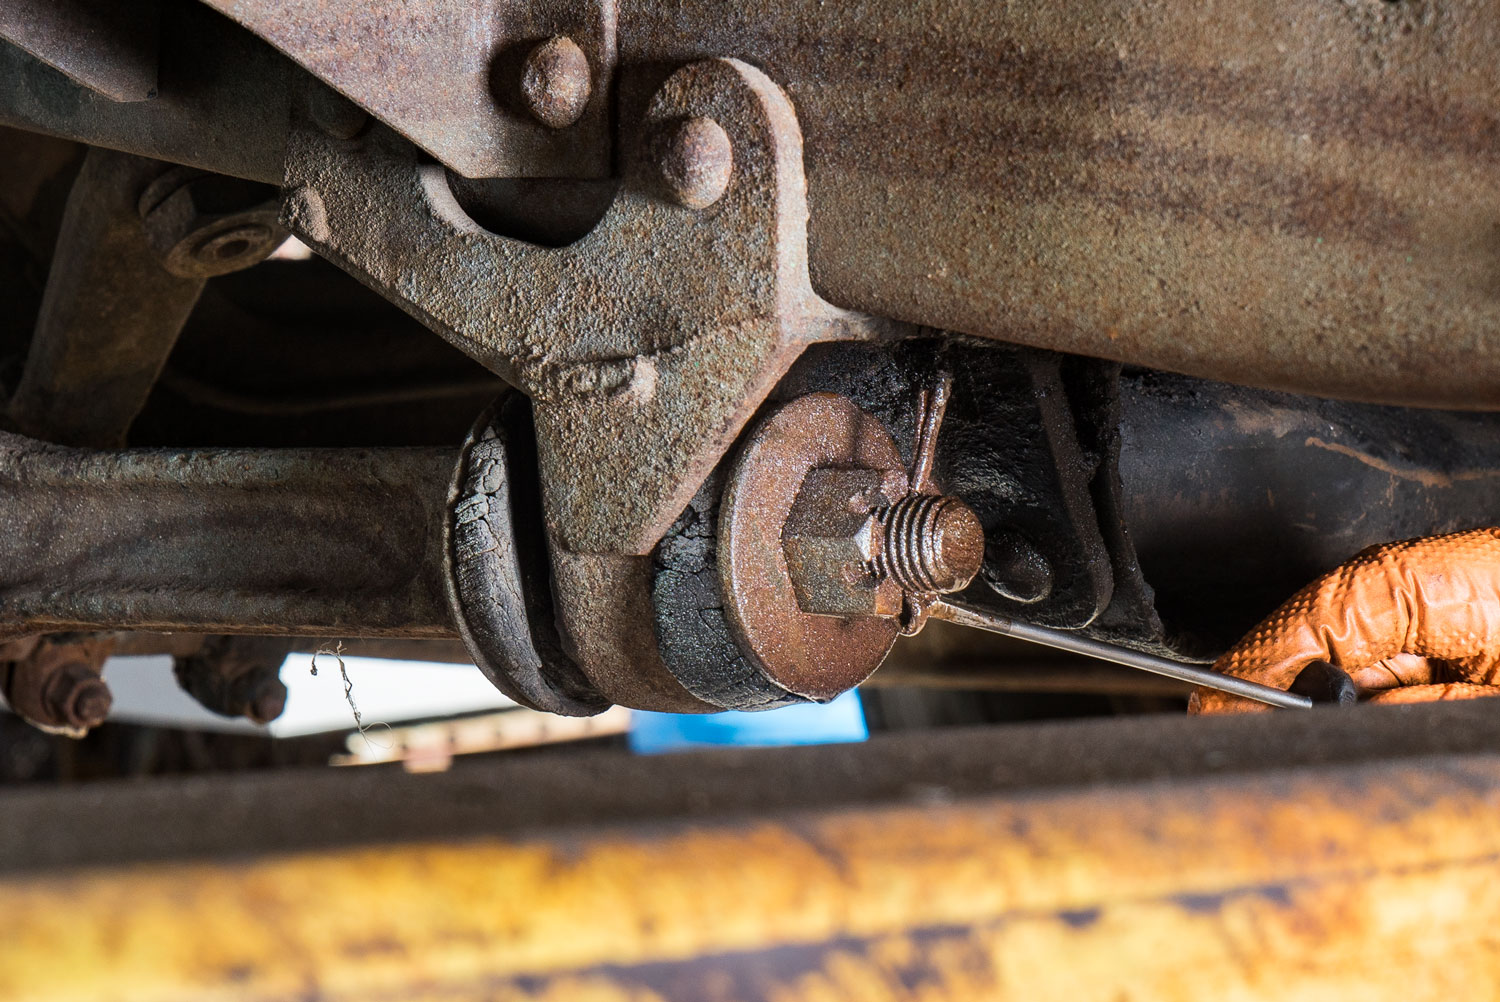
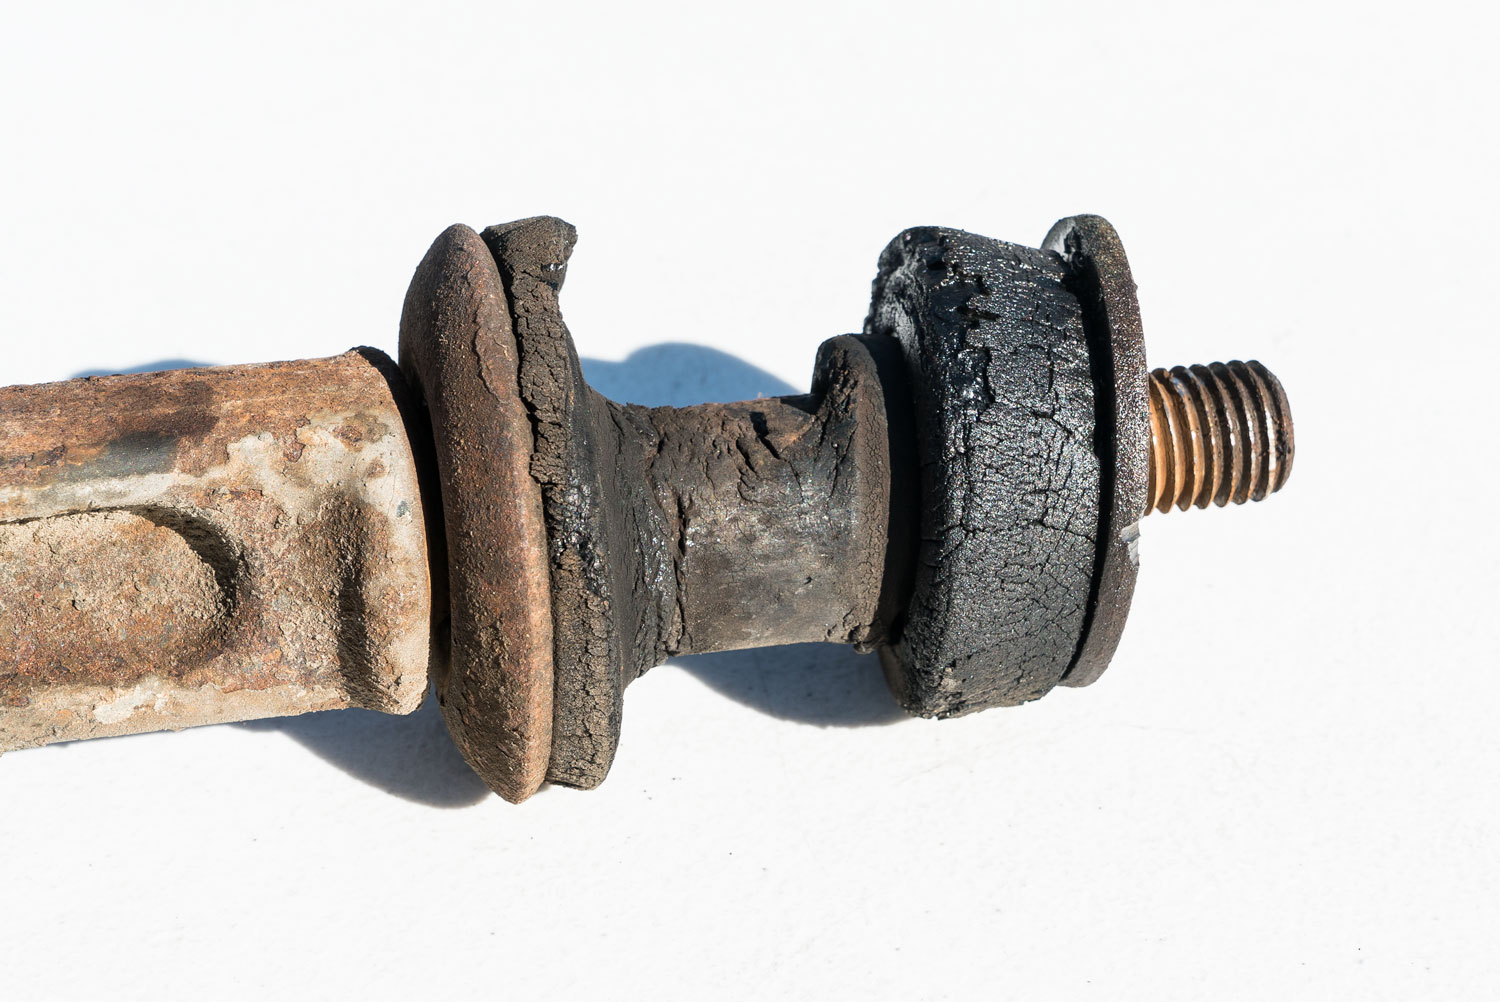
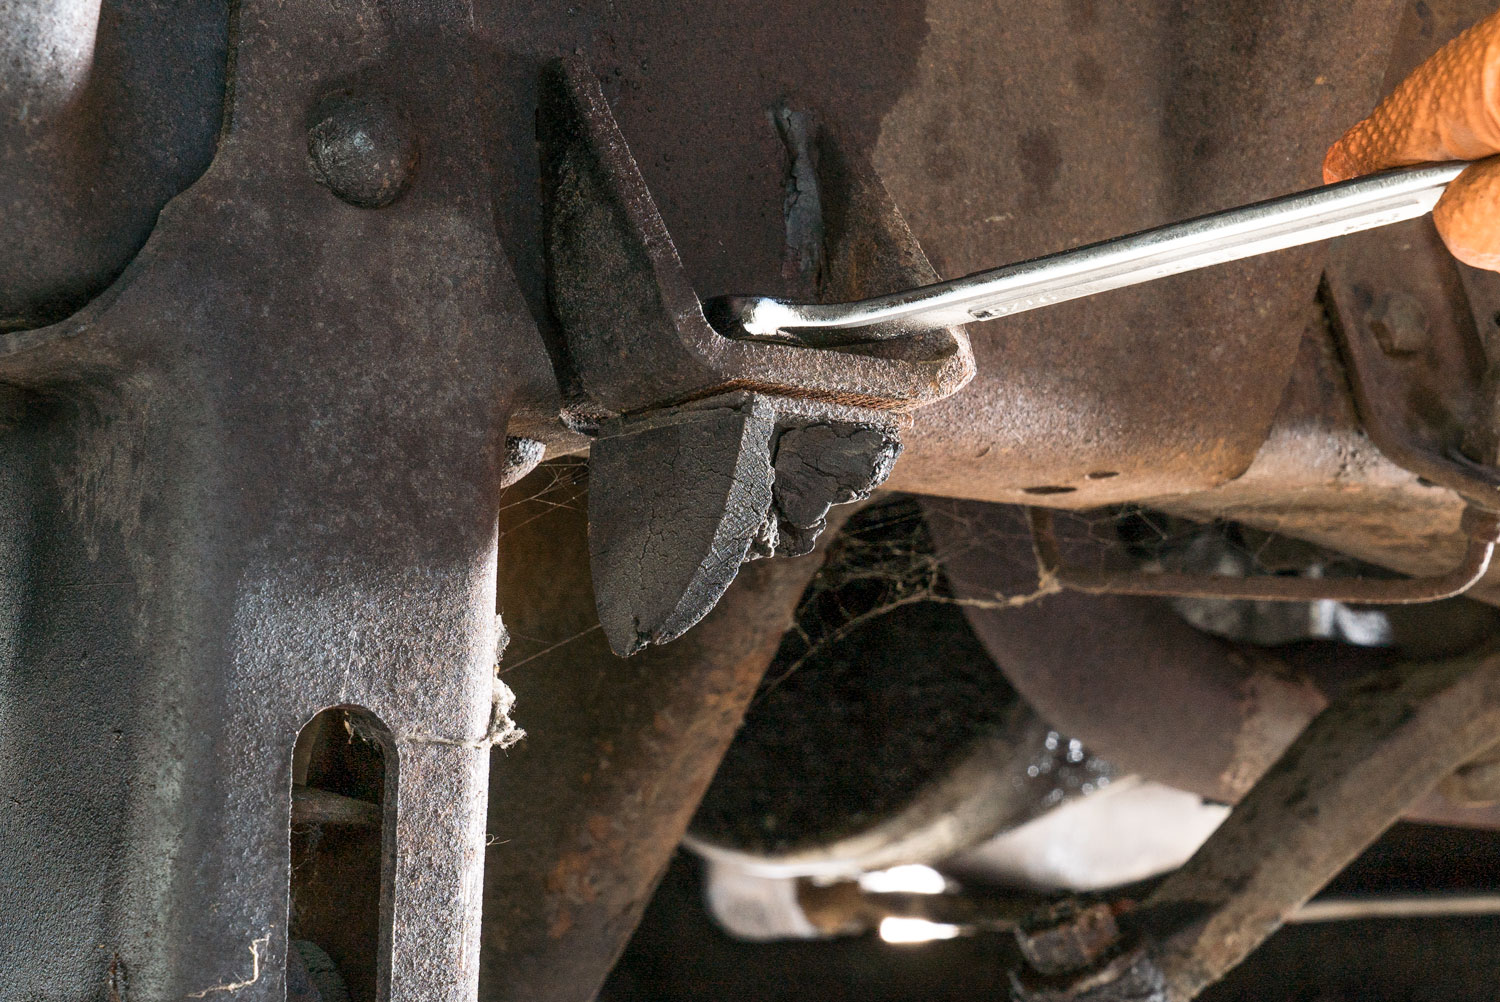
Replacing Radius Arm Bushings
Next, address the radius arm bushing replacement. After extracting the cotter key, remove the nut at the end of the radius arm. Old bushings will likely require some prying to come loose. Replacing these bushings improves ride quality and supports the correct geometry for the 1966 Ford F100 front suspension kit. Consider this a small investment for long-term durability.
Once the radius arms are removed and bushings replaced, clean the frame and mounting points thoroughly. This prepares the truck for the new Ford F100 Suspension parts. A clean surface allows parts to fit accurately and prevents interference from rust, dirt, or old grease.
Organizing Parts for Installation
As you dismantle the suspension, keep all hardware, bolts, and components organized. Label them if necessary. Proper organization simplifies the upcoming installation of the new 1966 Ford F100 front suspension kit. Having a well-documented teardown also makes it easier to reference the Ford F100 suspension parts you’ll need.
During removal, inspect each part carefully. Components like bushings, bolts, and pivot points may need replacement beyond the initial radius arm bushings. Taking note now saves time and ensures you have all parts on hand when it’s time for assembly.
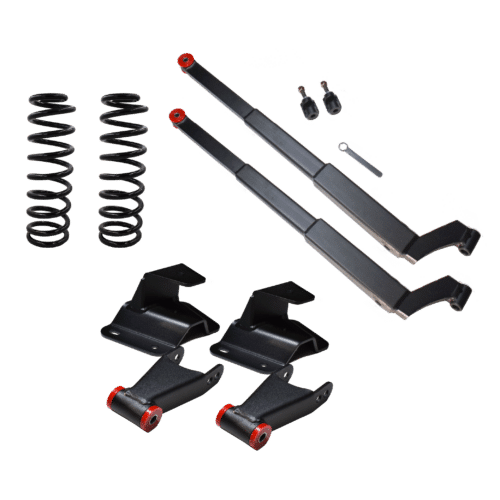
Preparing for the DJM Suspension Kit
Before installing the lowering kit, verify that the frame is smooth and free from corrosion. This small step is crucial for long-term durability and alignment. The new DJM Suspension kit relies on precise fitment, so preparation cannot be overlooked.
Also, consider upgrading certain components during this stage. For example, you can upgrade the radius arm for the Ford F100 to a stronger or more performance-oriented option. Doing these upgrades now prevents future disassembly and supports the handling and ride quality of your truck.
Get Ready for the Upgrade
Removing the factory front suspension on your truck is a critical step for a successful budget makeover. By now, the entire factory 1966 Ford F100 front suspension should be removed, with shocks, coil springs, radius arms, I-beams, kingpins, and bushings properly addressed. You’ve also cleaned and prepped the frame for installation. This step sets a solid foundation for the next phase in your budget makeover.
The final steps will involve installing the new lowering kit, aligning the I-beam and radius arms, and testing the front end for smooth operation. The upcoming Part Three will guide you through assembly and fine-tuning. After that, Part Four will complete the build, giving your classic F100 a transformed stance and improved handling.
If you need help getting a new suspension part for your Ford F100 or any other model, DJM Suspension is one of the best places to order it online. Contact us today if you need help with your order or can’t find a part you need.


Products Featured in This Blog
Part 1 - 66 F100 Budget Project
DJM Lowers a 1966 Ford F100 with our popular Dream Beams.
Part 3 - 66 F100 Budget Project
Part 3 of the DJM 1966 Ford F100 Budget Project is about installing your DJM Dream Beams
Part 4 - 66 F100 Budget Project
DJM 1966 Ford F100 Budget Project gets the rear lowered about 4 inches