By now, you’ve already tackled the first two stages of the 1966 Ford F100 budget makeover. Part One covered prepping and stripping the front suspension, while Part Two guided you through cleaning, inspecting, and prepping the I-beams and bushings.
In this third stage, we focus on reassembling the front suspension and installing the DJM lowering components. With kingpins ready, bushings installed, and all parts organized, this guide walks you through spindle assembly, lowering beams, brake inspection, shocks, drag link, and tie rod extenders to complete your 1966 Ford F100 lowered transformation.
If you haven’t reviewed the previous steps, we recommend checking out Part One and Part Two for full context. If you’ve already read those, read on to complete the third stage of the job.
Preparing Your Kingpins and Bushings
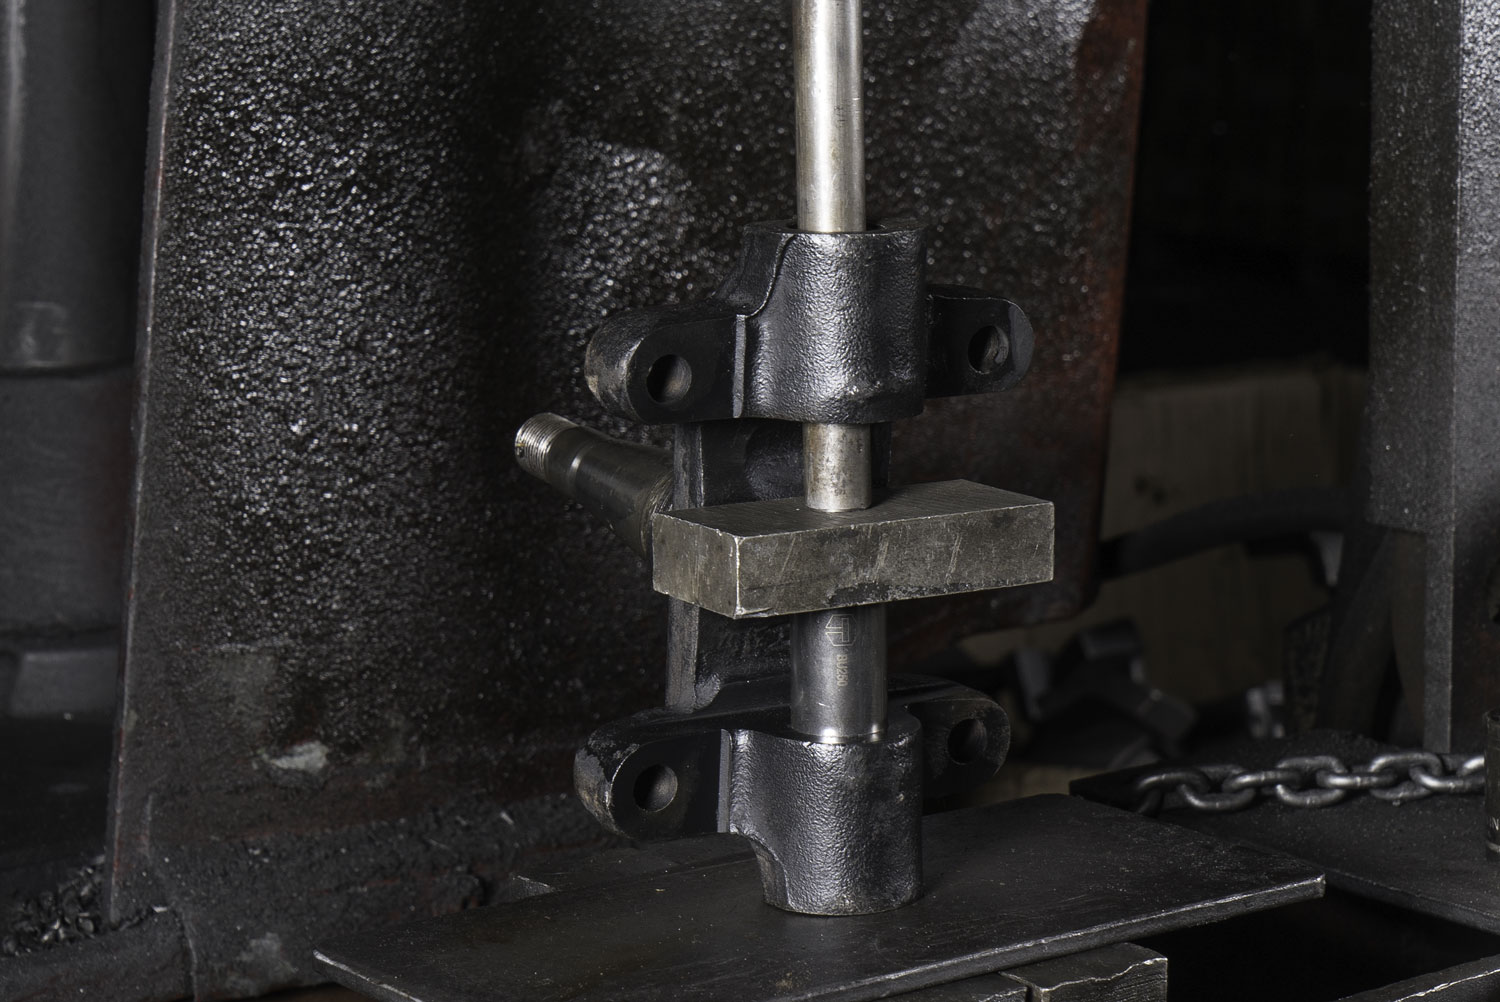
Before assembly, check your Ford F100 kingpin replacement fit. If your bushings were installed at a machine shop, you’re ready to proceed. If you installed them yourself, press them in carefully using a reamer tool, vise, and a small amount of oil for smooth fitment.
Brass bushings offer the perfect fit for new kingpins and make a noticeable difference in steering precision. You can do a test fit by hand. Assemble the spindle, kingpins, and I-beam. Everything should move freely without slop.
This step confirms proper alignment and will save time during final installation. Taking this extra step also prevents binding and uneven wear once the truck is on the ground.
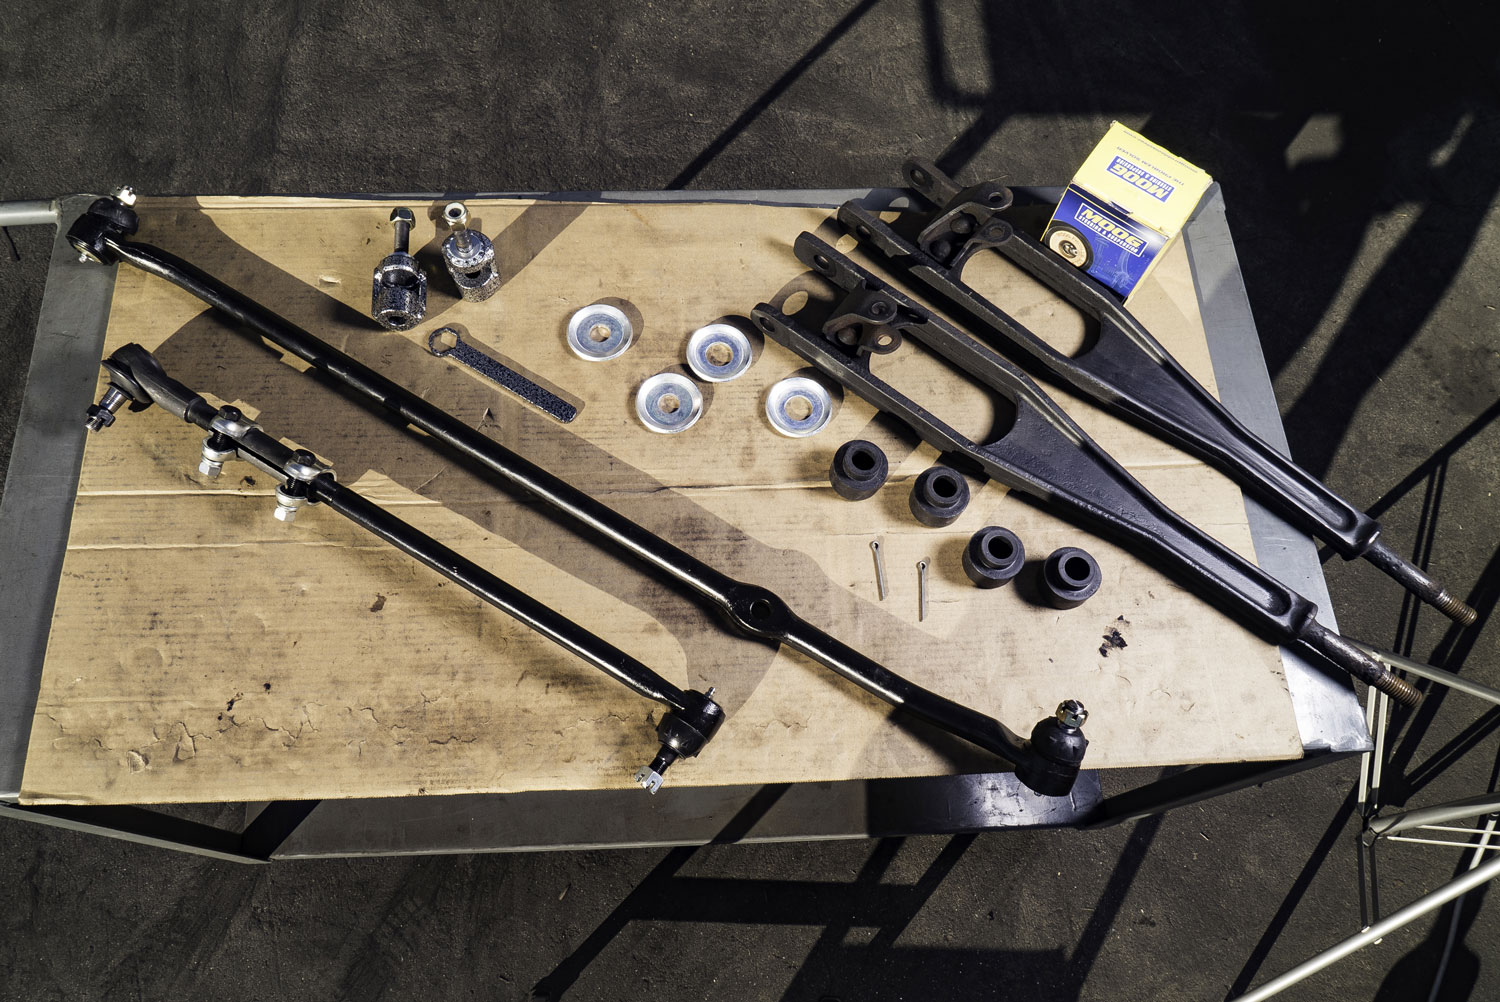
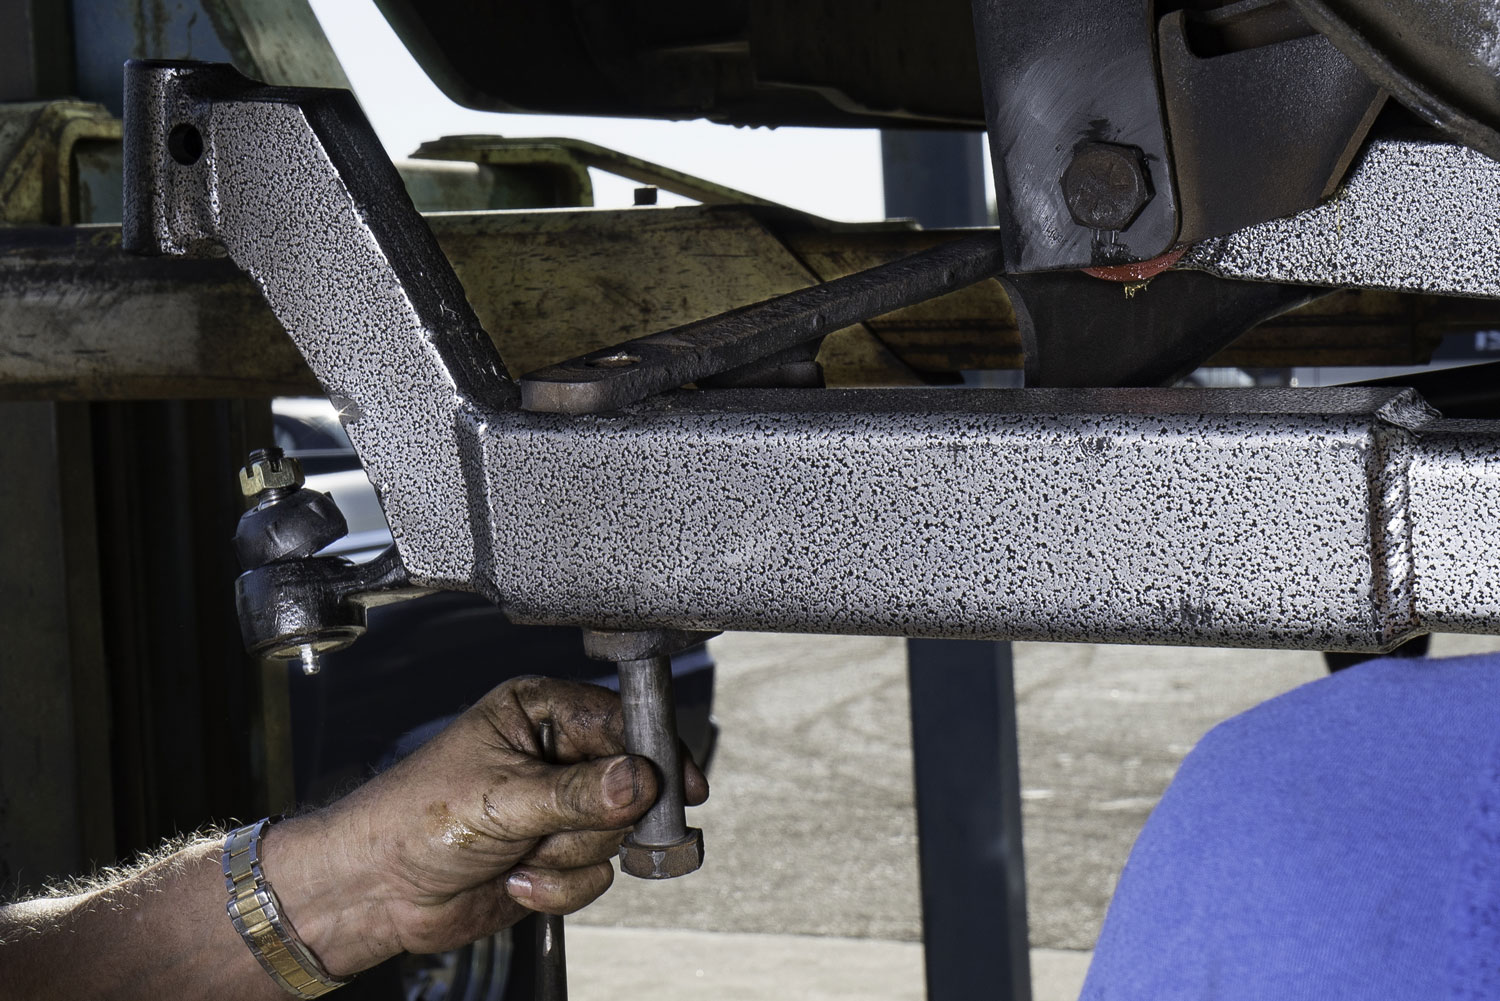
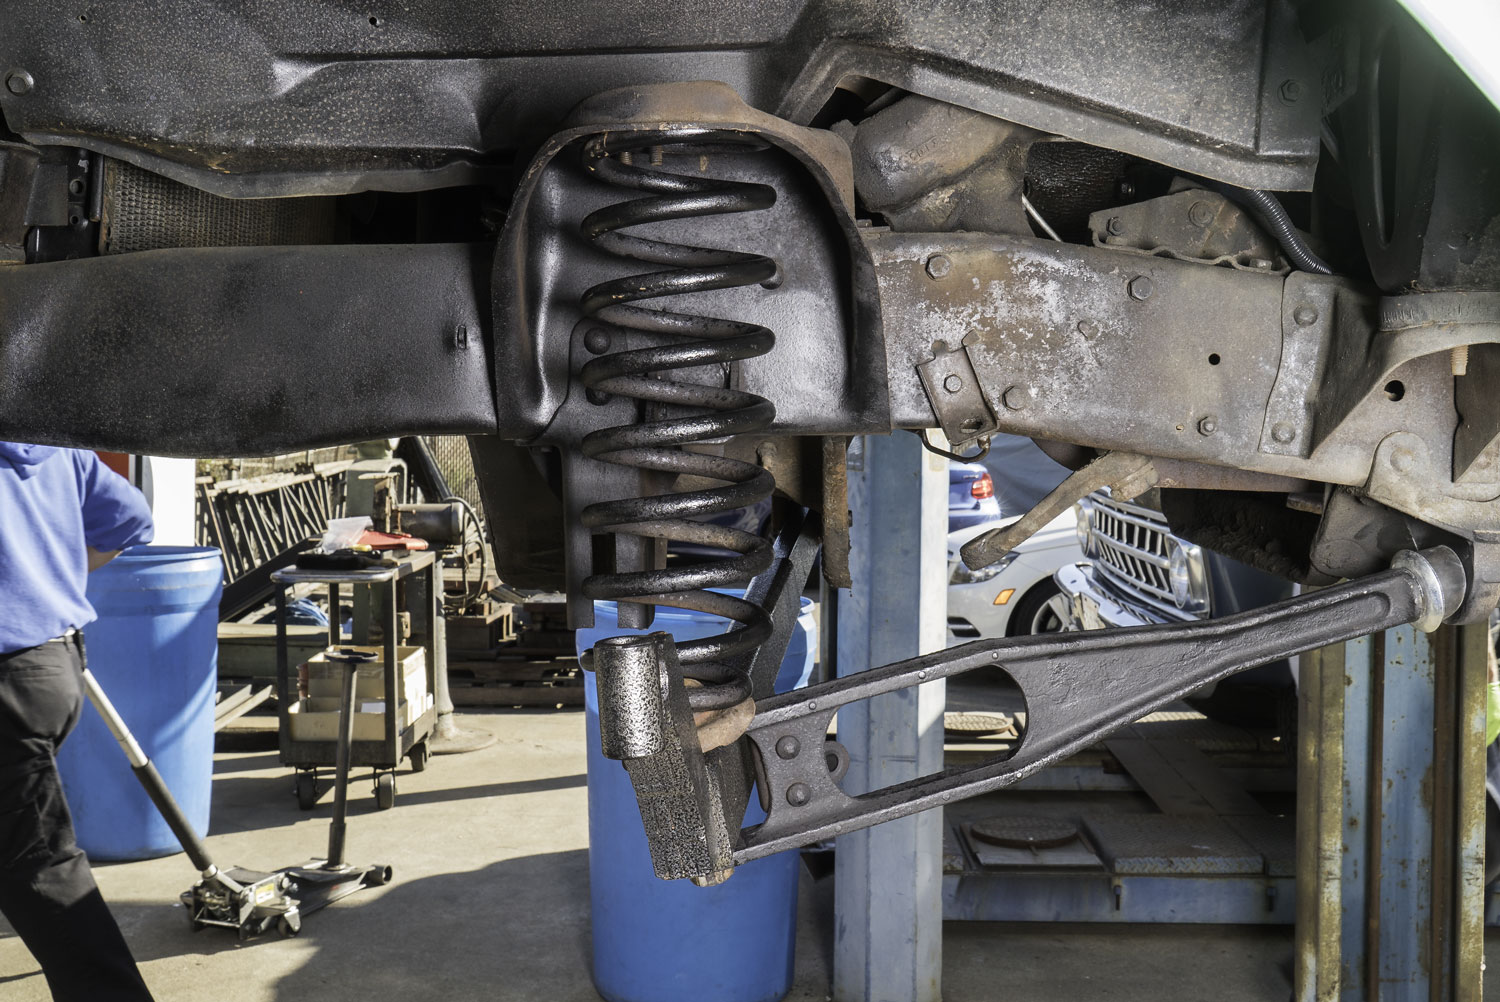
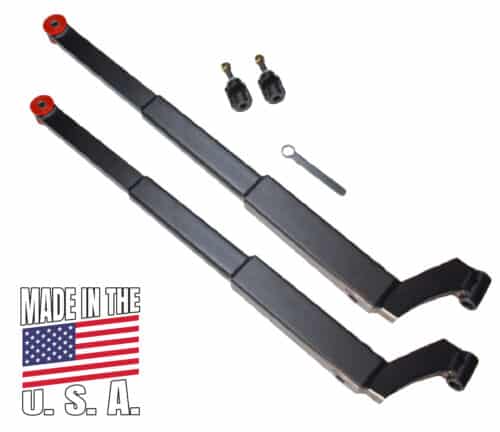
Installing the DJM Lowering Beams
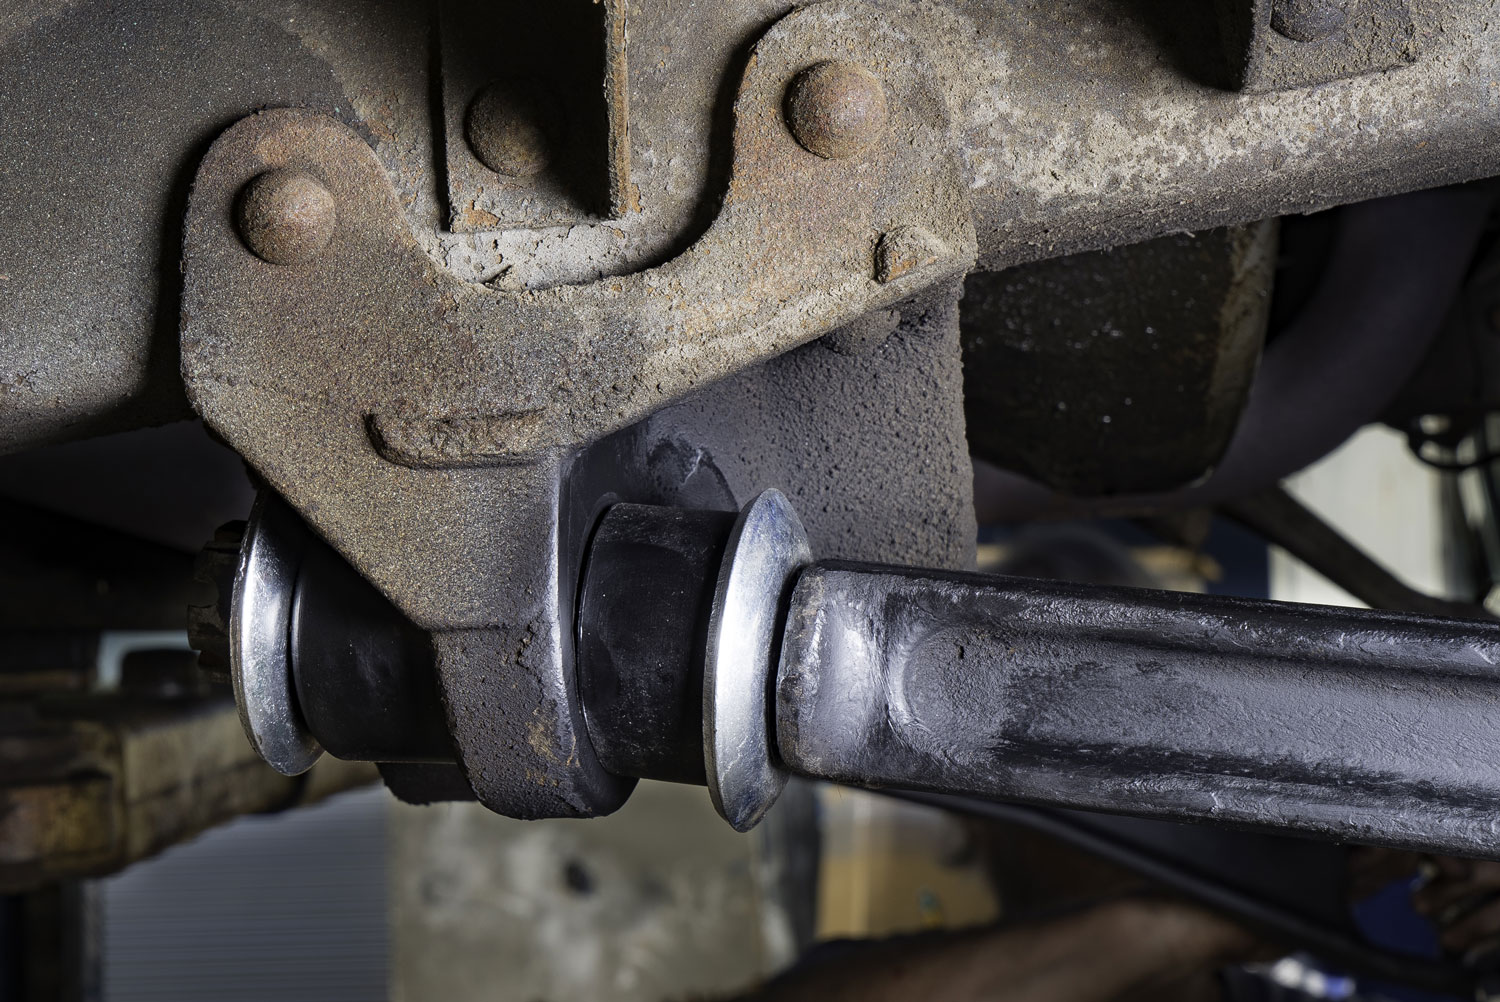
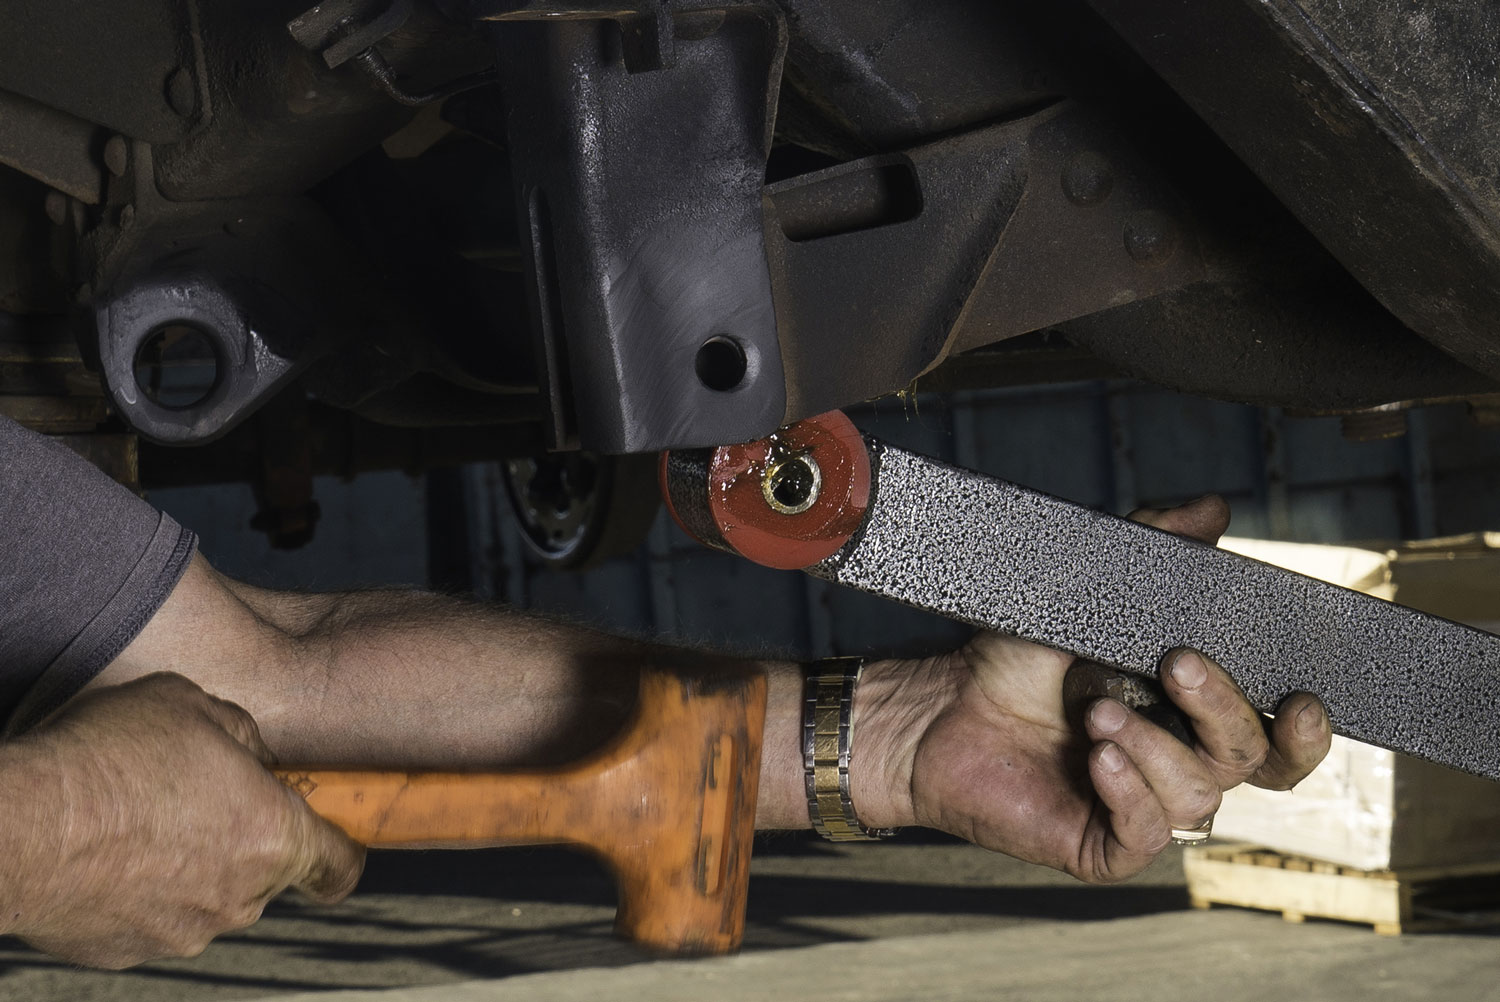
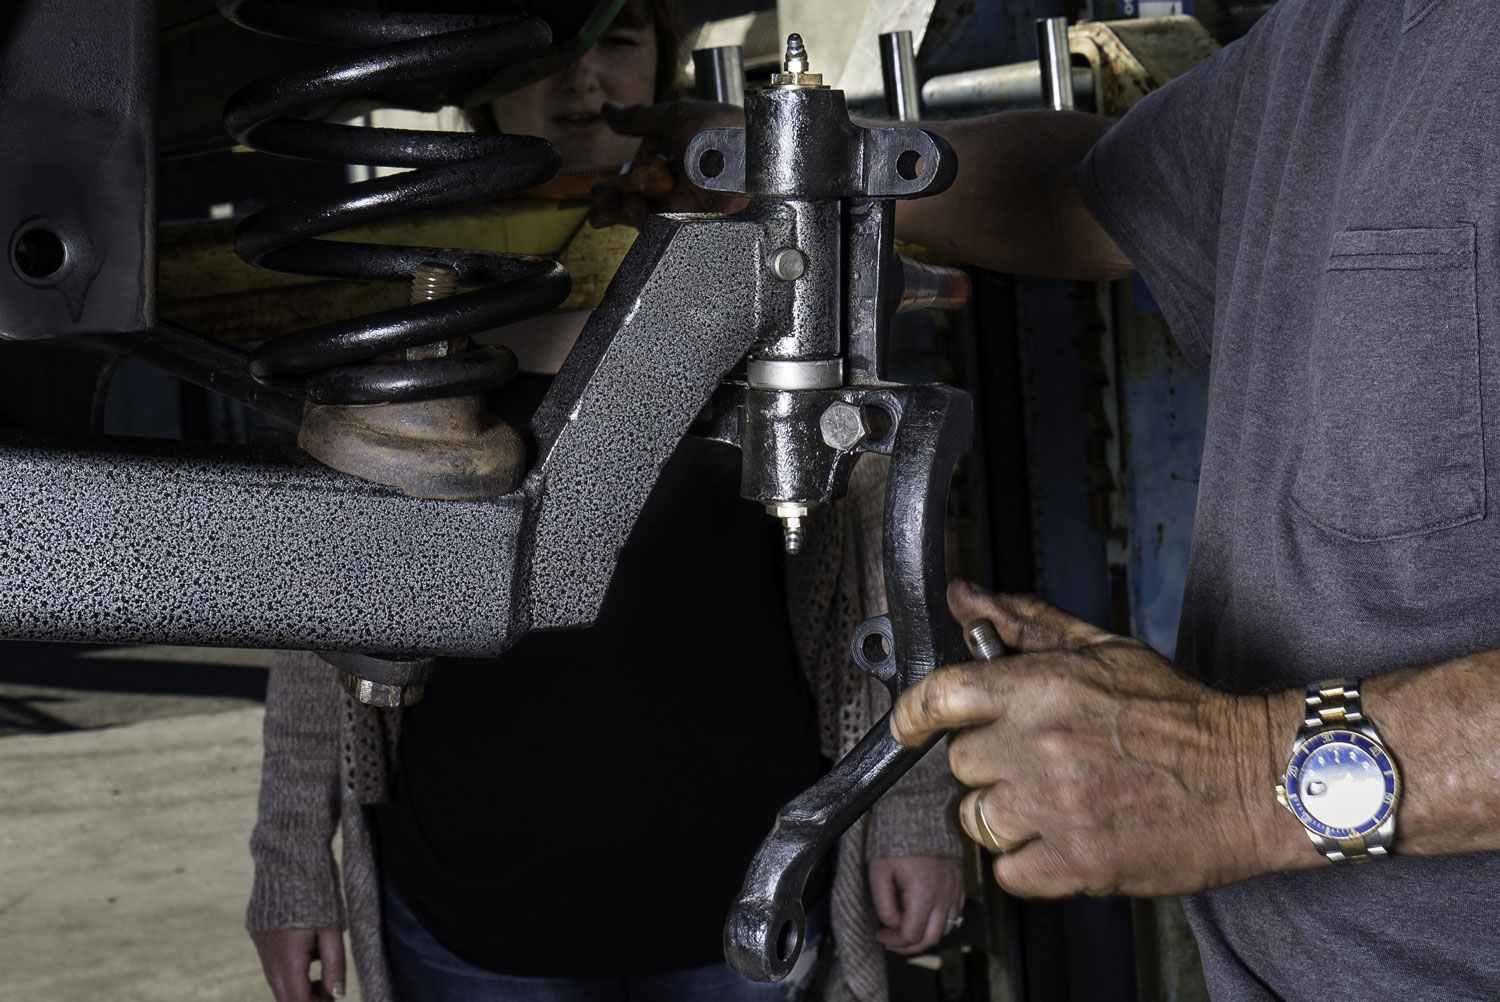
Start with the driver-side factory radius arm. Grease the new bushings and install the pivot end of your DJM Suspension beams. Line up the radius arm bolt, secure it with the factory nut, and place the lower spring seat on the bolt. Add the coil spring and tighten with the factory nut.
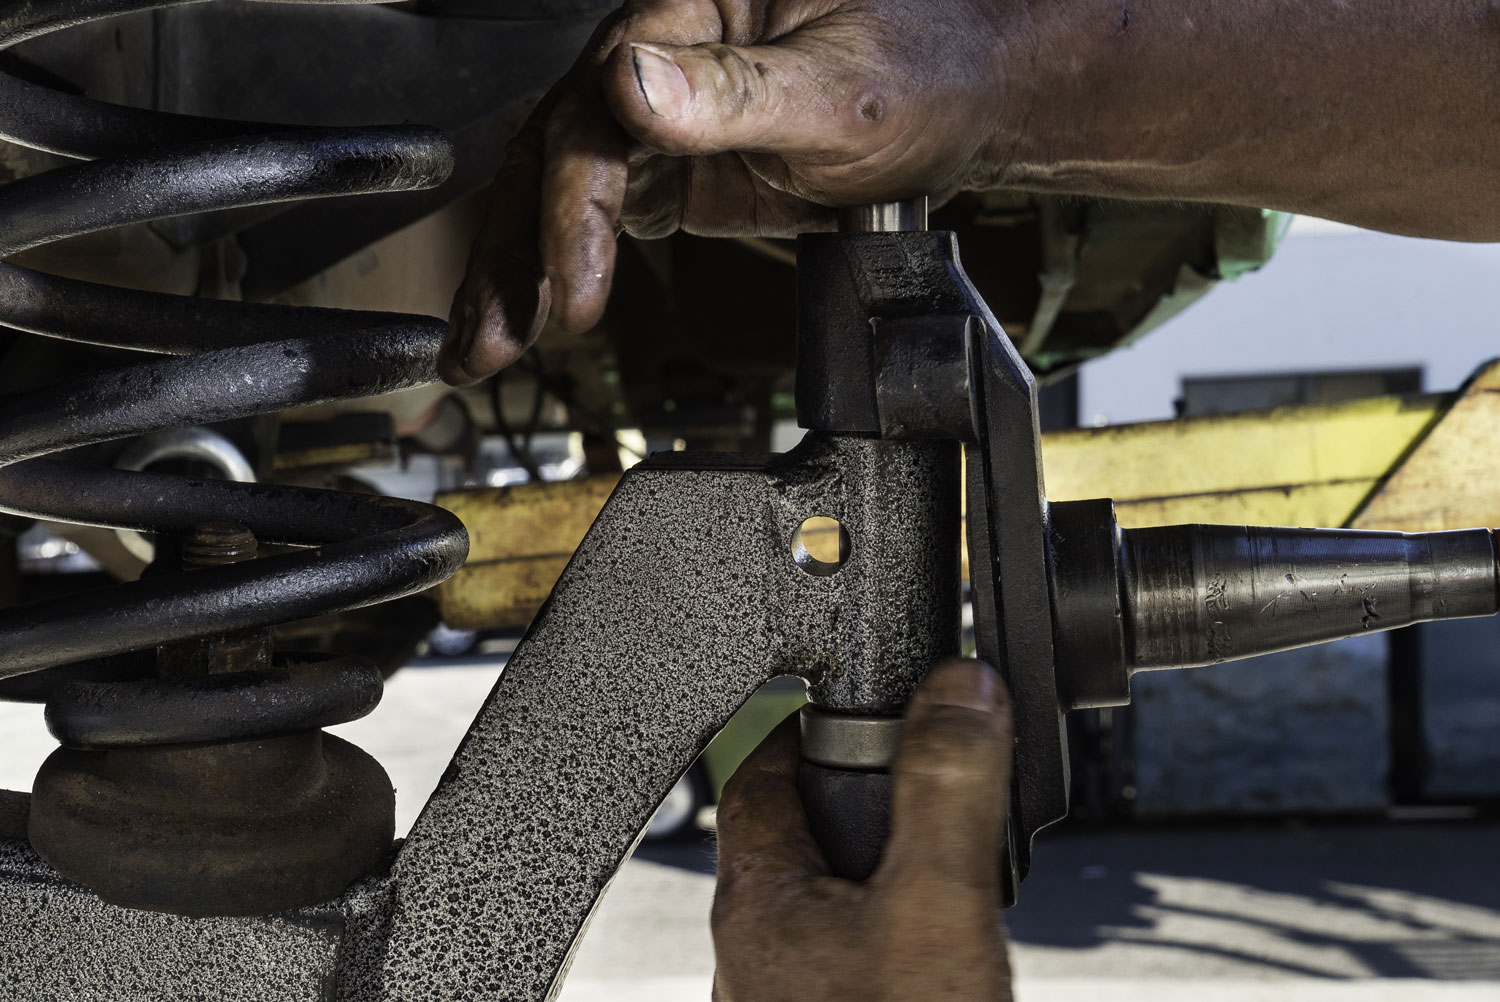
The 1965 Ford F100 4-inch rear lowering kit makes the assembly stress-free. Once test-fitted, the spindle should slide easily onto the kingpin by hand. Orient the bearing correctly, referencing the top callouts from your previous test fit. If shims are required, the test fit informs the correct thickness for your setup.
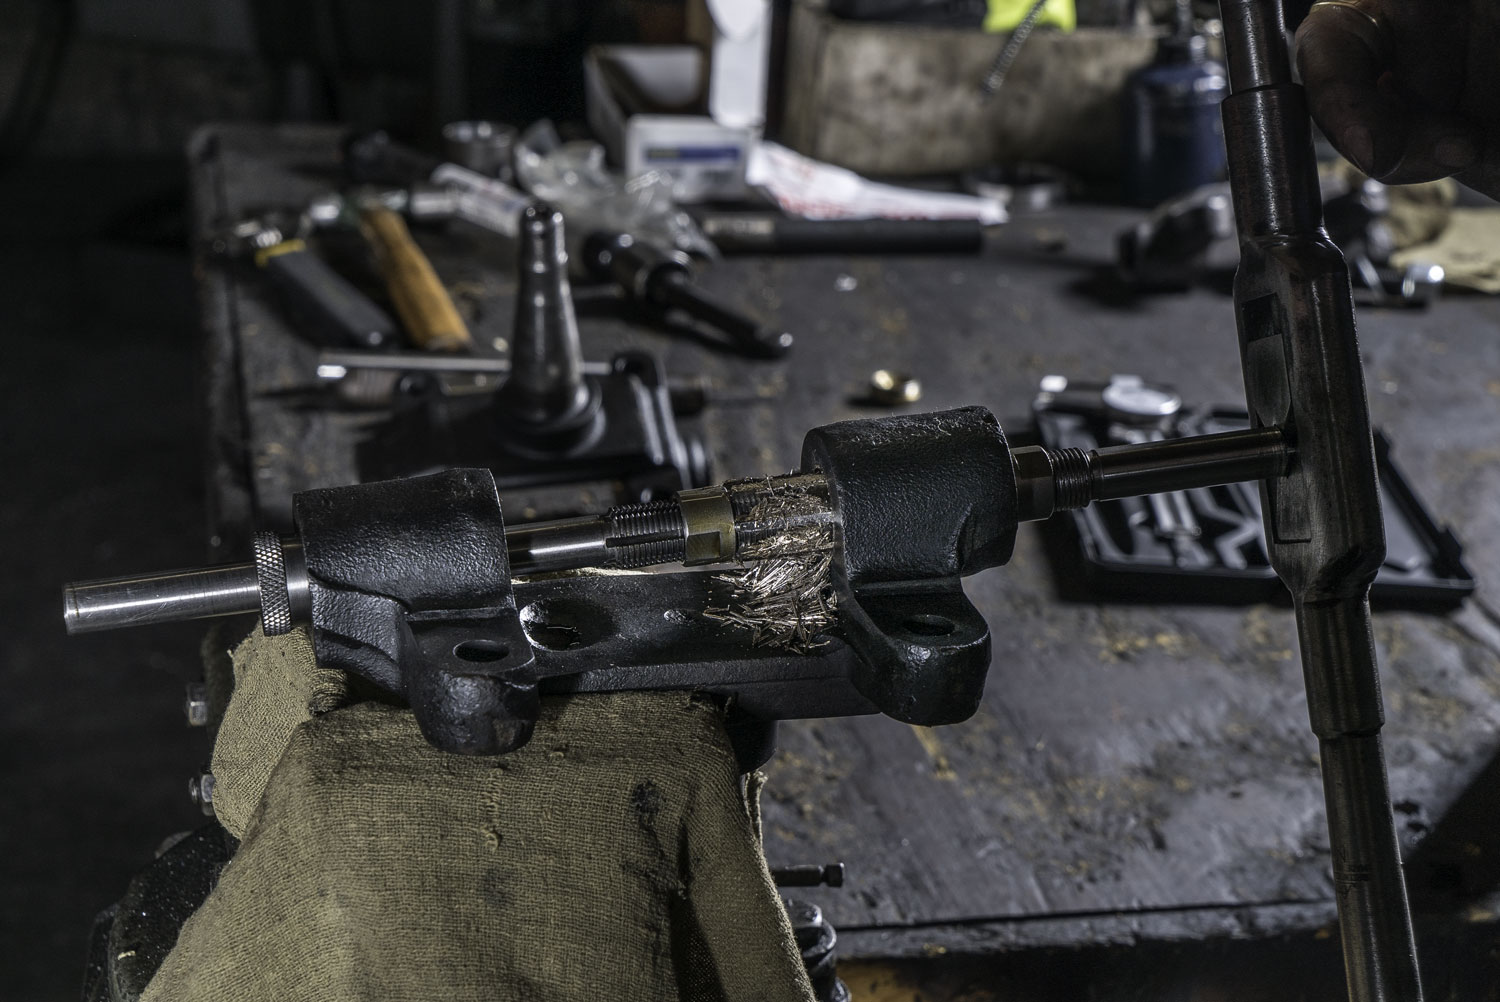
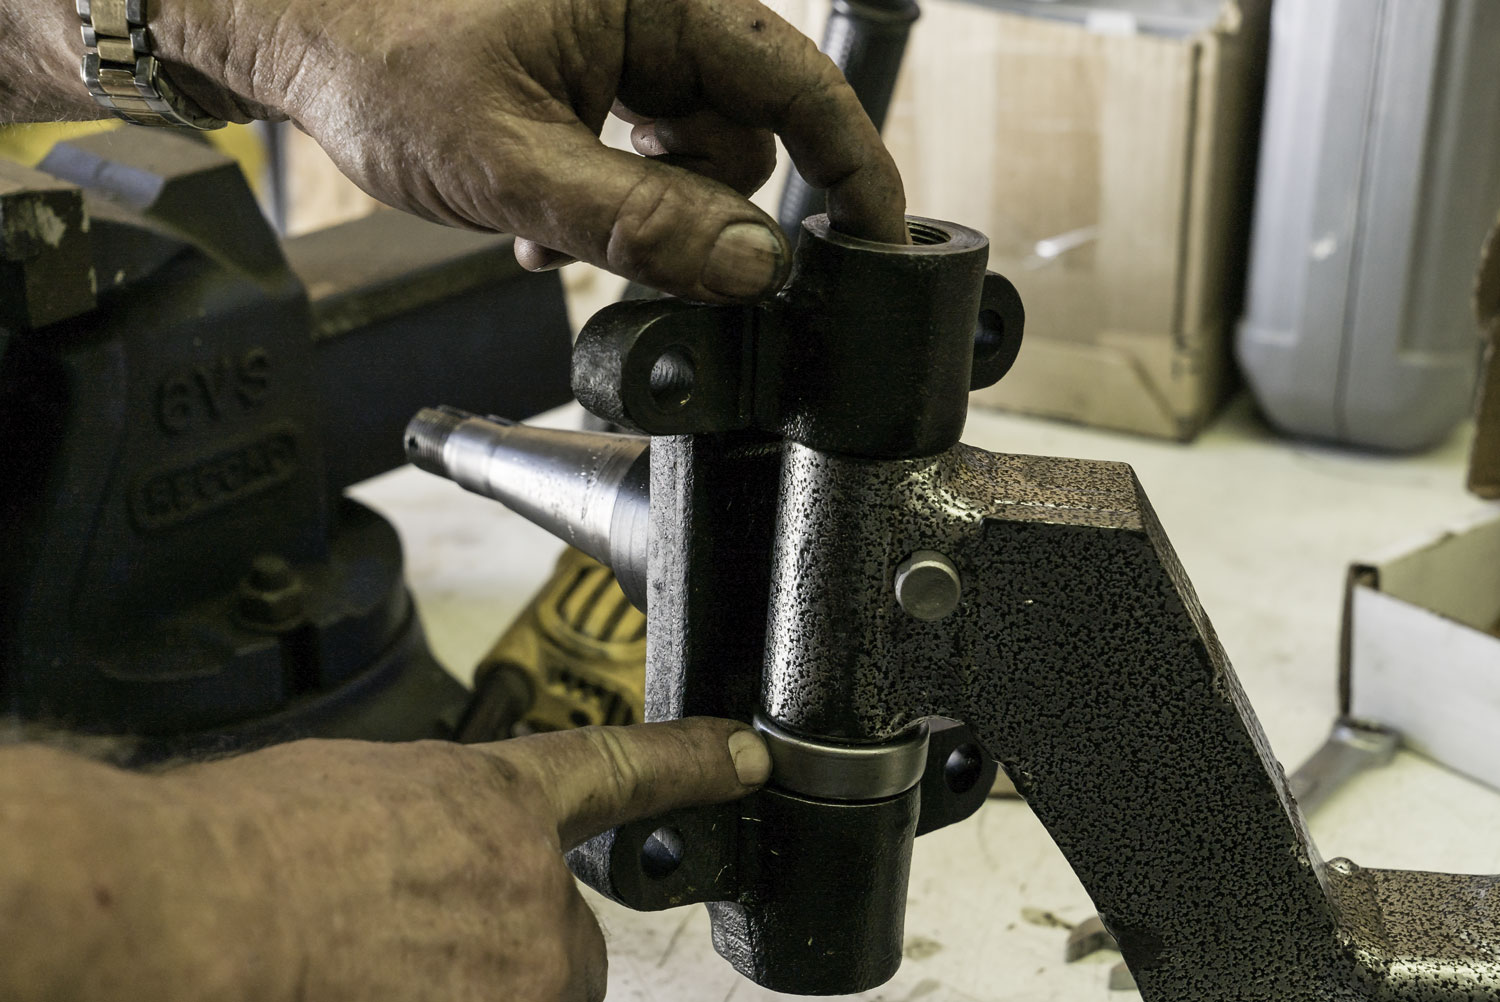
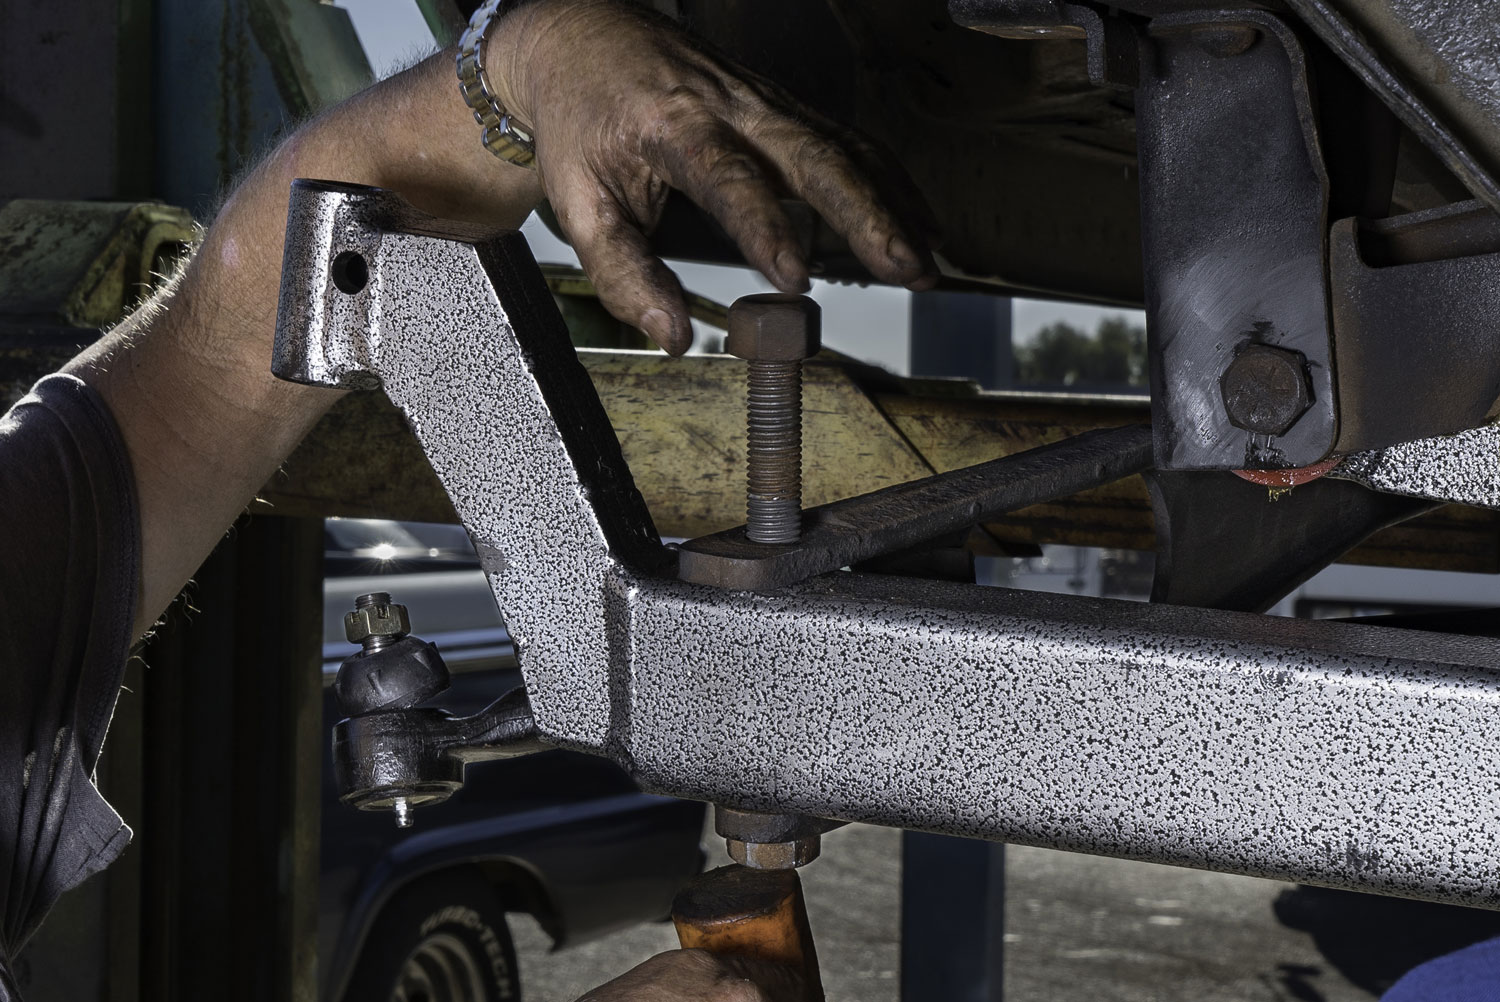
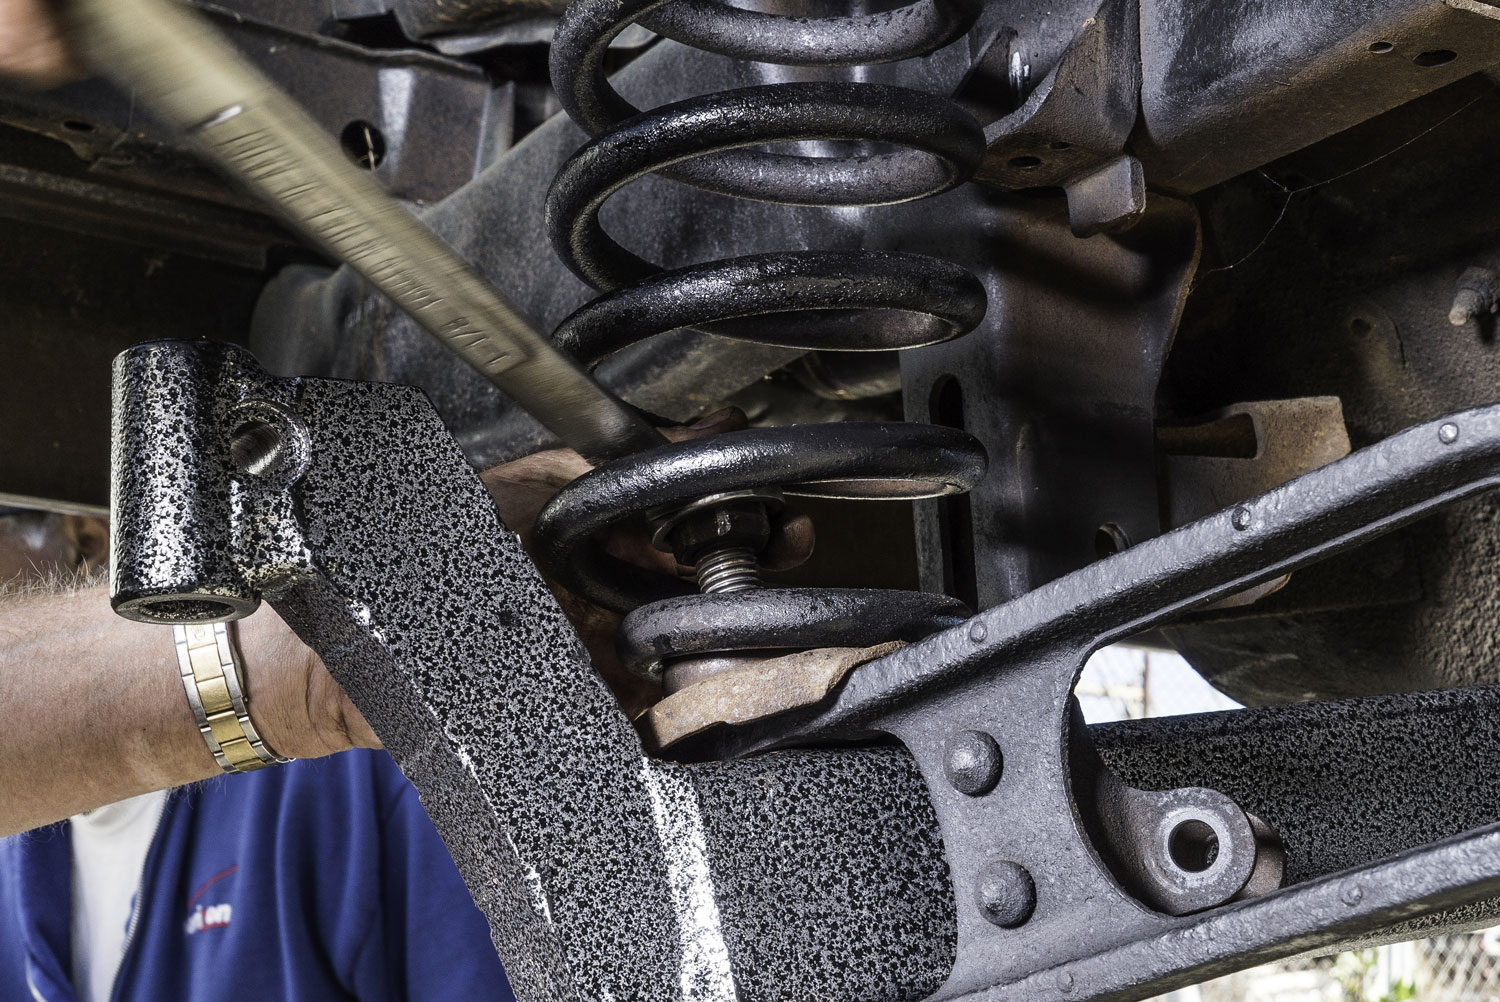
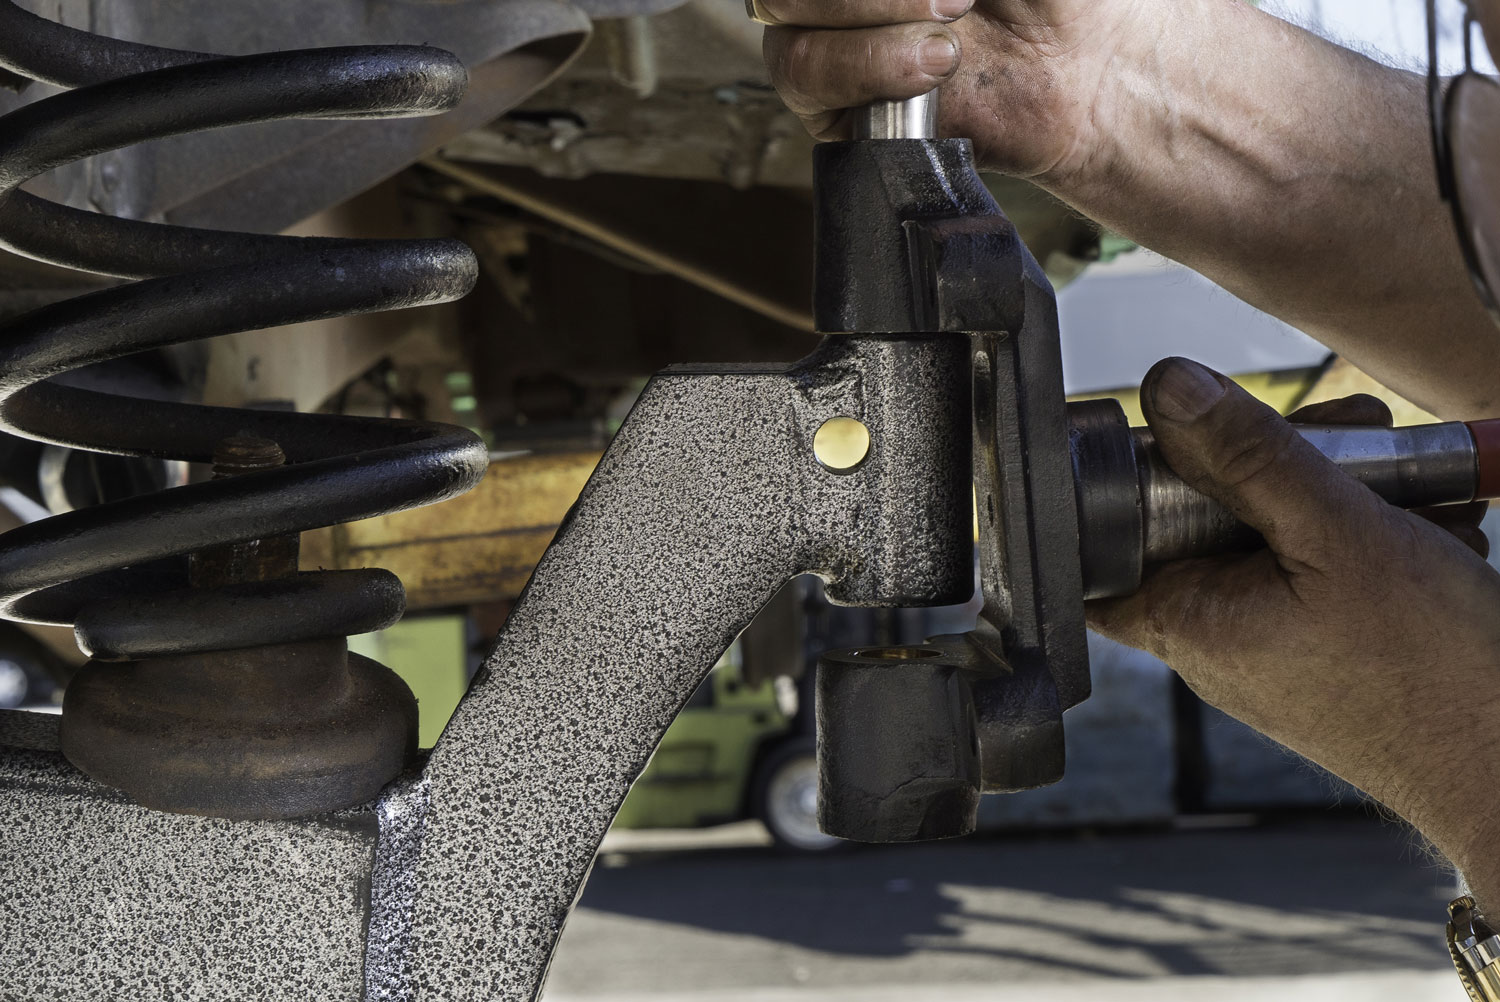
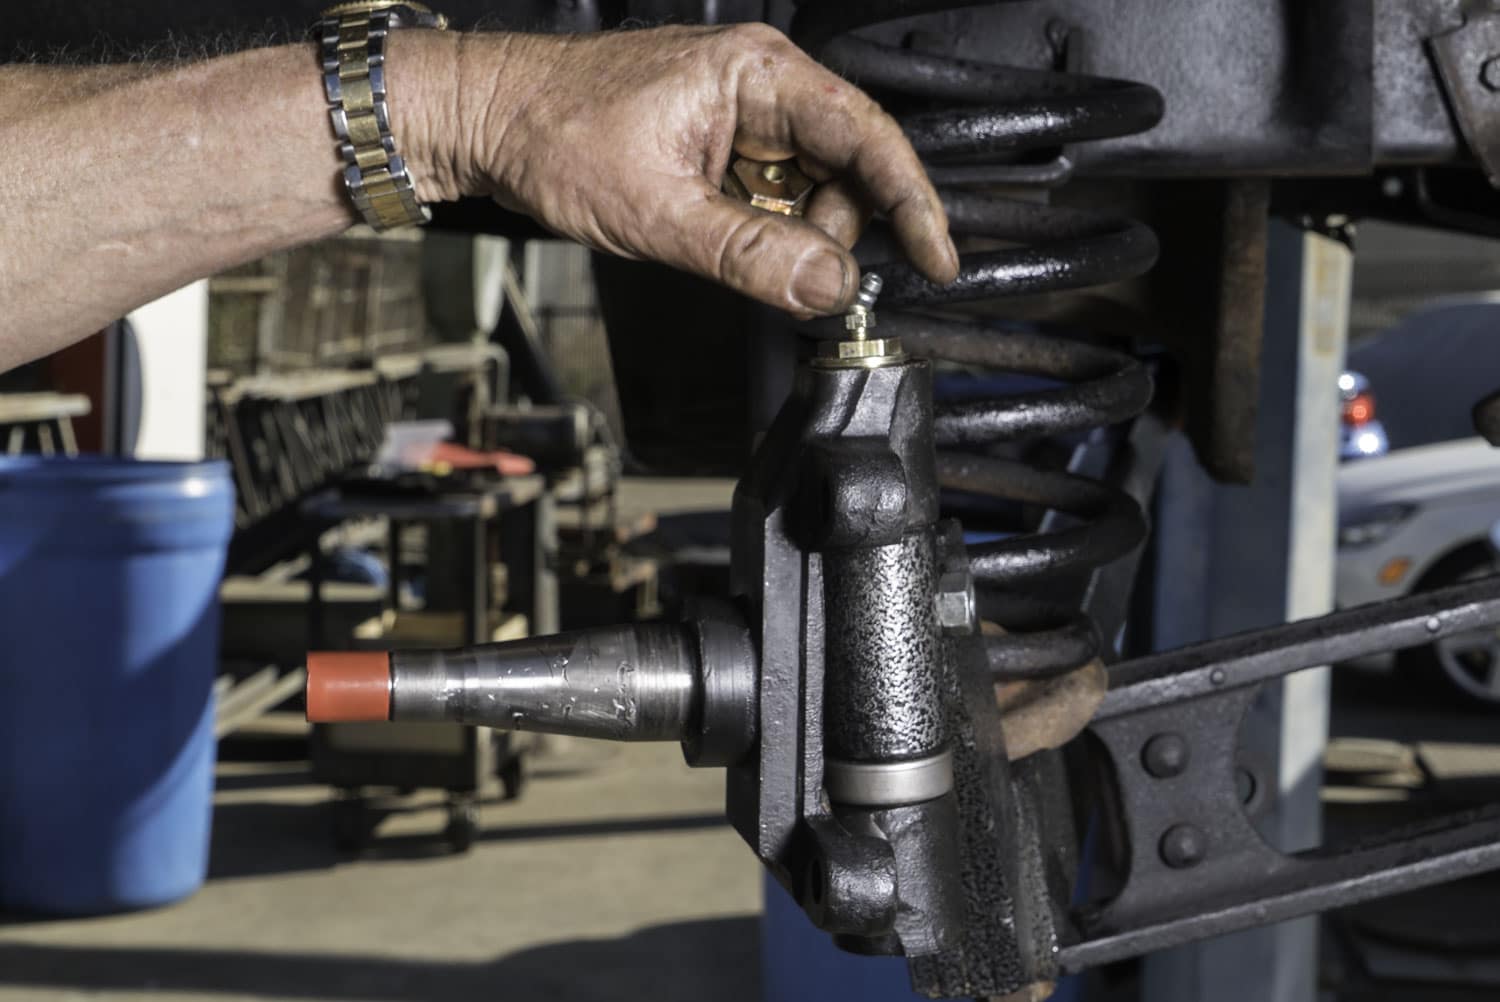
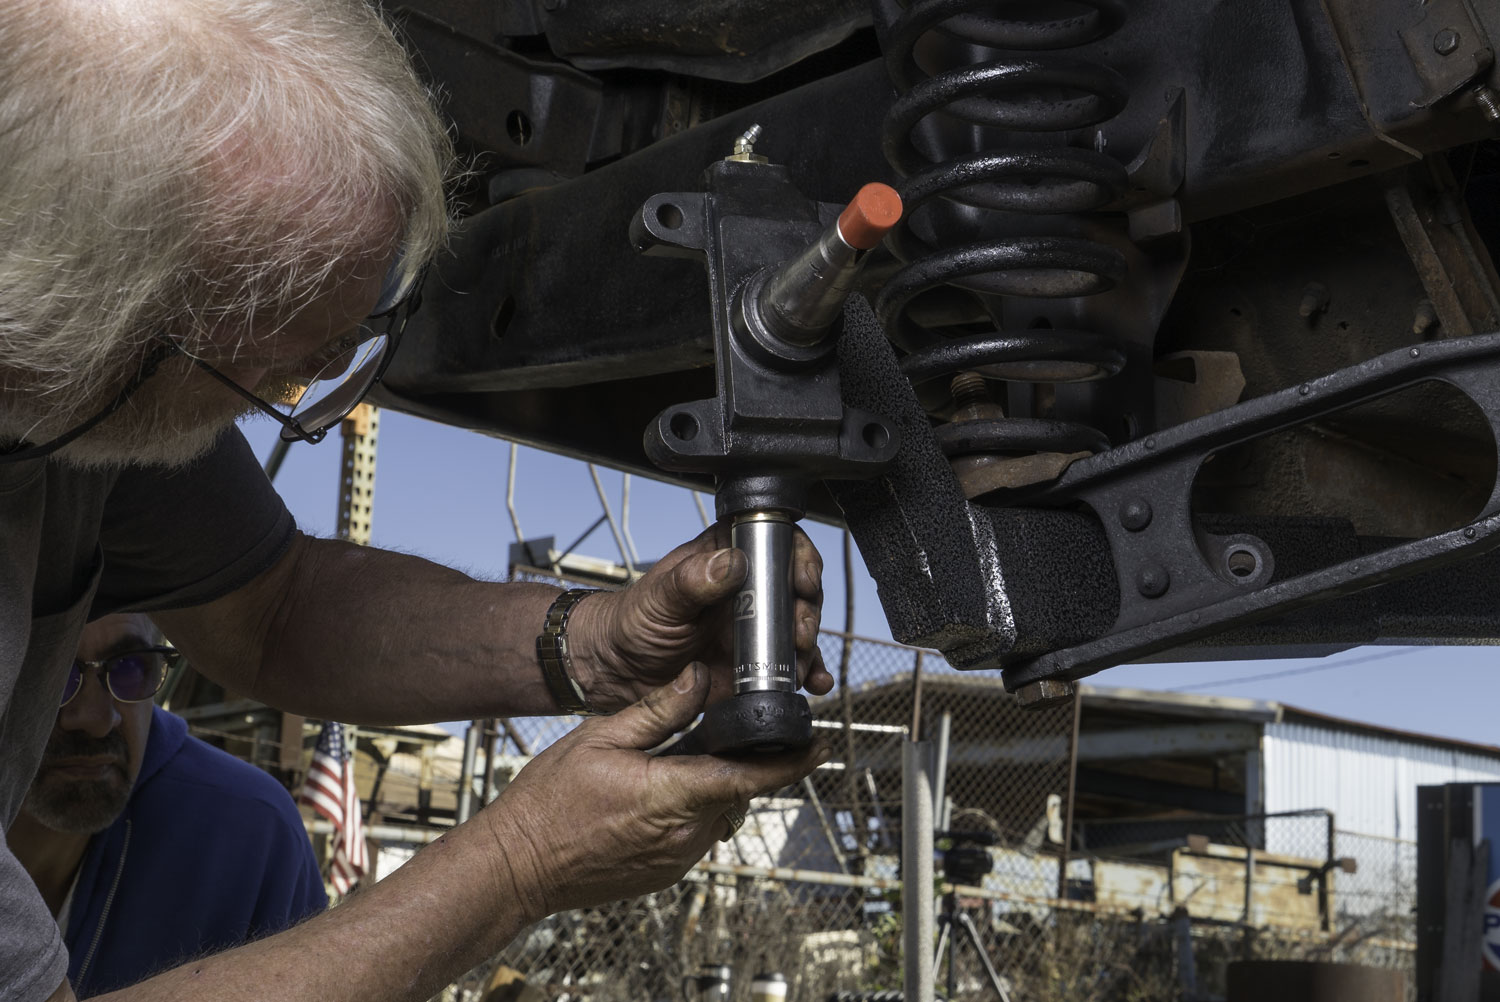
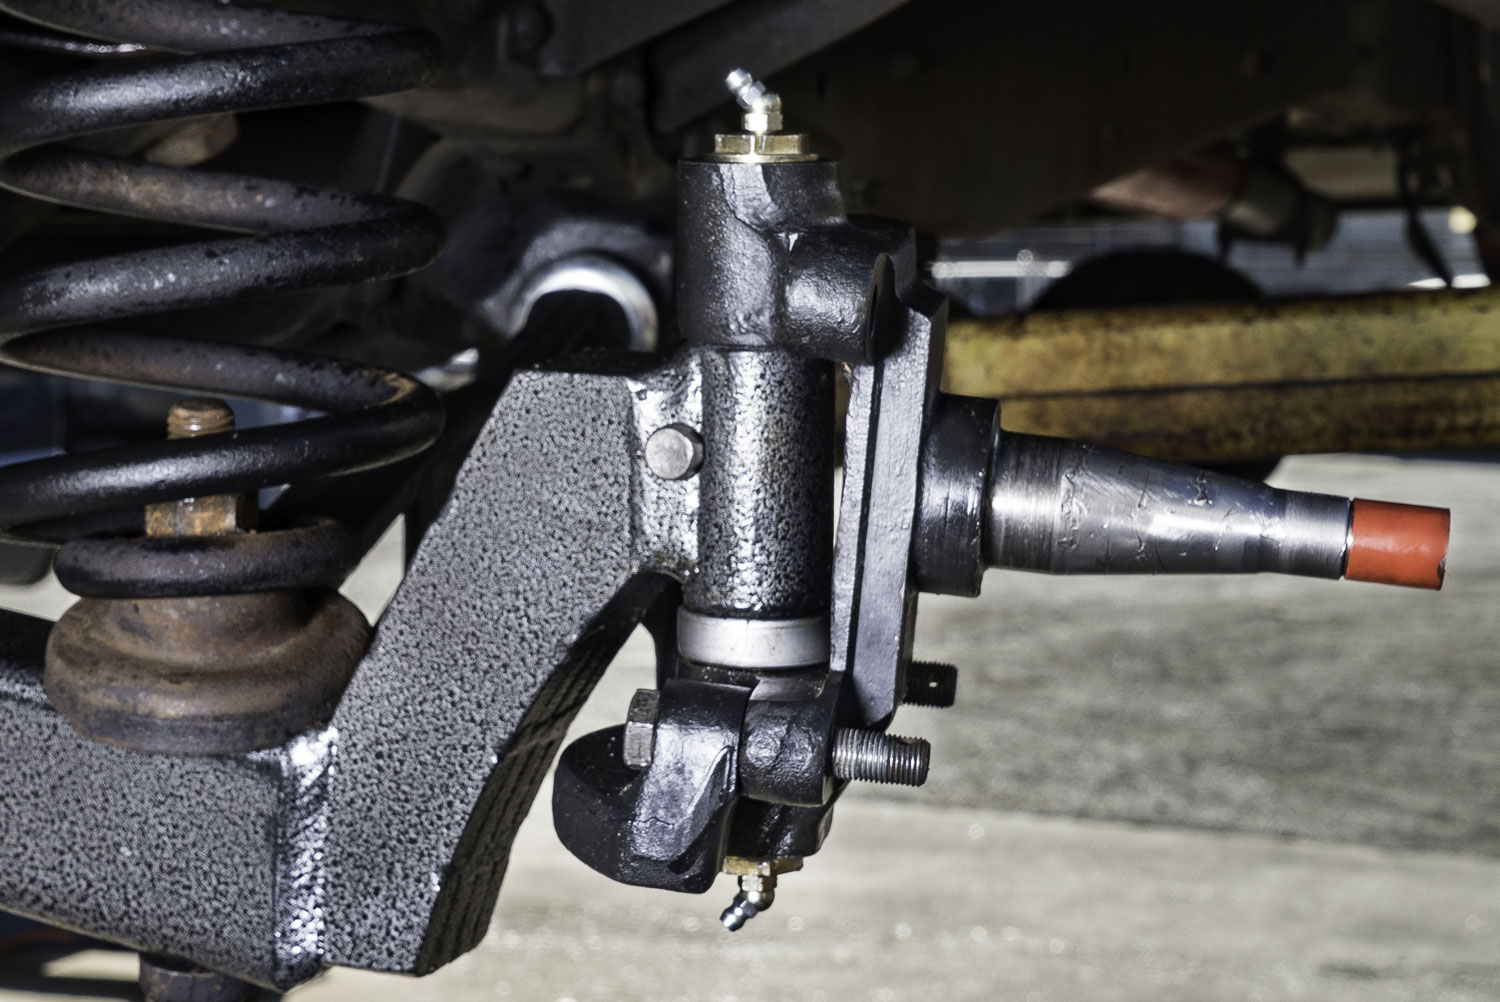
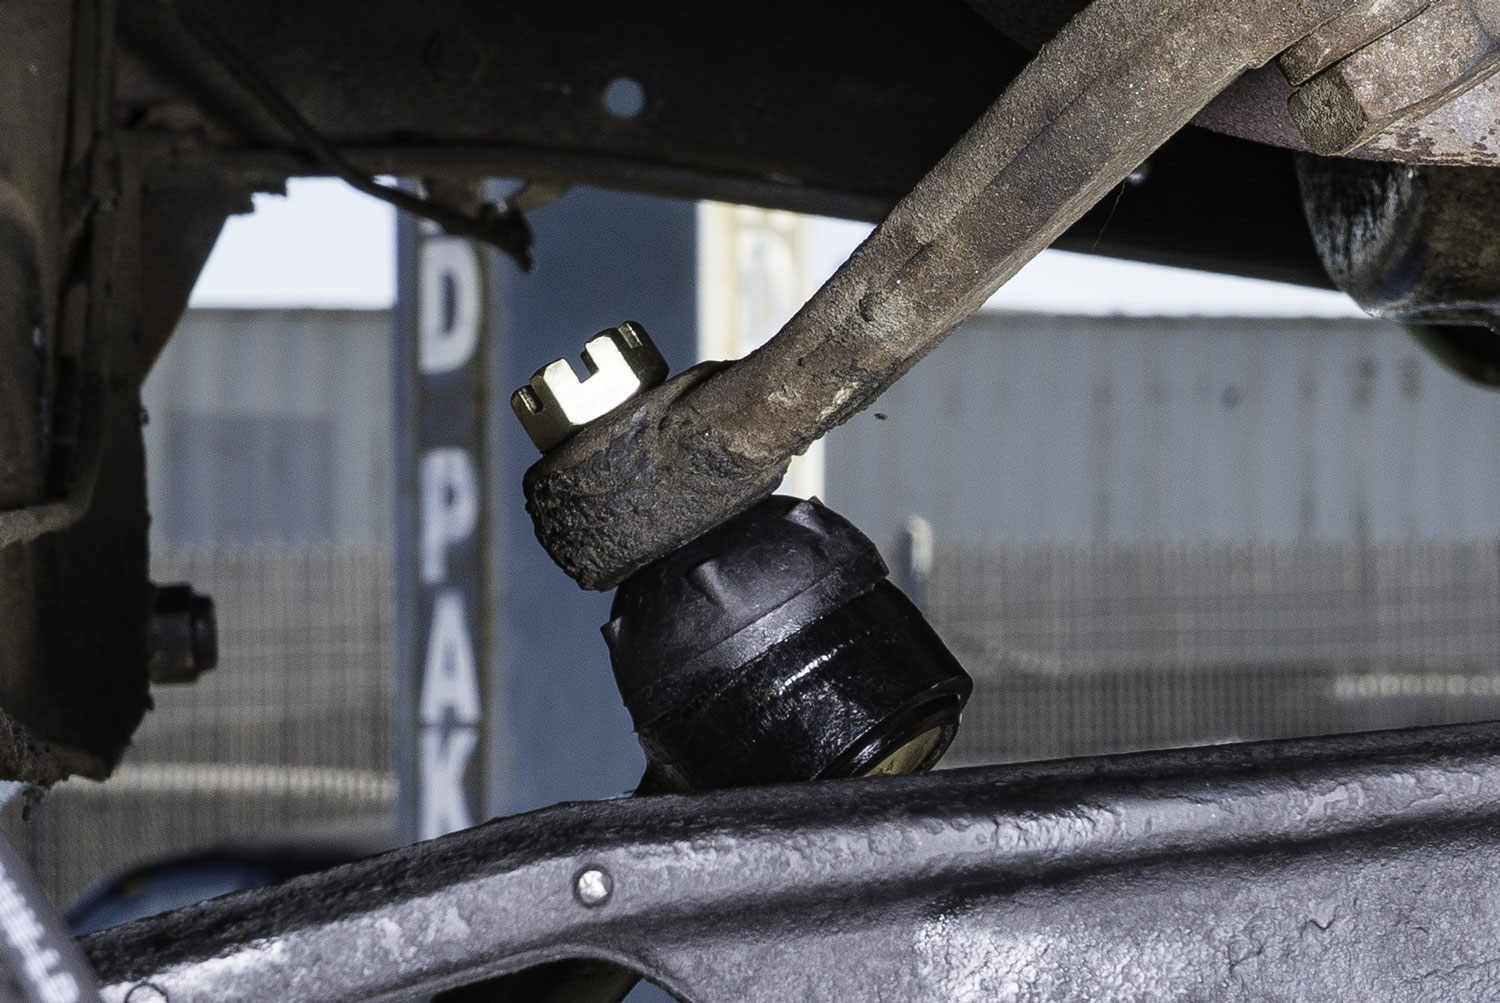
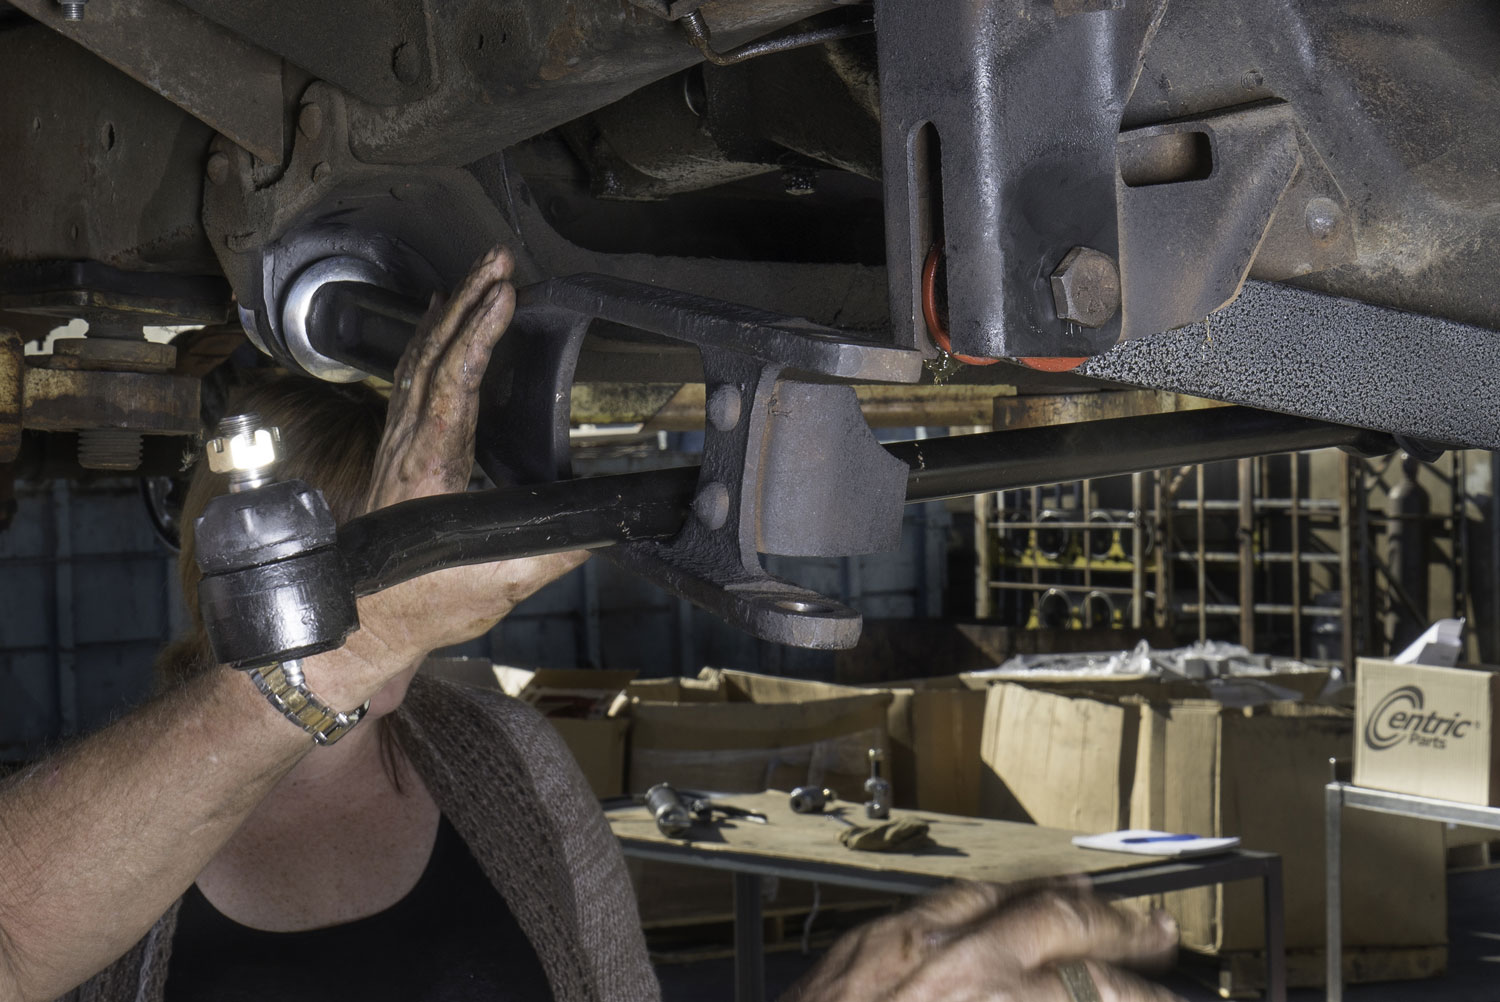
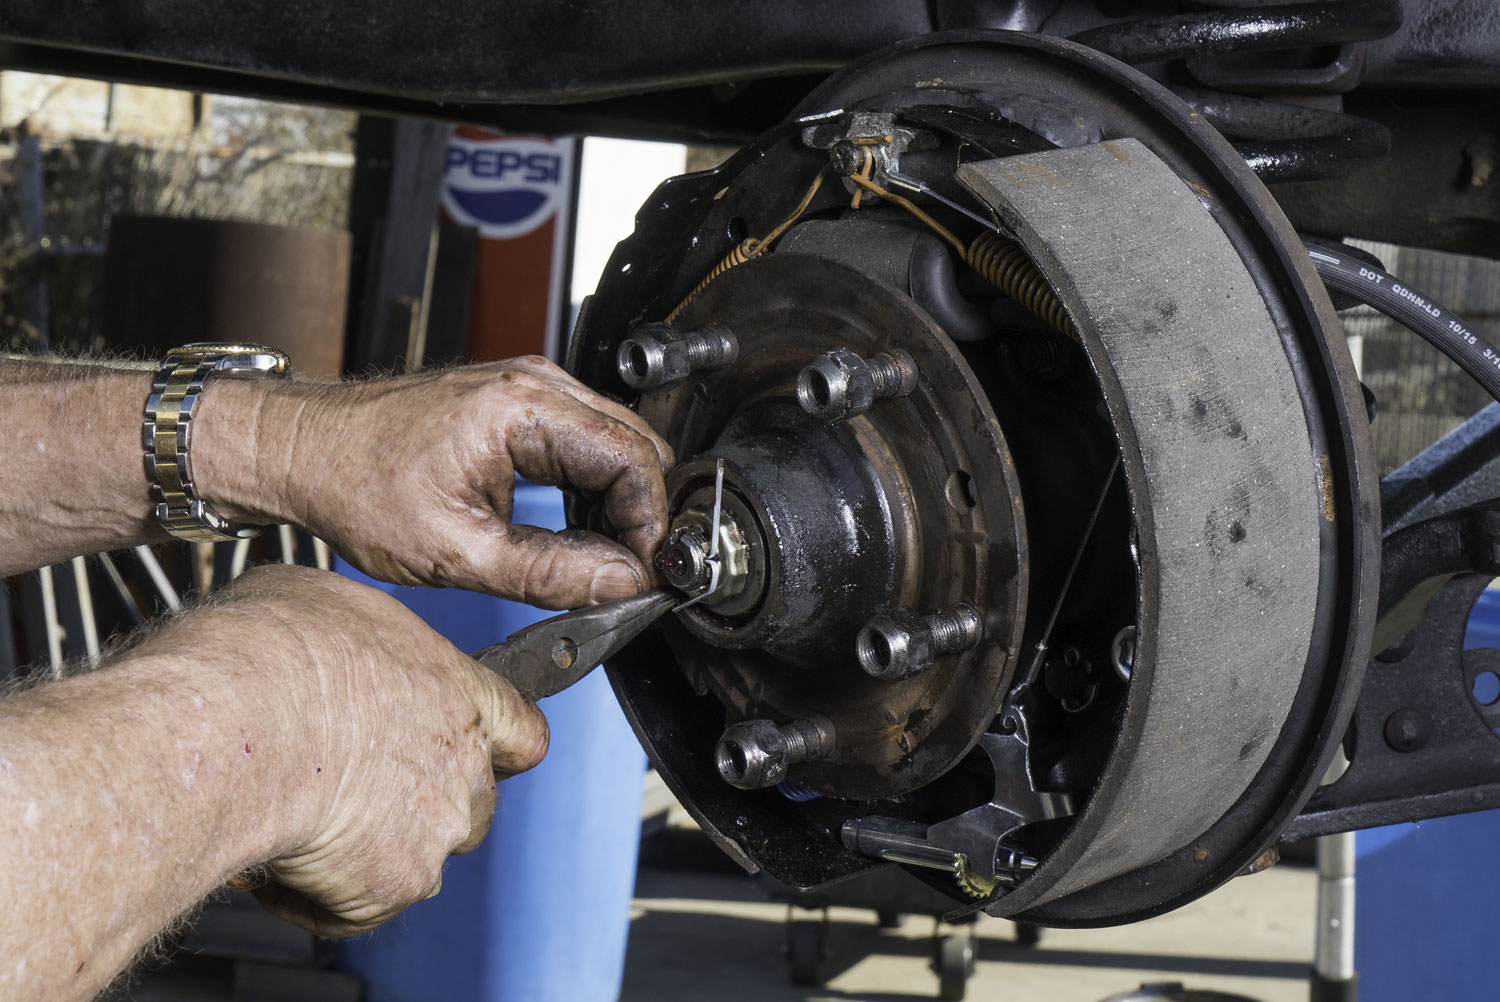
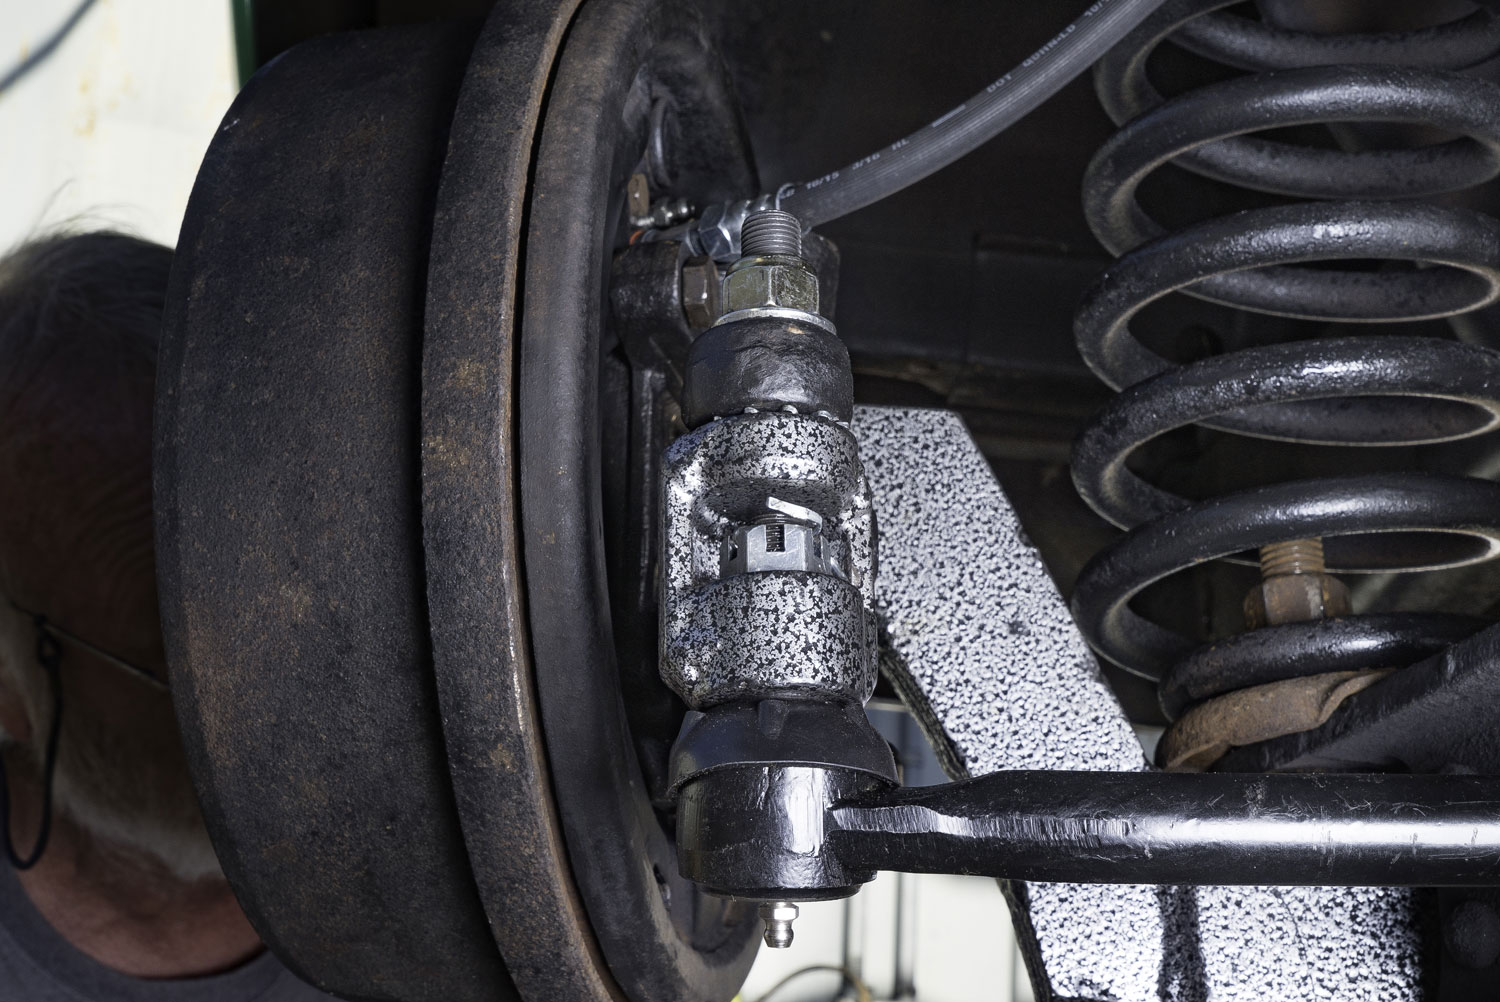
Spindle Assembly and Tie Rod Mounts
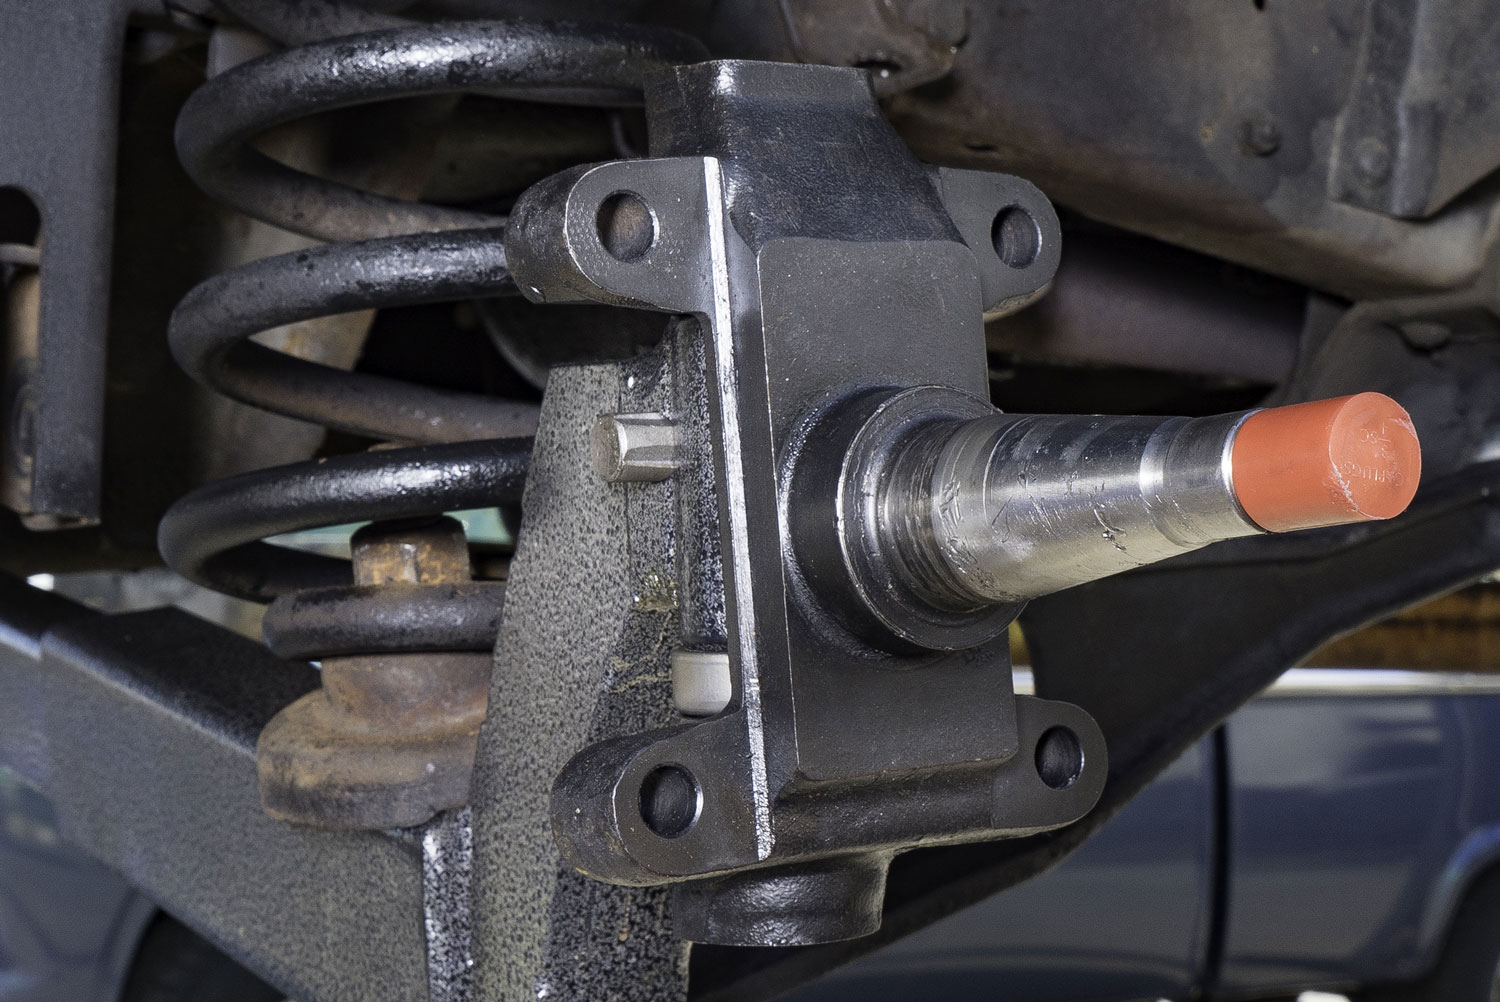
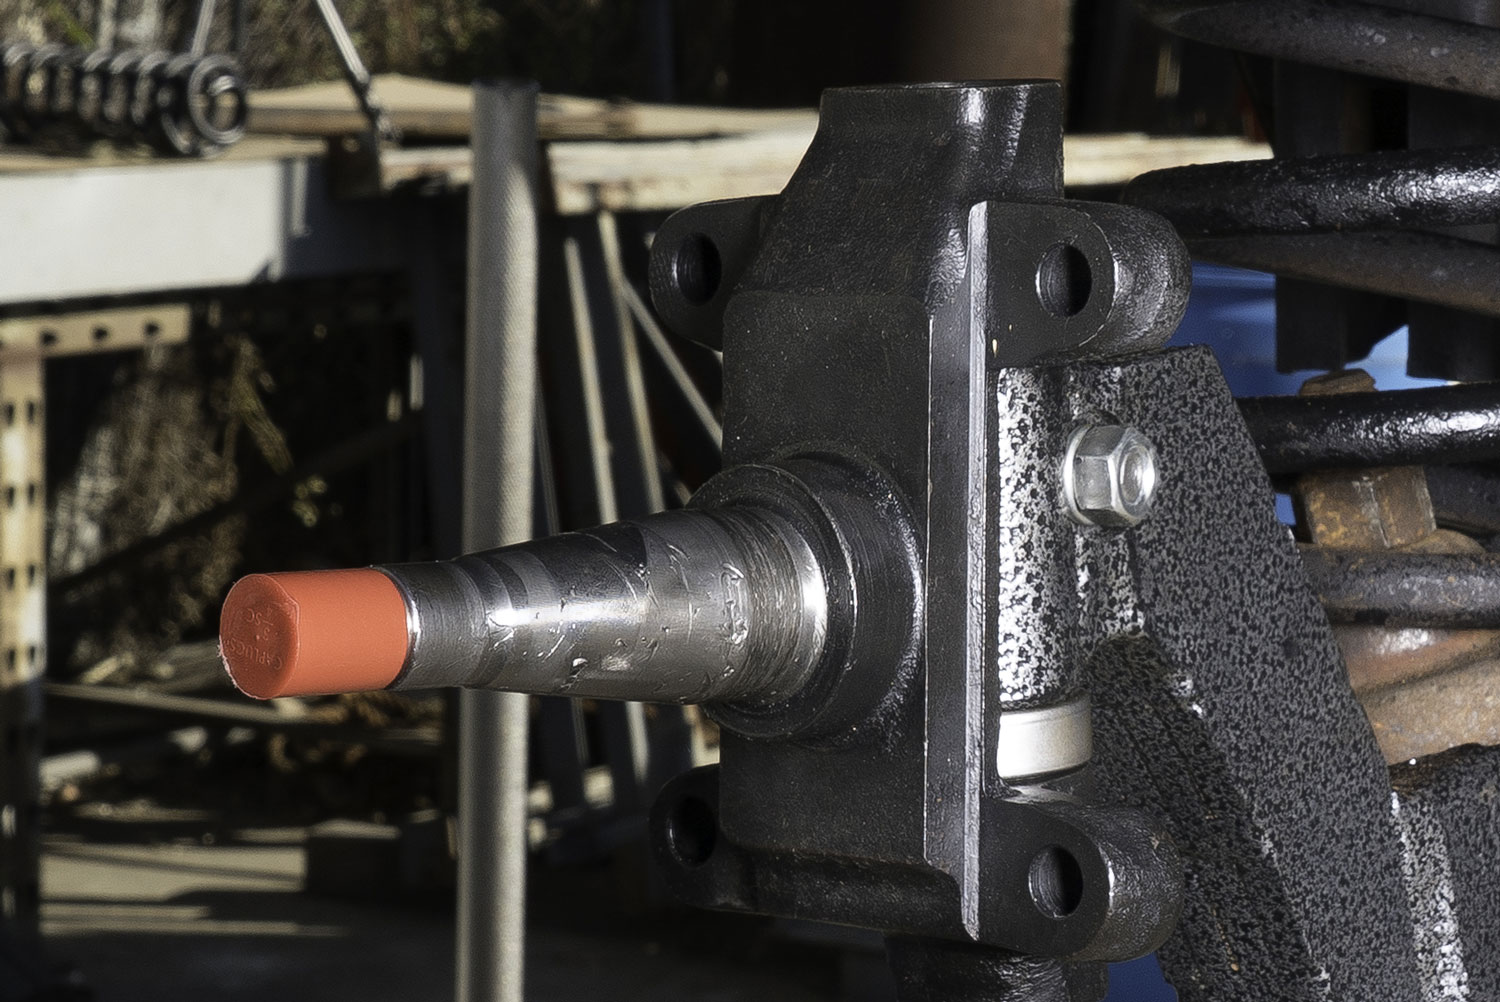
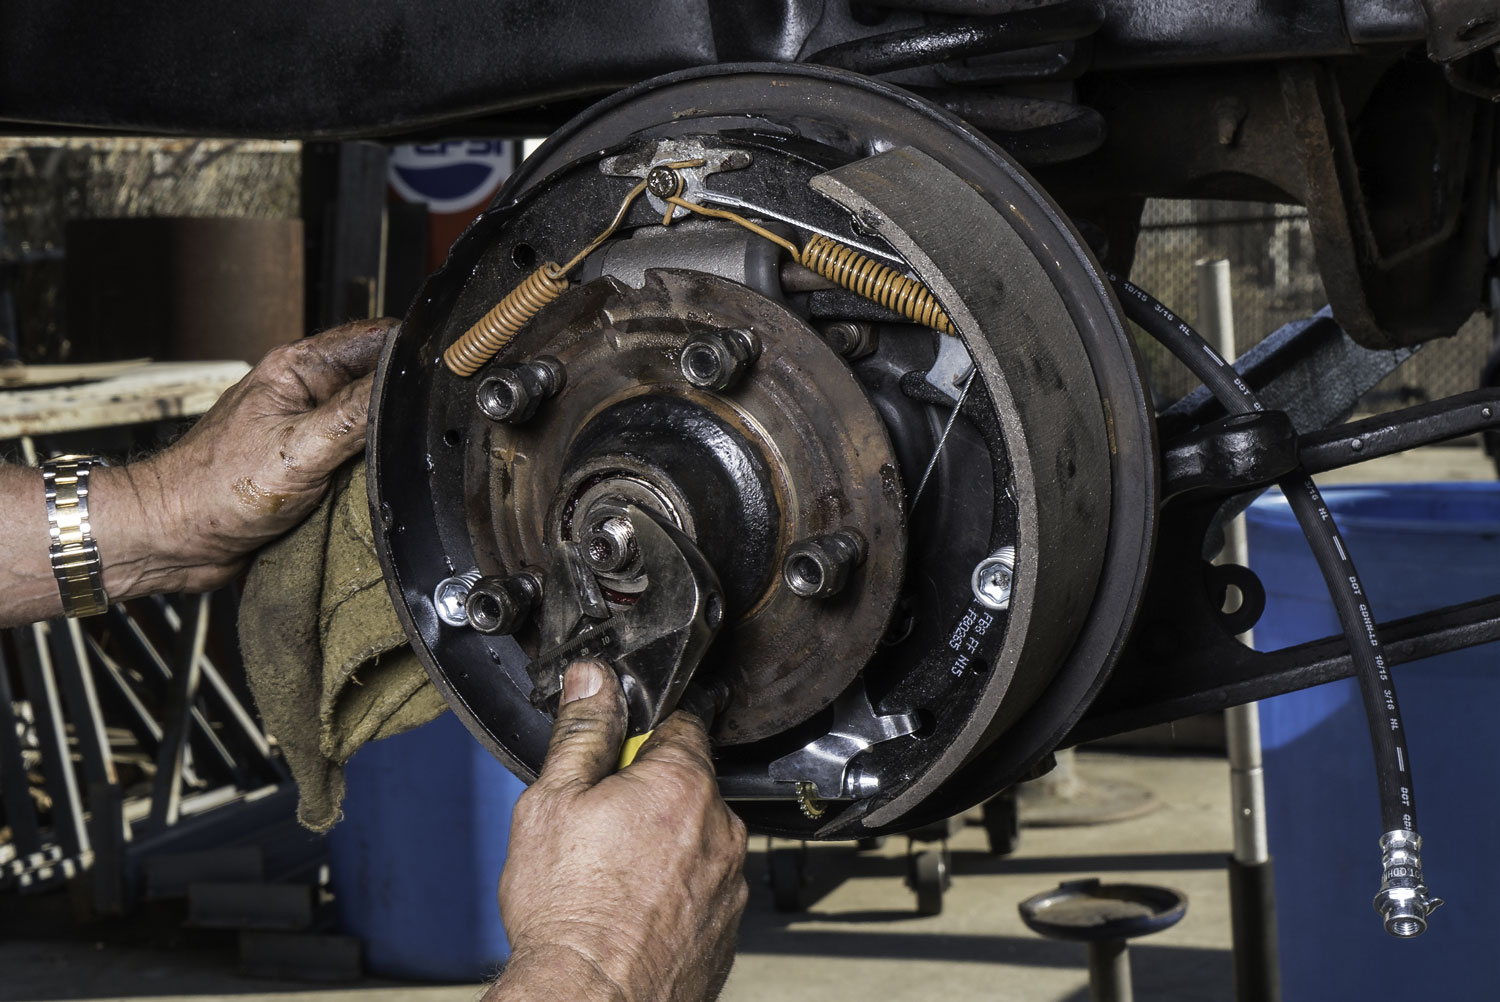
Install the kingpin locking bolt, grease caps, and tie rod mount onto the spindle. Next, address the brake backing plate. Many classic F100s have brake components installed incorrectly. Use this opportunity to rebuild the front drum brakes and inspect all parts for wear.
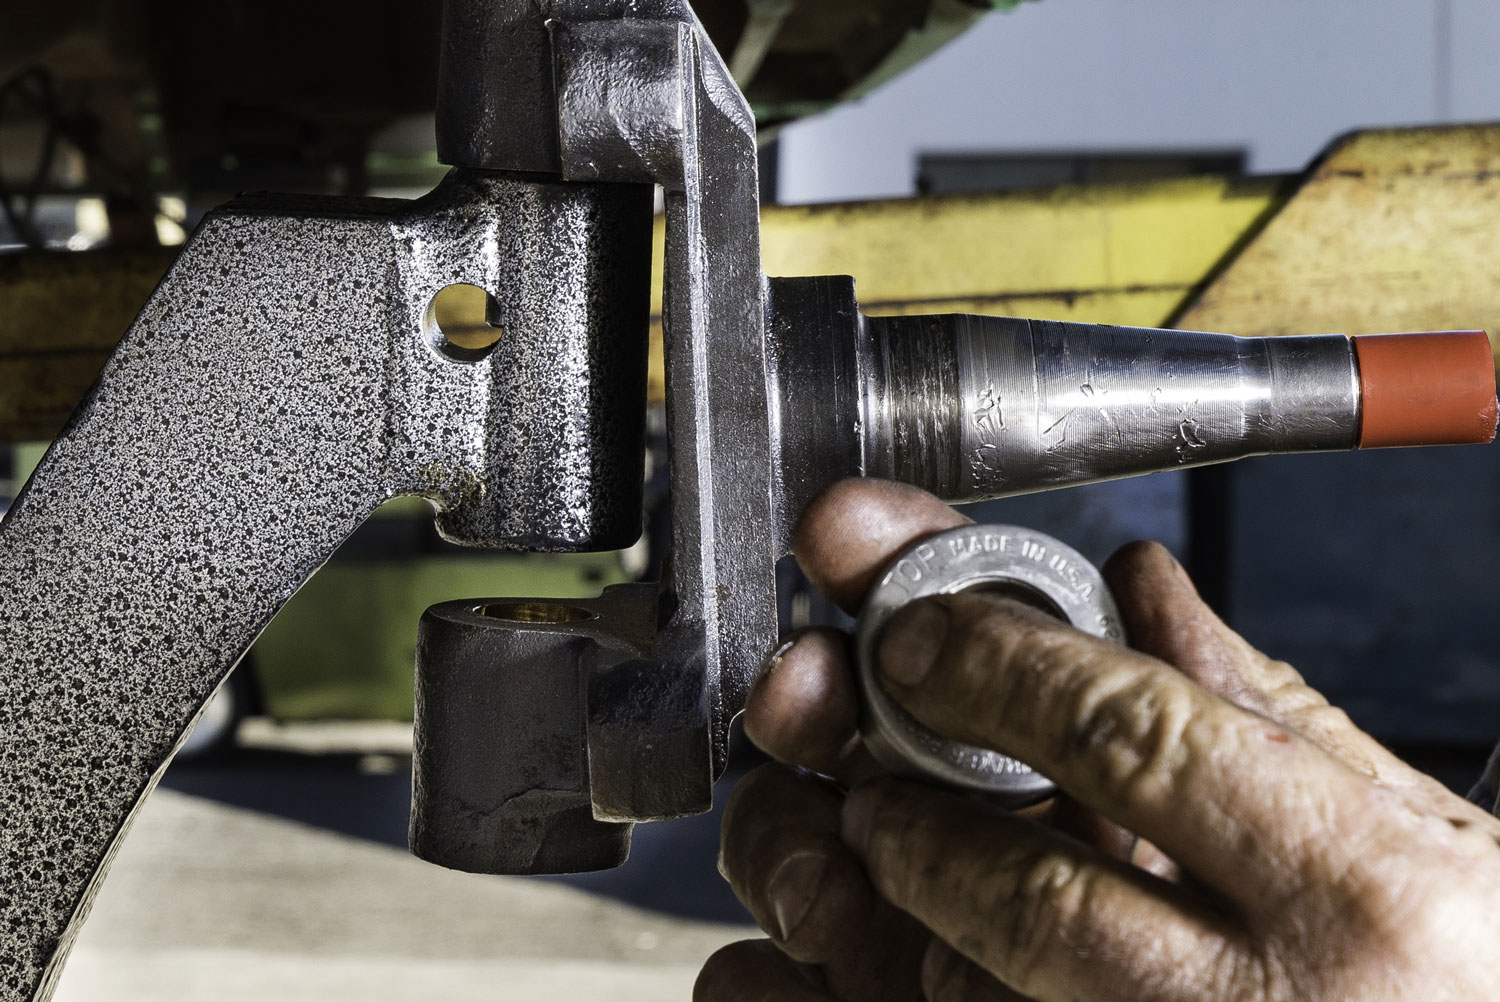
Proper alignment of the lower brake backing plate bolts improves steering geometry and provides a better turning radius. Attach the tie rod through the radius arms, using tie rod extenders to maintain the correct positioning.
These extenders are engineered to retain the original tie rod placement through the Ford F100 lowering I beams, avoiding steering pull or binding.
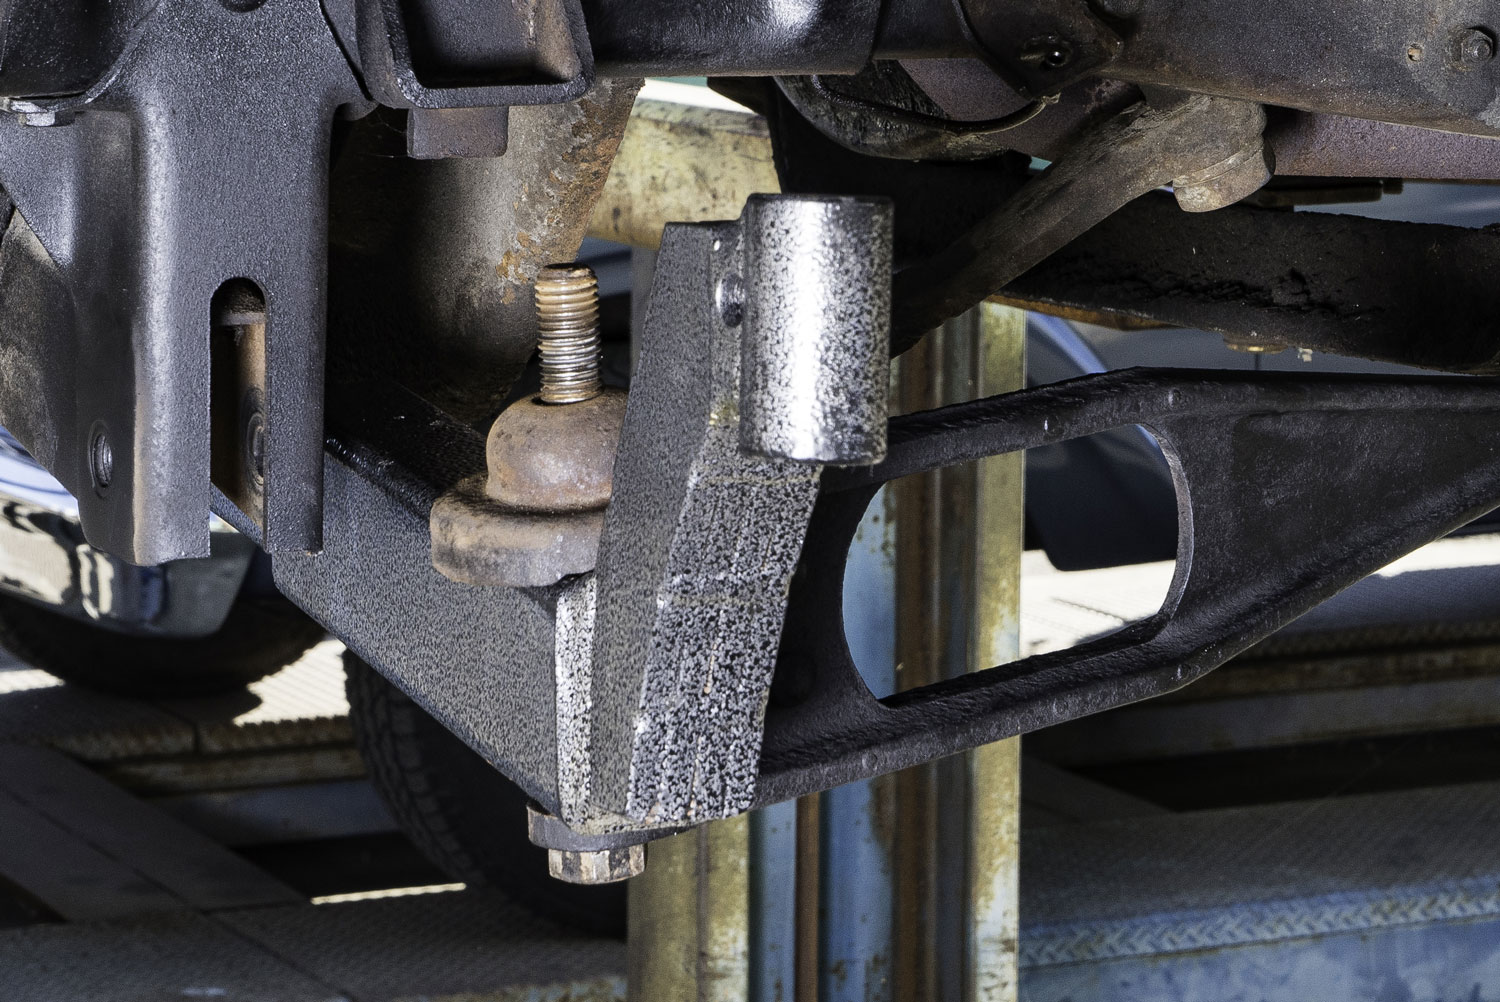
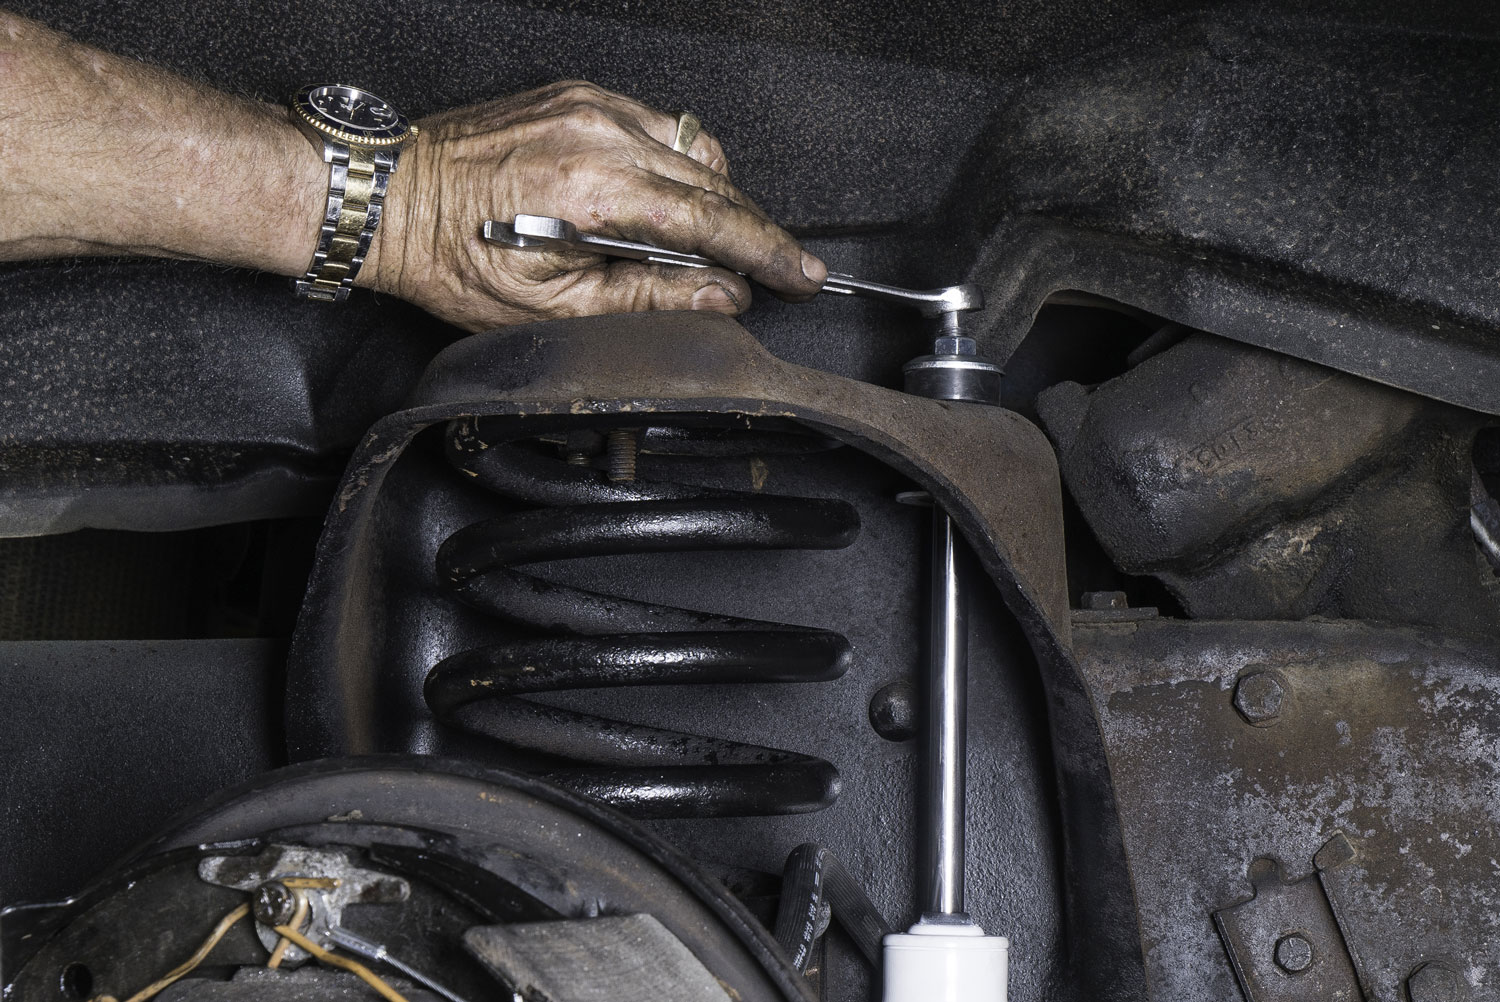
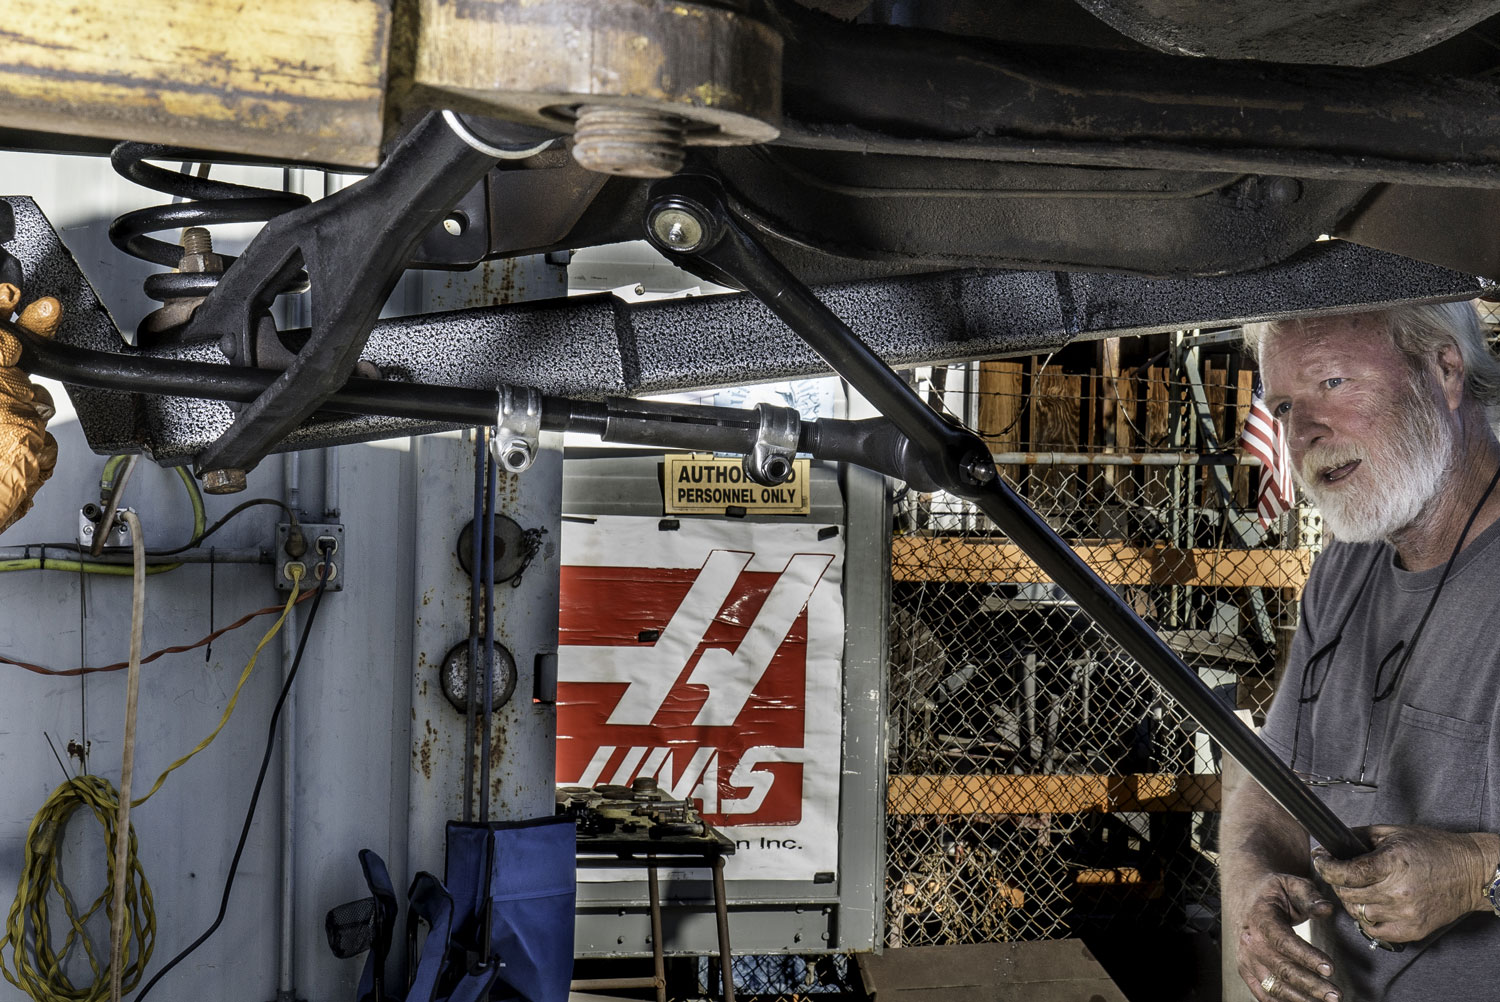
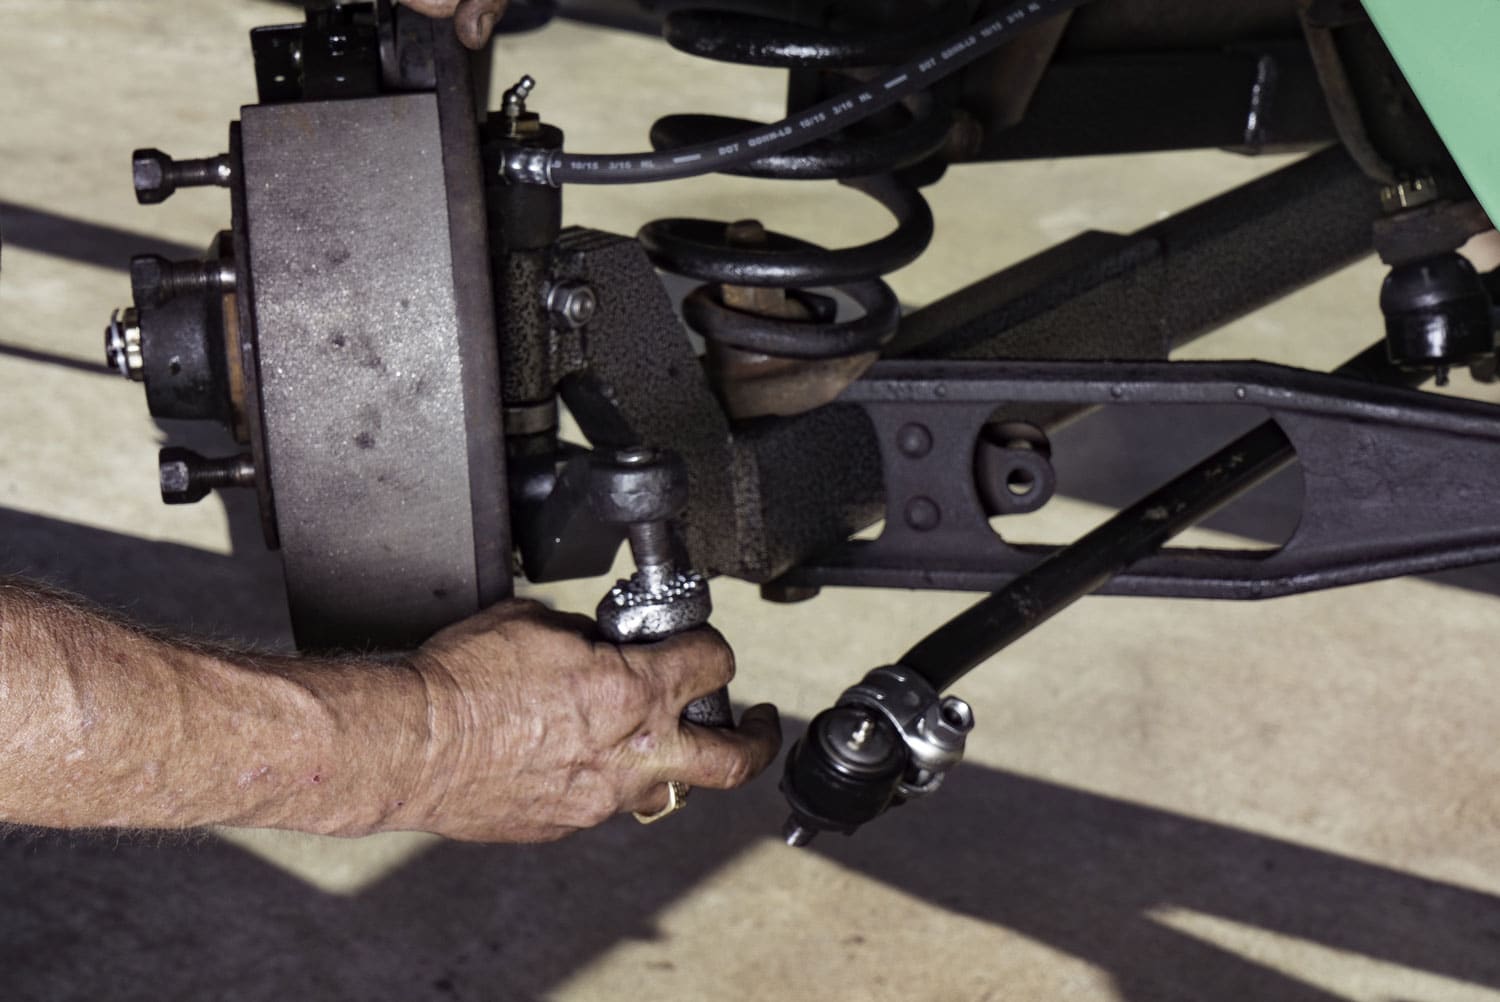
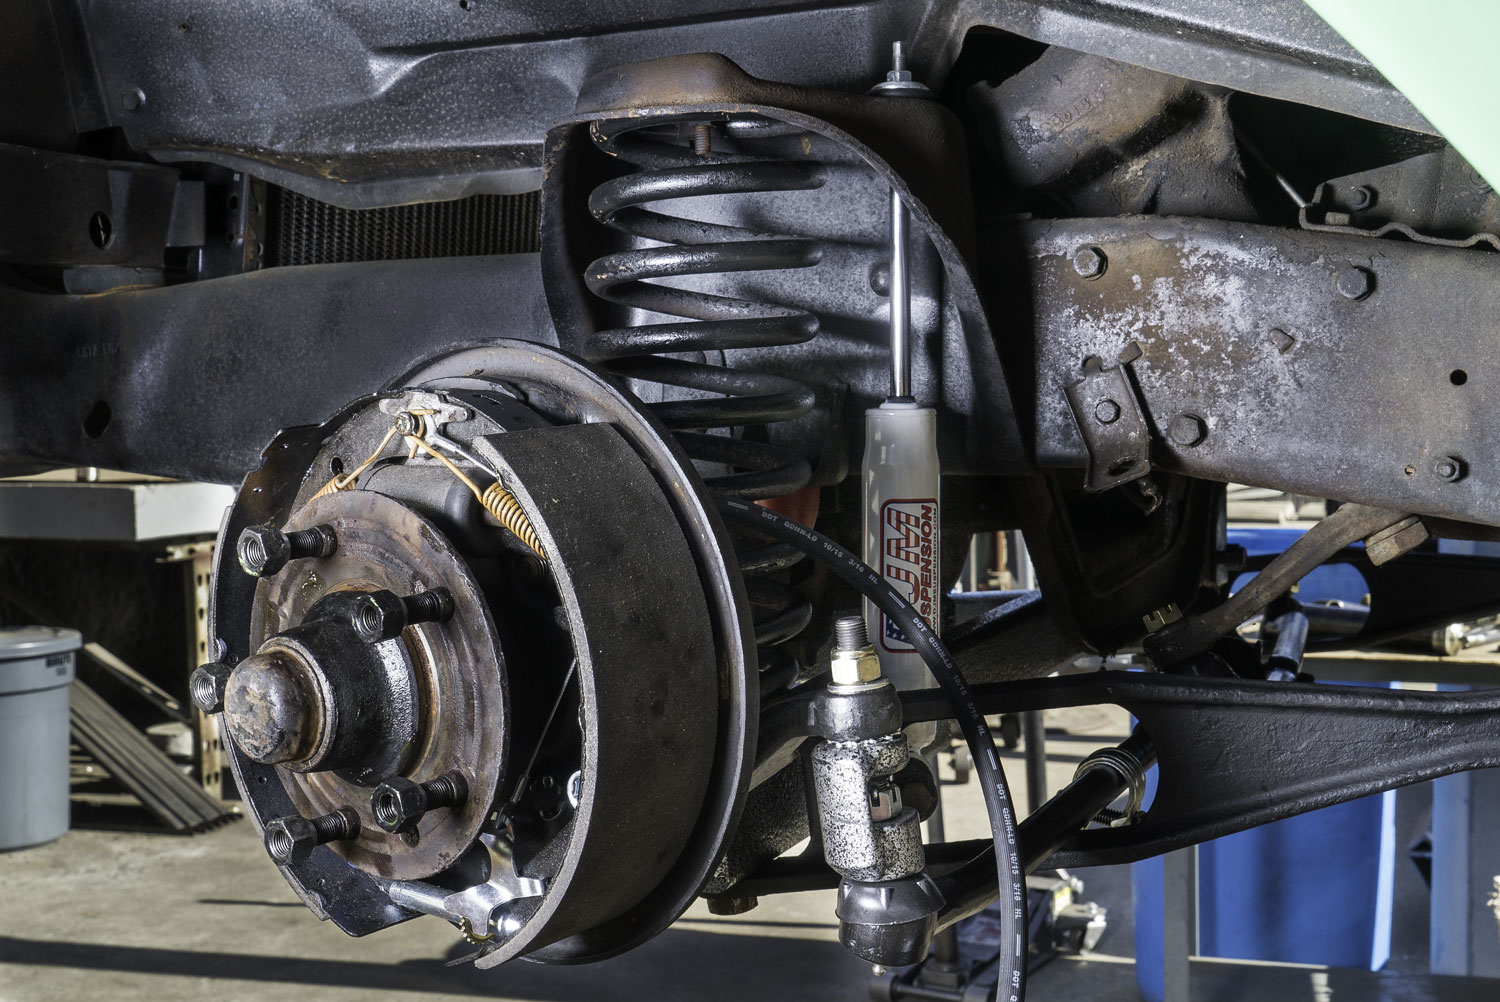
Installing Drag Link and Shocks
With the front end prepped, attach the new drag link to the pitman arm. Install the new DJM Suspension shock absorbers, connecting both the upper and lower mounts firmly. Check that all components move smoothly and do not bind. Proper shock placement is critical to handling, especially on a lowered truck.
Once the drag link, tie rods, and shocks are installed, perform a visual inspection of the front-end assembly. Confirm that the Ford F100 3-inch Lowering I-Beams, radius arms, and kingpins are seated correctly. Your suspension geometry should align perfectly with the new ride height, giving you a balanced stance without compromising safety.
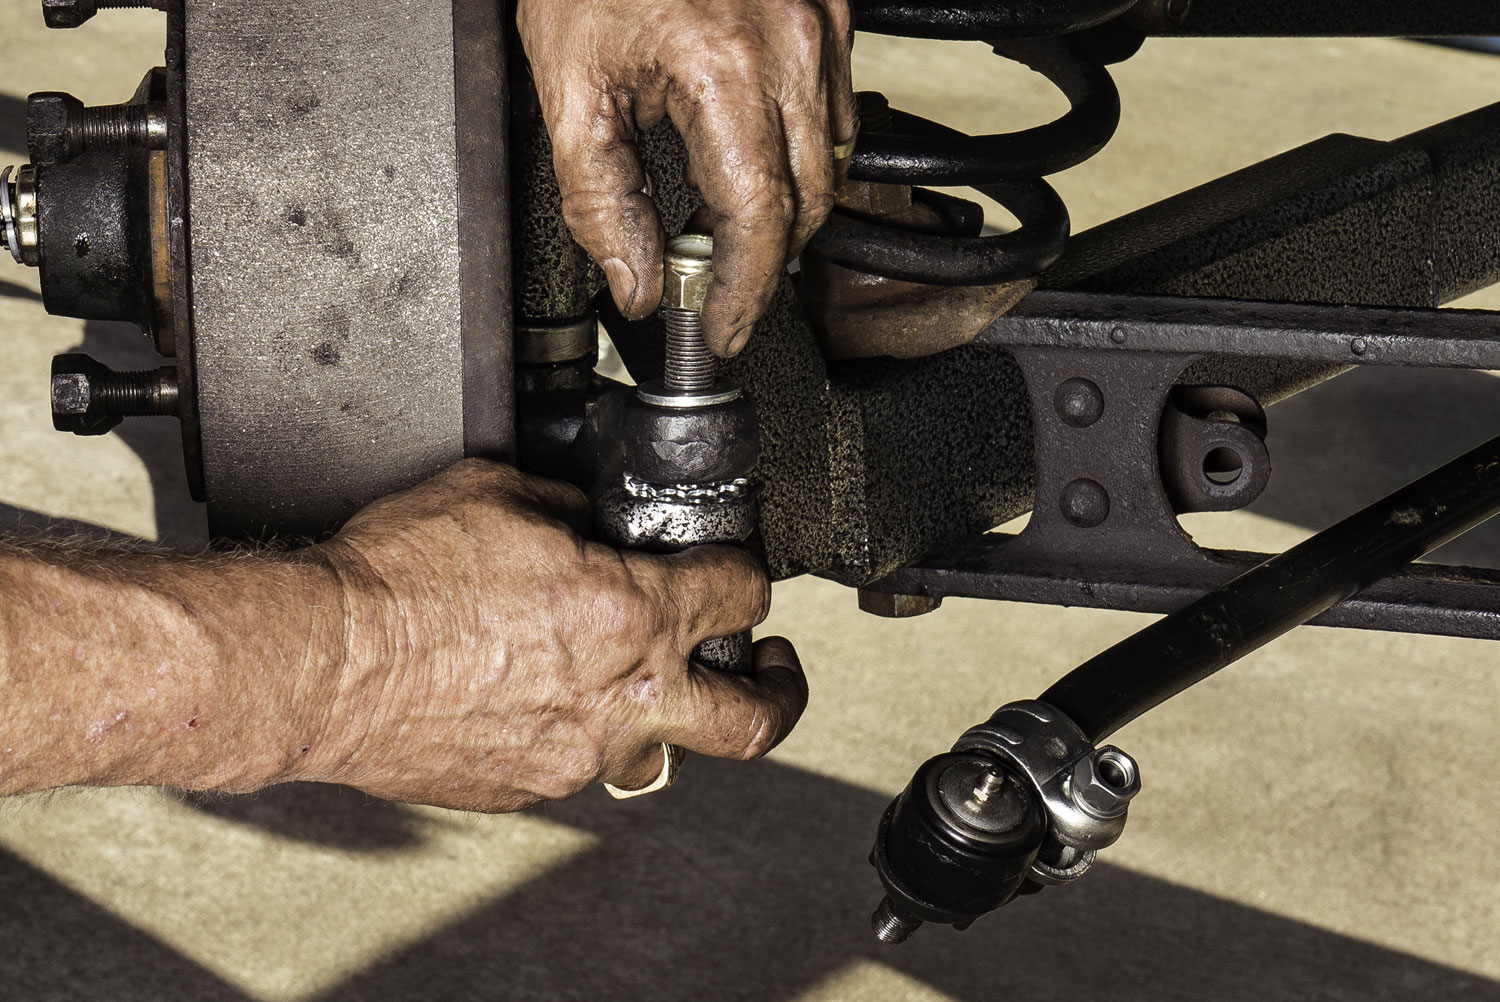
Final Assembly Checks
After installing all components, revisit each mounting point:
- Recheck radius arm bolts and pivot points for tightness.
- Confirm kingpins and spindle bearings are seated and lubricated.
- Verify tie rod extenders are properly oriented, and drag link connections are secure.
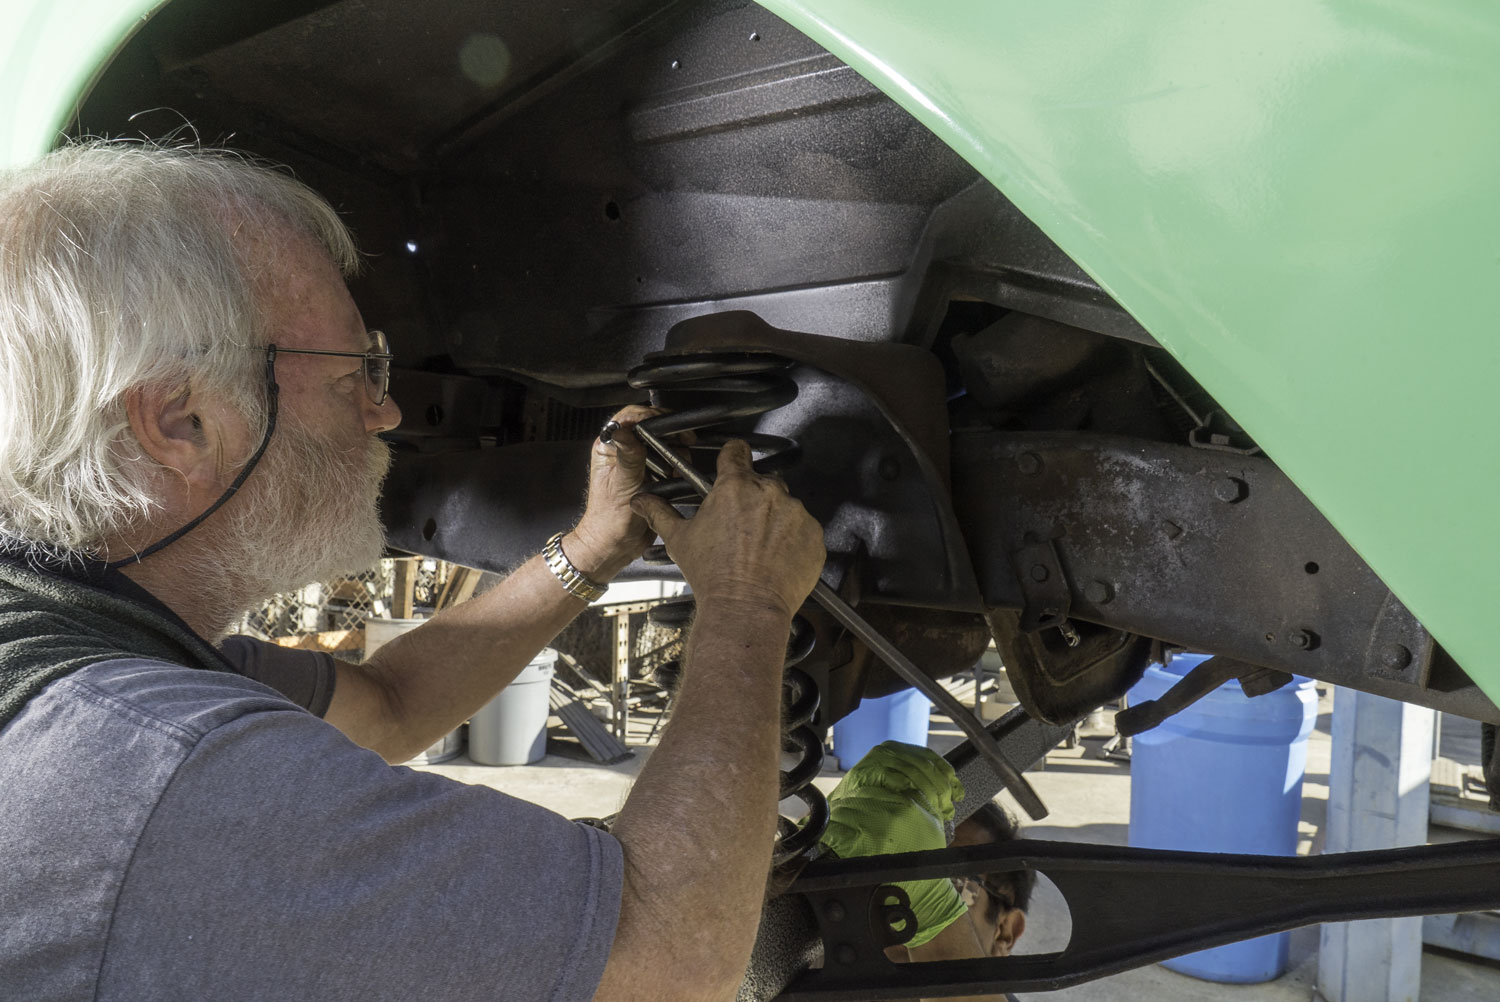
- Inspect coil spring seating and shock absorber installation.
Performing these checks before lowering the truck to the ground avoids unnecessary disassembly. A well-assembled front suspension provides smooth handling and preserves the integrity of your lowered 1966 Ford F100.
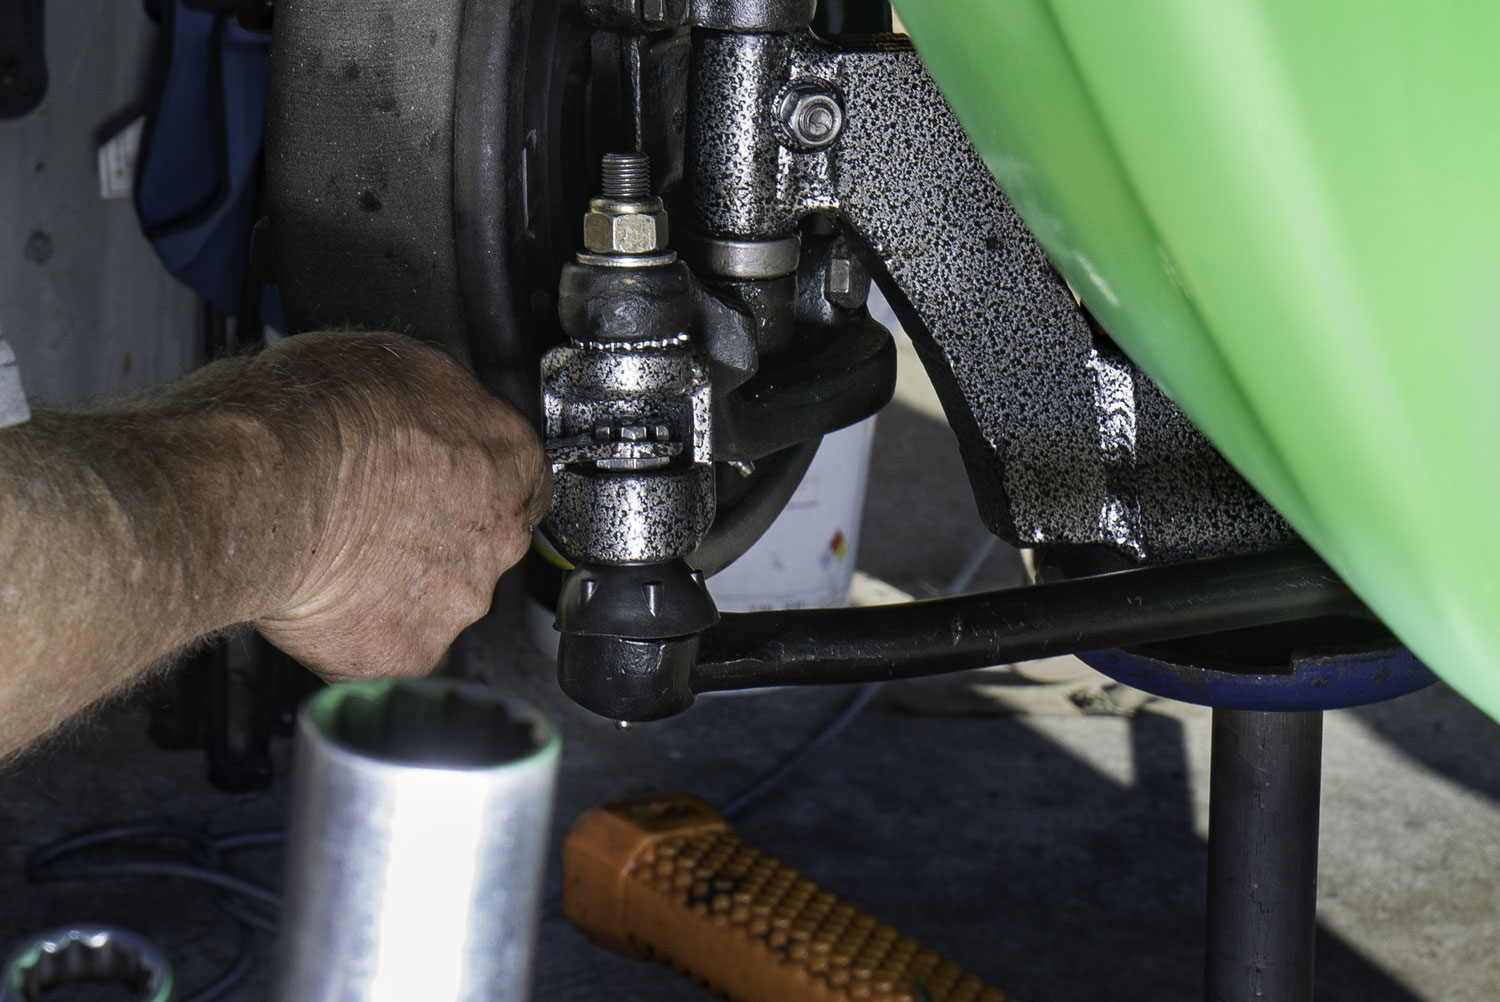
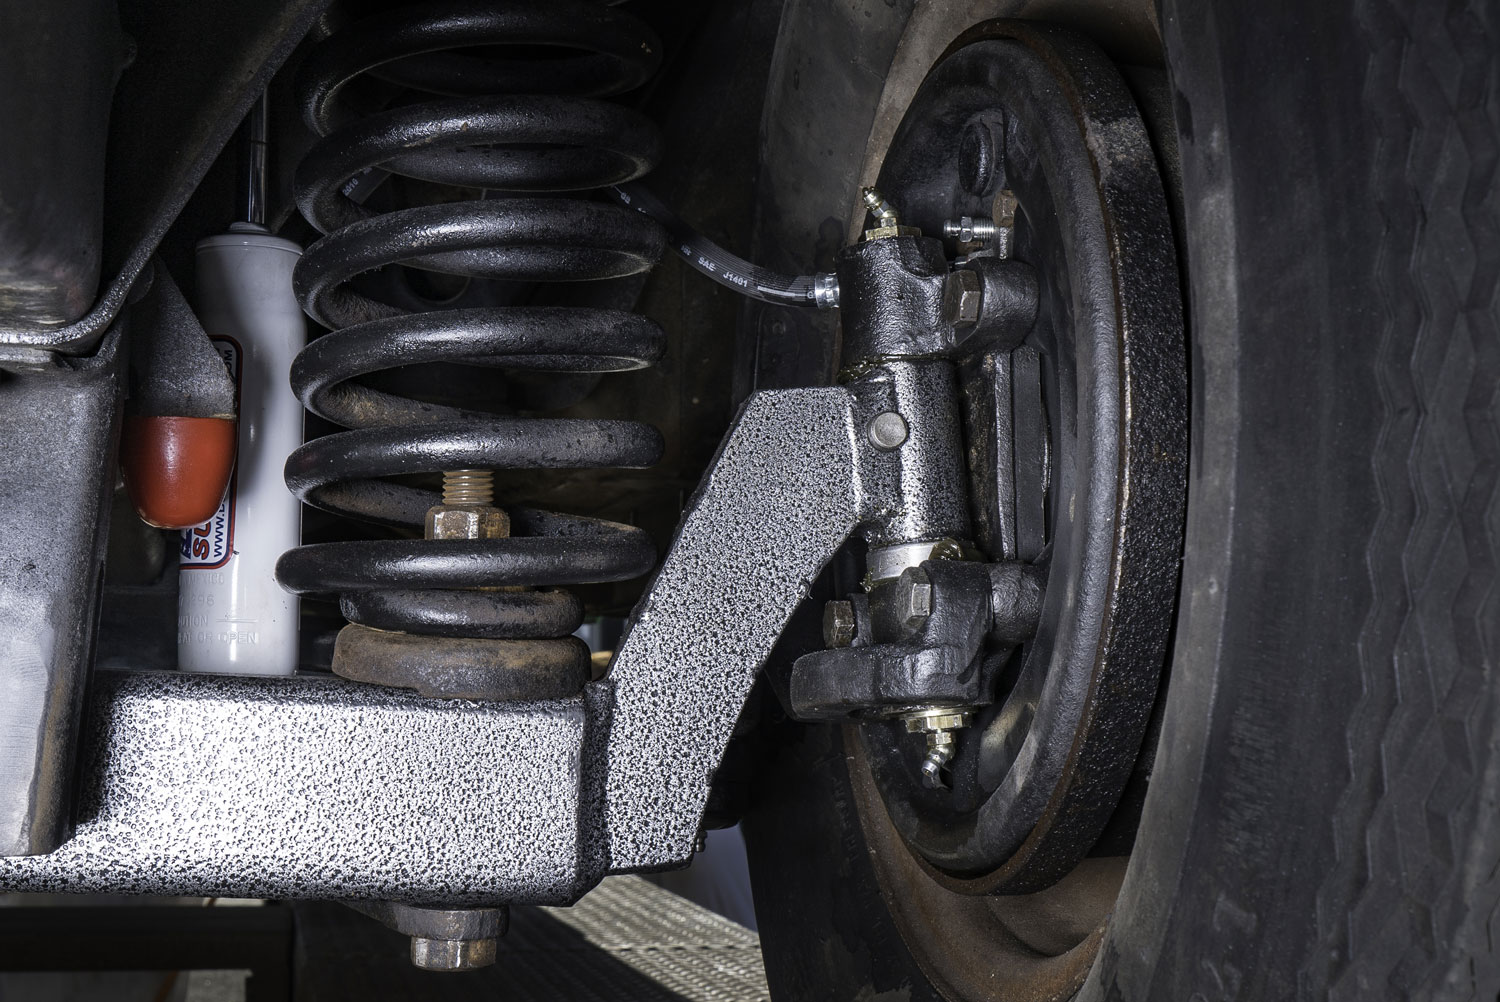
Alignment and Test Drive
Once the truck is lowered, check alignment visually and by hand. Wheels should turn smoothly, and the front suspension should respond without play. A short test drive helps identify any minor adjustments needed for the Ford F100 lowering I-beam setup. If necessary, adjust shims, tie rods, or pivot points to perfect the ride.
Looking Ahead to the Final Stage
With the spindle, kingpins, and DJM Suspension lowering components installed, your front suspension is fully functional. Your lowered 1966 Ford F100 already drives with improved handling and precision. The rebuilt brakes, new shocks, tie rod extenders, and properly seated bushings give your truck a solid, reliable feel while maintaining its classic style.
Working with DJM Suspension means you have access to top-tier craftsmanship and components that simplify installation while preserving performance. Our kits are built for enthusiasts who want reliable, long-lasting results with minimal guesswork.
The final and fourth part of this budget makeover will focus on completing the rear suspension, final ride height adjustments, and fine-tuning alignment for the ultimate stance and performance. Following that, your F100 will be ready to hit the road with a balanced, professional setup that combines style, comfort, and control.


Products Featured in This Blog

Part 1 - 66 F100 Budget Project
DJM Lowers a 1966 Ford F100 with our popular Dream Beams.
Part 2 - 66 F100 Budget Project
DJM's F100 Budget Project move's into removing the factory suspension!
Part 4 - 66 F100 Budget Project
DJM 1966 Ford F100 Budget Project gets the rear lowered about 4 inches