Whether you're a grease monkey or not, every classic truck owner puts their time, effort, and heart into restoring their ride, making it as comfortable and safe to handle as possible. We're here to make that job more fulfilling (and a lot easier) with a few hands-on tips we've learned over the years.
Recently, we discussed the step-by-step process for installing a C-notch on a 2003 Chevy Silverado to address frame clearance issues and achieve that ideal stance. This time, we’re shifting gears to help you upgrade your classic truck with an essential component: The F100 radius arm.
Classic trucks like the Ford F100 from 1965 to 1979 are known for their durability and charm, but suspension wear can lead to a host of problems. If you're driving one, learning the ins and outs of F100 radius arm and bushing replacement will help you get a comfortable ride.
In this post, we'll walk you through everything you need to know about the F100 radius arm and bushing replacement, why it's necessary, and how to get it done step by step.
Why Upgrade Your F100 Radius Arm and Bushings?
You might be wondering, "Why should I bother replacing my Ford radius arm or the bushings?"
Well, here’s the deal: if the radius arm for your Ford is worn out, damaged, or compromised, it can seriously affect your truck’s suspension system and steering. The F100 radius arm is a critical component of the suspension system that helps control the movement of the front axle.
A bad F100 radius arm and bushing can lead to steering instability, odd handling, and even potential safety risks. Upgrading your radius arm for Ford means you’re investing in a smoother ride, improved handling, and more precise steering. This will turn your classic F100 into a much more enjoyable and safer ride.
Upgrade Your F100 Radius Arm: Step-by-Step Guide
Properly replacing the F100 radius arm and its bushings is critical to breathing new life into your truck’s suspension. Here’s a step-by-step guide, with a focus on clarity and practical insight:
Step 1: Remove the Old Radius Arm
Before you get to the new parts, remove the old F100 radius arm. Begin by safely lifting the truck with a jack and securing it with jack stands. You’ll need to remove any parts that could get in your way, such as shocks or the tie rod extender. Once you’ve got the clearance, locate the bolts holding the radius arm in place, and carefully remove them.
Step 2: Inspect the Existing Radius Arm and Bushings
Take a close look at your old radius arm for Ford, especially where the bushing seats. Look for missing material, excessive wear, or damage. If it’s excessively worn, corroded, or compromised (like in our case), replacing it is the best option.
Even if the arm appears intact, any significant loss around the bushing pocket means the arm is compromised. If you attempt to re-use it with new bushings, you’ll likely still face issues with a loose fit, and your truck won’t drive properly.
Testing by moving the arm with a pry bar can highlight issues. Moreover, check if the bushings fit loosely. This is a warning sign that a simple bushing replacement will not solve the problem.
Step 3: Decide Whether to Replace or Repair
Too often, owners are tempted to reuse or rebuild original radius arms. But when it comes to classic trucks like the Ford F100, some parts are no longer rebuildable. Heavily worn arms, even with new bushings, will still produce sloppy handling or may even fail.
Attempting to source a used Ford radius arm may be an option, but many found online will have similar issues. Prioritize safety and performance: if the arm has lost too much material, opt for a brand-new F100 radius arm engineered to precise specifications.
Step 4: Select a Quality Bushing Kit
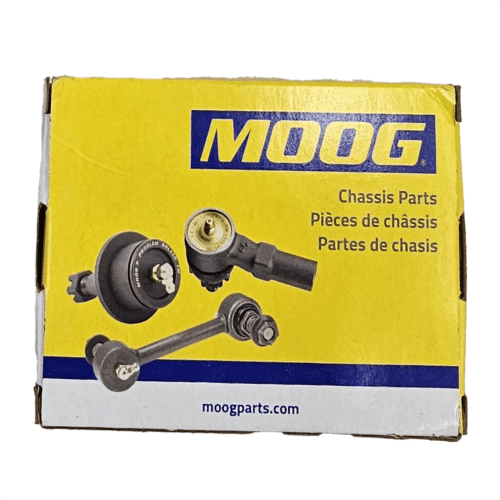
Next, you need to select the right F100 radius arm bushing. Favor American-made kits like the Moog 8146. These come with new bushings and cups, which provide a correct and lasting fit. It’s advisable to verify compatibility with your specific year since there are minor differences within the 1965–1979 range.
Proper bushings help the radius arm in Ford suspensions isolate vibrations, maintain alignment, and deliver precise steering input. Without robust bushings, your truck can never handle as it should.
Step 5: Install the New Radius Arm and Bushings
Pre-assemble the bushings and cups onto your new F100 radius arm. Make sure all contact surfaces are clean and free of rust or debris. Fit the radius arm to the frame, lining up the holes. Install new bolts and torque them to the manufacturer’s specs.
If your truck has been equipped with upgraded brakes or a dual master cylinder (as is common among modernized F100s), confirm all lines and components have proper clearance from the new arms.
Step 6: Reassemble and Inspect Other Suspension Components
With the new radius arm for your Ford in place, reinstall the shock absorber, tie rod extensions, and sway bar (if present). Lubricate all moving parts as you go. This is a good time to check related items like the drag link, as worn boots or torn joints will affect steering feel and safety.
Re-inspect all fittings and make sure every nut and bolt is torqued correctly. The most important thing throughout this process is safeguarding both your investment and well-being.
Step 7: Double-Check for Stability
Once everything is in place, double-check all bolts and components. It’s always a good idea to give your new F100 radius arm a test run before hitting the road. Take it for a short drive, paying close attention to how the suspension handles. A well-installed F100 radius arm and bushing should make a noticeable improvement in how your truck feels on the road. If everything feels solid, you’re all set!
What You Gain from a Proper F100 Radius Arm and Bushing Replacement
The F100 radius arm and bushing play a crucial role in the suspension system of your Ford. If it’s worn or damaged, it can cause unwanted movement in the front axle, affecting the alignment, steering, and handling of your truck. By replacing this assembly, you make sure that your suspension system functions correctly and safely.
This upgrade:
- Restores precise suspension geometry for safer, more enjoyable driving
- Eliminates vague steering and wandering caused by worn bushings or lost material
- Enhances ride comfort, making your vintage Ford feel nearly modern on rough roads
- Boosts confidence in your truck’s reliability, as a failed radius arm for Ford can pose real safety risks
- Completes the foundation for further upgrades like lowering beams, sway bars, or brake kits
Make Your Classic F100 Handle Like New
Upgrading the F100 radius arm and bushing is a simple yet highly effective way to improve your classic truck's suspension and steering. Whether you're dealing with worn-out bushings or a compromised Ford radius arm, this upgrade will make your F100 drive more like it did when it was new.
Remember, using high-quality parts like those from DJM Suspension can make all the difference. So, if you want your truck to handle better and ride smoother, it's time to consider this upgrade.
Let us know how your project goes or if you need more tips, reach out to us at 310-538-1583 or tech@djmsuspension.com.