1968-1972 Chevy/GMC 5 inch Rear Leaf Spring Flip Kit For Trucks with 2.25 inch Wide Leaf Springs
$194.52
Want to enjoy a smooth, aggressive stance for your truck? Do that easily with this 5-inch rear leaf spring flip kit for 1968-1972 Chevy or GMC trucks. Designed for C10 trucks with 2.25-inch-wide leaf springs, this kit is made to last.
Upgrade your truck’s rear end with DJM Suspension’s 5-inch rear leaf spring flip kit. This DJM flip kit is custom-designed for 1968-1972 Chevy or GMC trucks. It gives you a smoother ride and lowered look. Plus, it’s easy to install and made in the USA.
- C10 flip kit for 5-inch lowering
- Fits 2.25-inch-wide leaf springs
- Built to last in the USA
Description
Why Buy from DJM Suspension
Made in the USA
Get top-quality parts with DJM Suspension. We craft all our products, including C10 flip kits, in the USA, offering dependable, long-lasting solutions for your truck.
Easy Installation
Our rear leaf spring flip kit is made for a hassle-free installation, so you can enjoy a lowered look and smooth ride in no time.
Trusted by Truck Owners
With decades of experience, DJM Suspension is the preferred choice for truck owners who need reliable suspension parts for their vehicles.
About DJM Suspension
DJM Suspension was created from a love for aftermarket automotive parts. As a family-owned and operated American manufacturer, we’ve been leading the lowering industry since the 1970s. We pride ourselves on offering high-quality products that perform in any condition.
Frequently Asked Questions
Additional information
| Weight | 20 lbs |
|---|
PART # FK1012-5
1970-1972 CHEVY C10 REAR FLIP KIT
INSTALLATION INSTRUCTIONS
Please Note: Unless specifically stated, all DJM lowering components are intended exclusively for two wheel drive applications only!!!
Rev. # 7-04
Please take the time to read these installation instructions and check the Hardware Parts List to be sure you have all the listed parts.
These installation instructions are prepared for the professional installer with the proper equipment, tools and experience in suspension systems and safety. This vehicle and its components are extremely heavy and can be dangerous without the proper equipment and experience.
Please read the warranty information (blue page enclosed). Complete your Product Warranty Card and mail it to DJM Suspension.
Please take a few minutes to fill out your installation helper (back side of warranty). Accurate measurements BEFORE BEGINNING INSTALLATION will show any irregularities in your vehicle.
NEVER WORK UNDER TRUCK SUPPORTED BY A JACK ONLY!!! USE QUALITY JACK STANDS WHICH HAVE A RATING ADEQUATE FOR YOUR TRUCKS WEIGHT!!!
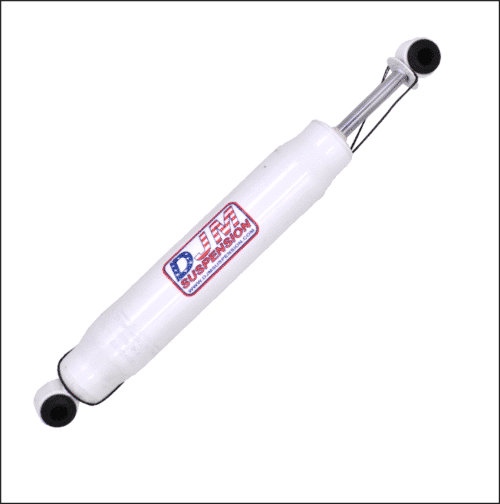
New shocks are required.
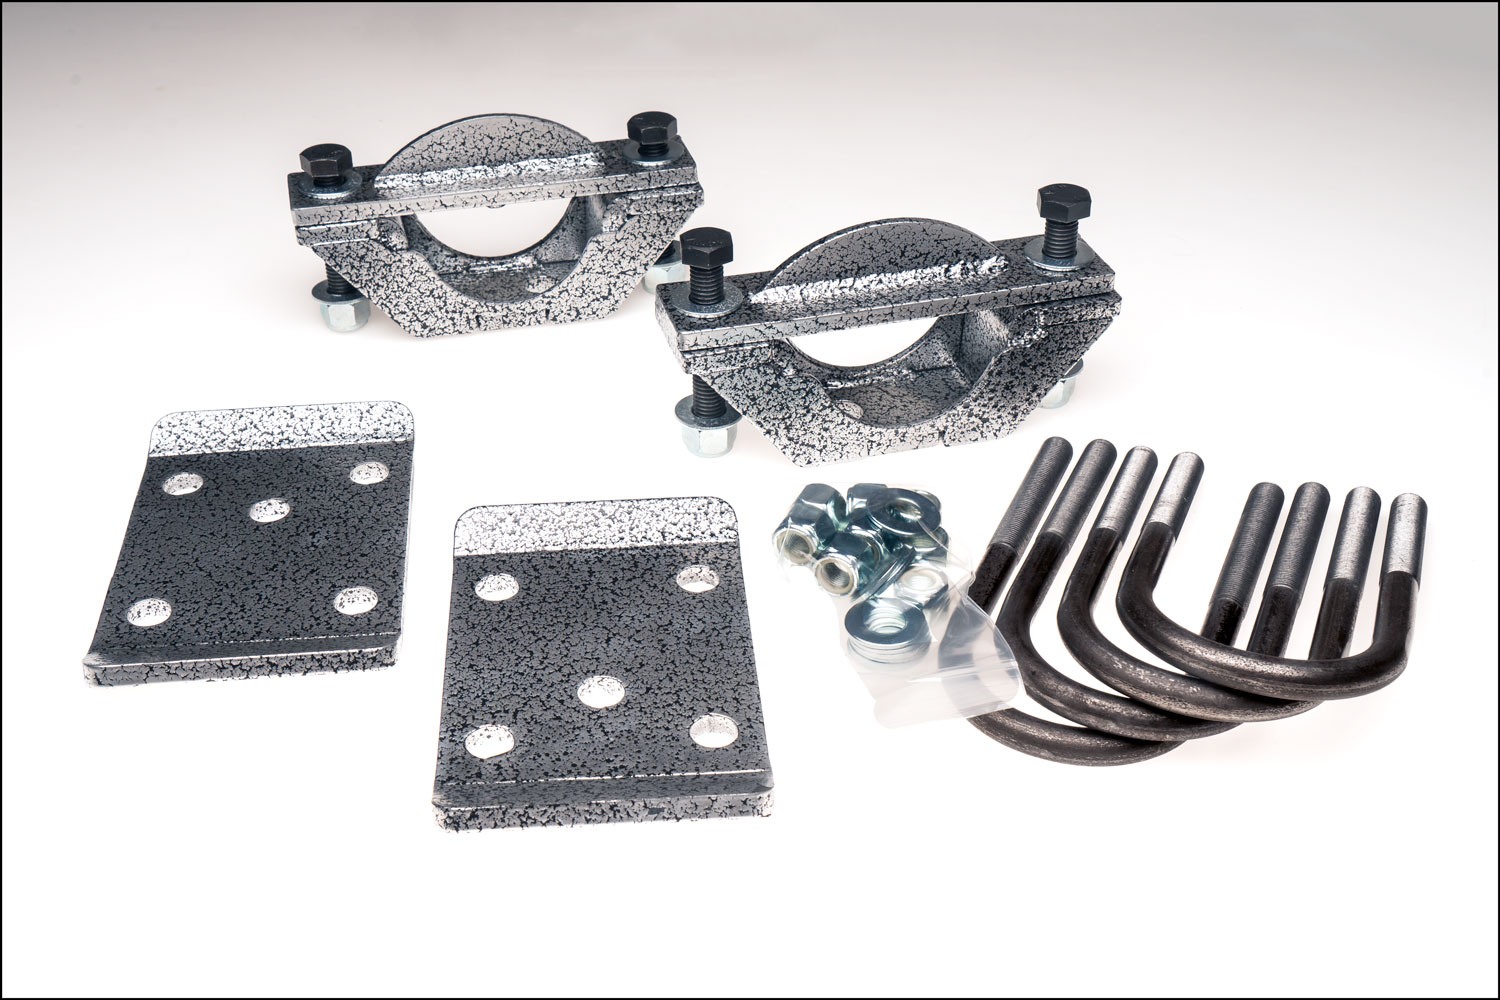
Hardware Parts List
| Axle Flip Kit 2 — Axle Locators (1010-A) 2 — Upper Axle Plates (1010-P) 4 — 5/8" U-Bolts (1025) 8 — 5/8" x 18 Nuts 8 — 5/8" Flat Washers 2 — Leaf Spring Plates, 5 Hole (1025) 2 — Flat Bump Stops (10S) 2 — 5/8" x 11 x 3-1/2" Bolts 2 — 5/8" x 11 x 4" Bolts 8 — 5/8" Flat Washers 8 — 5/8" x 11 Nylock Nuts |
Installation Instructions
Measure the vehicle and record on the installation helper.
-
Remove front and rear spring eye bolts and remove spring from truck. Keep bolts — they will be reused to reassemble springs. Reinstall the leaf spring under the axle. Place the new axle locator bracket on top of the spring, with the off-center hole toward the front of the vehicle. This will center the rear axle and pull the drive shaft back from the transmission slightly. Lower the rear axle into the new axle supports. Rotate axle to desired pinion angle.

Axle locator bracket installed on spring -
Install new U-bolts and spring plates (5 hole) on the bottom of the springs. Cross-torque u-bolts. Over tightening may bend spring plates.
U-bolts and spring plate cross-torqued in place -
Place the new upper axle plates with the pin down on top of the axle. Install the 5/8" x 3-1/2" bolt forward and the 5/8" x 4" bolt to the rear, with one flat washer on top of the upper plate and one on the bottom of the axle locator.
Upper axle plate with forward and rear bolts installed -
Remove the factory bump stop bracket from the frame, drill a 3/8" hole, and install bump stop to frame.
-
Install new rear shocks.
-
Test drive vehicle.
-
Measure the amount of drop and record on the installation helper.