
1989 – 1997 Ford Ranger 3 Inch drop beams
$544.76
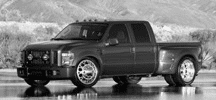
Give your Ford Ranger a lower, cleaner stance with these DJM drop beams made for a straightforward front suspension upgrade. This setup helps you get the look you want without cutting into your truck’s factory character.
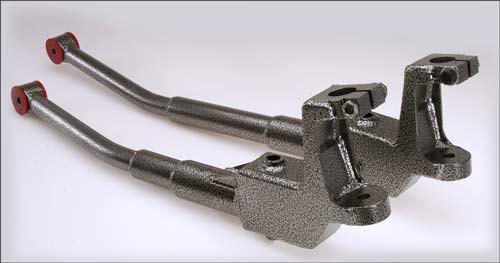
These 3-inch DJM drop beams lower your 1989 to 1997 Ford Ranger by replacing the original beams, making the upgrade simple and direct.
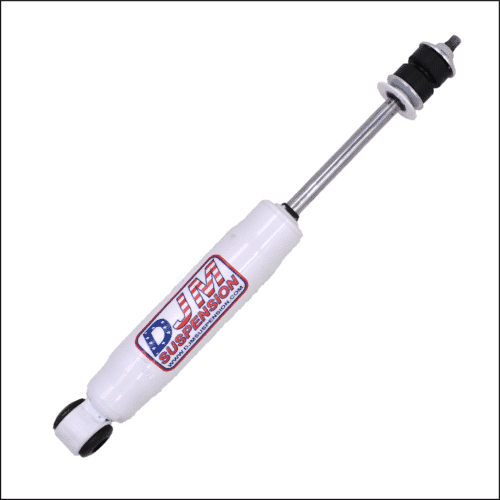
You get a clean drop, proper fit, and a setup built for truck owners who want solid parts and a better stance. Shocks are not included with this lowering kit for the Ford Ranger. We recommend shock number 1415, sold separately.
- Lowers front 3 inches
- Direct beam replacement
- Shock 1415 recommended
Description
Why Buy from DJM Suspension
Built for a Straightforward Install
These Ford Ranger drop beams replace the factory beams, which helps make installation simpler for builders and truck owners. It is a practical option for getting the stance you want without extra guesswork.
Backed by Real Lowering History
DJM Suspension has spent decades focused on lowered truck performance and fitment. That history matters when you want parts designed by people who know how a lowered truck should sit and drive.
American-Made Quality
These Ford Ranger I-beams are made in the USA with the kind of attention truck owners expect from a long-running suspension brand. You get parts built for dependable use and lasting value.
About DJM Suspension
DJM Suspension is a family-owned, American-made manufacturer with roots that go back to the early 1970s. The company started from a real passion for aftermarket automotive parts and has stayed focused on helping truck owners get the right stance, fit, and ride. When you buy from DJM Suspension, you buy from a brand that knows lowered trucks.
Frequently Asked Questions
Get the Right Stance for Your Ranger
Upgrade your Ford Ranger with USA-made 3-inch drop beams built for a clean look, a direct fit, and the lowering results you want.
Additional information
| Weight | 60 lbs |
|---|
DREAM BEAMS
INSTALLATION INSTRUCTIONS
DB3003-3 1983–1986 F150
DB3000-3 1987–1996 F150
DB3001-3 1989–1997 Ranger
DB3005-3 1987–1998 F350
DB3015-3 1999–2011 Superduty / Excursion
Please take the time to read these installation instructions and check the Hardware Parts List to be sure you have all the listed parts.
These installation instructions are prepared for the professional installer with the proper equipment, tools and experience in suspension systems and safety.
Please read the warranty information (blue page enclosed). Complete your Product Warranty Card and mail it to DJM Suspension.
Please take a few minutes to fill out your installation helper (back side of warranty). Accurate measurements BEFORE BEGINNING INSTALLATION will show any irregularities in your vehicle.
NEVER WORK UNDER TRUCK SUPPORTED BY A JACK ONLY!!! USE QUALITY JACK STANDS WHICH HAVE A RATING ADEQUATE FOR YOUR TRUCKS WEIGHT!!!
USE FACTORY COIL SPRINGS ONLY!! SHORTER COIL SPRINGS WILL CAUSE EXCESSIVE NEGATIVE CAMBER.
NOT DESIGNED FOR AIR BAGS.
INSTALLER MUST CHECK THAT THERE IS ABSOLUTELY NO CLEARANCE PROBLEMS BETWEEN THE WHEELS, THE SPINDLE, THE CALIPER, THE LOWER CONTROL ARMS AND ANY OTHER COMPONENT BEFORE DRIVING VEHICLE.
Installing DJM Dream Beams uses the same installation procedures as replacing a factory beam. Refer to your repair manual for guidelines. Factory shocks can be reused.
DO NOT ATTEMPT TO BEND YOUR NEW DJM DREAM BEAM TO CORRECT CAMBER. Aftermarket cam kits are available up to 3.5 degrees.
Note: Part# DB3003-3 is the only beam that has a press-in ball joint — all others are mounted in the spindle. Care must be taken not to bend the ball joint mounts when reinstalling the ball joints. The span between the ball joints should be supported in order not to bend the mounts.
Hardware Parts List
| DB3000-3, DB3001-3, DB3002-3, DB3003-3, DB3015-3 1 — LH Dream Beam 1 — RH Dream Beam |
DB3005-3 1987–1998 F350 1 — LH Dream Beam 1 — RH Dream Beam 1 — Sway Bar Hardware |
Sway bar spacer and bolts included with DB3005-3 only. All others use factory hardware.
Installation Instructions
-
Install DJM Dream Beams following the same procedures as replacing a factory beam. Refer to your vehicle repair manual for specific guidelines.

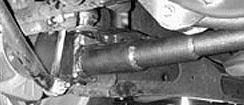
Typical beam installed -
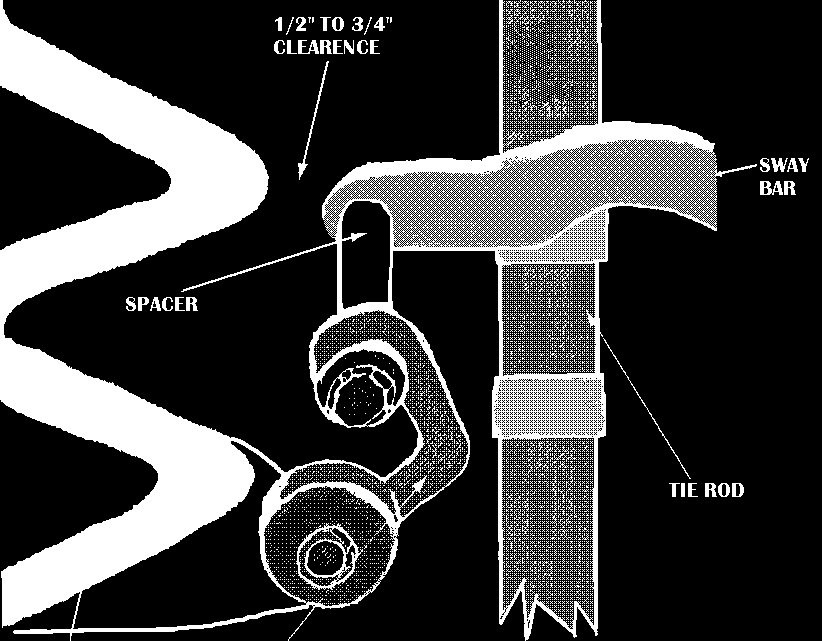
Install factory sway bar end links as shown in the diagram below. The sway bar needs to be moved above the bracket. It is necessary to reverse the left and right brackets — leave loose (spacers are not required on F150). Loosen the bolts holding the plate that holds the D-bushing. Remove the threaded clips. Move this plate forward until the end links stand straight up, then line drill and replace the clips and bolt to frame. When installation is complete and the vehicle is on the ground, tighten end links. Maintain 1/2" to 3/4" clearance as shown.

Typical sway bar installed — 1/2" to 3/4" clearance required
RANGER SWAY BAR INSTALLATION
-
When you get ready to install your sway bar on the dream beam, you will find at first that the holes do not line up.
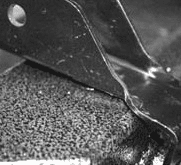
Holes do not line up at first 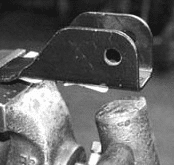
Place bracket in vice and bend to create angle -
Place the bracket in a vice and give it a couple of good hits to create an angle that will help with alignment. After bending, the hole alignment will be better — however the bracket will not yet sit flat with the surface of the beam.
Hole alignment improved after bending — bracket not yet flush 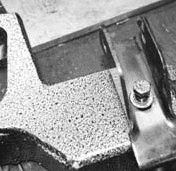
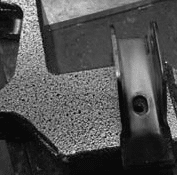
Bolt is long enough to start by hand -
The bolt is plenty long enough to get started by hand. Thread it in manually, then crank down the bracket with your ratchet until it is flush with the surface of the beam.
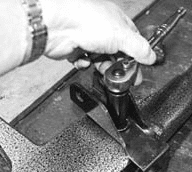
Crank bracket down with ratchet until flush 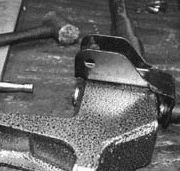
Bracket flush with beam — finish installation