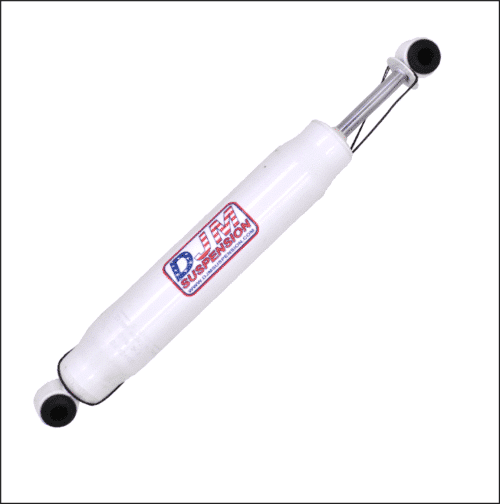
2015-2018 Silverado/Sierra Complete 4 inch Front / 7 inch Rear Lowering Kit (Shocks Included)
$942.32
Give your truck a bold, lowered stance with the 2015-2018 Silverado 4/7 drop kit. Featuring assembled control arms, an adjustable rear axle flip system, and included rear shocks, this kit delivers a clean look with dependable ride quality.
Get the aggressive stance you want with DJM Suspension’s 2015-2018 Silverado lowering kit. The upper and lower control arms deliver a 4-inch front drop around the factory strut while maintaining factory ball joint angles, wheel clearance, and stock alignment specifications. The rear axle flip system provides a 7-inch drop for a balanced, low-profile appearance.
- 4-inch front drop using preassembled upper and lower control arms
- 7-inch rear drop using an adjustable axle flip system
- Two rear SuperShock 1800 shocks included
- Factory front strut assembly retained
Description
Recommended Paired & Replacement Parts
The following replacement components are available for maintaining your lowered Silverado or Sierra's suspension. Check the part numbers and fitment details to confirm compatibility with your truck.
Recommended Shocks
- Factory Front Shock/Strut: Reuse the factory front shock/strut assembly.
- Rear shock - 18.5″ Loop / Loop SuperShock (1800) (Sold each)
Replacement Parts
- Upper Ball Joint 6292
- Lower Ball Joint - 6015 Replacement Ball Joint
- Upper Bushing Kit BK2007U
- Lower Bushing Kit BK2007L
Important Fitment Information: For 2015 models, 2014 4x4 models, and early 2016 models, review DJM's 2015 Silverado/Sierra Spindle Chart to confirm the correct parts for your truck.
Why Buy from DJM Suspension
Designed Around the Factory Front Strut
This kit uses DJM's upper and lower lowering control arms around the factory front strut assembly, providing a 4-inch front drop without requiring replacement front struts.
Preassembled Components
The control arms come preassembled with new ball joints, urethane bushings, and twin-tube pivot sleeves. The rear kit includes adjustable axle brackets, U-bolts, spring plates, and installation hardware.
Decades of Suspension Experience
With roots dating back to the early 1970s, DJM Suspension brings decades of lowering suspension knowledge to every kit, helping you build your truck with confidence.
About DJM Suspension
DJM Suspension is a family-owned and operated American manufacturer with roots in Southern California's aftermarket automotive scene. Since the early 1970s, we've helped truck enthusiasts achieve the lowered stance they want with suspension components designed for dependable performance. Our passion for automotive customization drives us to develop practical lowering solutions for truck owners across America.
Frequently Asked Questions
Shop the Silverado/Sierra 4/7 Lowering Kit
Do you want a smooth 4/7 drop for your Silverado? Choose DJM Suspension's complete lowering kit for an aggressive stance, factory-compatible front struts, and included rear shocks.
Additional information
2015-2018 Silverado, Tahoe, Suburban 4 inch Lowering Control Arm Set
| Weight | 40 lbs |
|---|
2007-2018 Silverado/Sierra 7 inch Rear Lowering Kit
| Weight | 20 lbs |
|---|
18.5″ Loop / Loop SuperShock (1800)
| Weight | 3 lbs |
|---|
CA2515-3 and CA2515-4
2016–2018 Silverado
2 Wheel Drive Only

Sway Bar End Links


Grease Fittings
Install the grease fitting on the TWIN TUBE SLEEVES. Make sure to pre-grease the sleeves to make sure the predrilled holes are free and the grease flows smoothly. If the ball joint is greaseable, grease it at this time. If it is maintenance free (no grease fitting), no action is necessary. Now install and align the arms to factory specifications.

Upper Ball Joint Taper (Steel Knuckle Only)
On 2016–2018 steel knuckle only. There is a small burr on the upper ball joint taper. This can be removed with a file or a die grinder. Test fit the upper ball joint to make sure there is no interference.

CA2515U Upper Control Arm
Install the brake line bracket.

Part # RK2507-7
2007–2008 Chevy Pickup Rear Flip Only
Installation Instructions
Rev. # 1-08

Please take the time to read these INSTALLATION INSTRUCTIONS and check the Hardware Parts List to be sure you have all the listed parts.
These installation instructions are prepared for the professional installer with the proper equipment, tools and experience in suspension systems and safety. This vehicle and its components are extremely heavy and can be dangerous without the proper equipment and experience.
Please read the warranty information (blue page enclosed). Complete your Product Warranty Card and mail it to DJM Suspension.
Please take a few minutes to fill out your installation helper (back side of warranty). Accurate measurements BEFORE BEGINNING INSTALLATION will show any irregularities in your vehicle.
NEVER WORK UNDER TRUCK SUPPORTED BY A JACK ONLY!!! USE QUALITY JACK STANDS WHICH HAVE A RATING ADEQUATE FOR YOUR TRUCK'S WEIGHT!!!
NEW REAR SHOCKS ARE REQUIRED, DJM PART #2100.
Hardware Parts List
| Flip Kit | |
|---|---|
| 2 – Lower Axle Brackets (1010A) | 1 – Tube Loctite |
| 2 – Upper Axle Brackets (1010P) | 1 – 5/16" Drill Bit |
| 4 – 5/8" U-bolts (1025) | 1 – 3/8" x 16 Tap |
| 4 – 5/8" x 18 Nuts | |
| 4 – 5/8" Washers | |
| 4 – 5/8" x 11 x 3-1/2" Bolts | |
| 8 – 5/8" Flat Washers | |
| 4 – 5/8" x 11 Nylock Nuts | |
| 2 – Spring Plates (1025) | |
| 2 – Bump Stops (10R) |
The forward leaf spring bolt on the driver side cannot be removed without moving the gas tank. The flip kit can be installed without removing the bolt, as described in these instructions.

-
Support the frame with jack stands. The axle should also be supported with jack stands. A jack in the center of the axle will be used to raise or lower the axle when needed. With the axle secured on the jack and supported by jack stands, loosen and remove the U-bolts on both sides.
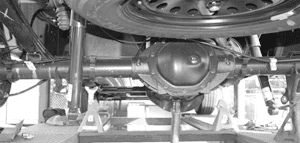
Support the frame and axle with jack stands -
The passenger side leaf spring bolts can be easily removed, so unbolt the leaf spring. Next, the leaf spring center bolts must be reversed. Use a C-clamp to hold the springs together and a vise grip on the bolt, and loosen the nut. Install the pin down through the spring and tighten with the original nut. Install the spring under the axle using only the front bolt for now.
On the driver side, unbolt the factory shackle. Leave the front bolt in place so you won't have to move the gas tank. Reverse the center bolt the same as on the passenger side.
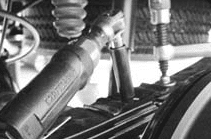
Clamp the spring pack before loosening the center bolt 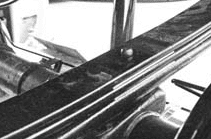
Reverse the leaf spring center bolt -
The brake cables are run through a bracket bolted to the frame on the driver's side. Unbolt the bracket.
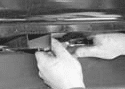
Unbolt the brake cable bracket -
Remove both lower shock bolts.
-
Carefully slide the axle to the passenger side just enough to get the driver leaf spring over the brake drum, then slide the axle back.
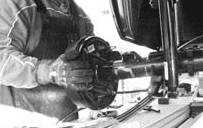
Slide the axle to clear the driver leaf spring -
Bolt the brake cable brackets back onto the frame and tighten.
-
Place the new axle locator bracket on top of the spring with the offset hole to the front of the vehicle. Line up the hole in the bracket with the pin in the spring. Raise the leaf spring and align the new bracket under the rear axle. Add a jack stand under the leaf for support.
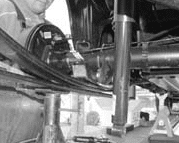
Axle locator bracket on top of the spring 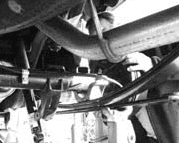
Raise the spring and align the bracket under the axle -
Rotate the axle to align the drive shaft.
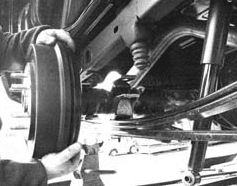
Rotate axle to align drive shaft -
Install the new U-bolts and spring plates (5 hole) on the bottom of the springs. Tighten the nuts on the U-bolts to hold the axle in place.
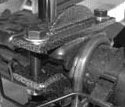
Install new U-bolts and spring plates -
Place the new upper axle plates on top of the axle and align the pin with the hole on the axle. Install the 5/8" bolts provided, with one flat washer on top of the upper plate and one on the bottom of the axle locator. Bolt on the shackles, then check the pinion angle. Tighten the U-bolts and axle bracket bolts.
-
Remove the factory bump stop. The factory bracket under the frame must be removed. Cut the bracket at the weld, smooth it out and touch up with some spray paint. Raise the axle and mark a center line on the frame where the new bump stop will go. Using the bit and tap provided, drill a 5/16" hole and tap with the 3/8" x 18 tap. The new bump stop will thread into this hole. You can add a little blue Loctite.
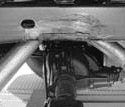
Factory bump stop bracket 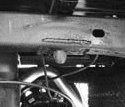
Bracket removed and frame smoothed -
Install rear wheels and torque lug nuts.
-
Tighten the shackle bolts and spring bolts. Test drive and adjust the pinion angle as necessary. Measure and record the height of the rear on the installation helper.